Why a Shed?
Our house in Austin, TX needed more space. 1,985 square feet isn’t bad for a family of four, but the house layout had its oddities. We started looking at ways to expand in early 2020. The biggest concern was office space and guest space, with both me and Lauren working from home and no spare bedrooms.
I work remotely full-time even outside a pandemic, and did not have a good dedicated space in the house. I had carved out a portion of the breakfast nook area of the kitchen for my computer desk, but it wound up being mostly kid entertainment central, with Edie propped up banging on monitors with her sticky hands demanding Peppa Pig. Also, as much as I prefer working from home to a commuting to an office, there was not much of a division between work and home, and it all just blended together. Having some sort of separation was important to Lauren, who was hoping I could finally just close up at 5:00 and concentrate on family stuff and not be tempted by my triple monitor computer setup. She’s also been working at home for the bulk of the last two years due to the pandemic, and her office is oddly placed in a corner of the living room. Our meetings interfered with each other a lot. I could never play music or anything cause it would drown out her frequent work calls. So for a house that needed two offices and had zero, we needed some sort of change.

We also have no guest room in our house. All three bedrooms are occupied, so when grandparents or friends visit, they are sleeping on couches or out in the open on an air mattress.
The first option was a major remodel, but we began to shy away from it after getting some designs put together by a local firm. (We haven’t ruled that out on a smaller scale for 2021.) An easier option would be to put the two kids together in a bedroom and use the other one for the office/guest room, but a 7yo boy and 3yo girl may not make the greatest of bunkmates.
A detached shed would solve several problems at once! An office 97% of the time, a guest room when necessary, and the previous office area of the house could be repurposed for more suitable things.

Choosing a Shed
There were a lot of options out there for sheds. Would we have our design/build firm work on it, do it all ourselves, hire a contractor, buy a pre-made shed and finish it? Well, after a lot of research, we landed on Studio-Shed. There were cheaper options, but we really liked the design of these, and they appeared to be pretty well reviewed and advertised their products as DIY. It would ship to us with partially constructed walls, and would need to be assembled. Their most basic shed was the 10×12 Pagoda. Our backyard doesn’t have a ton of space to work with, and I thought this shed would be the right amount of space.
I figured I could hire professionals where needed and enlist friends and family to help here and there, and perhaps by the spring of 2022 I would have a finished product.
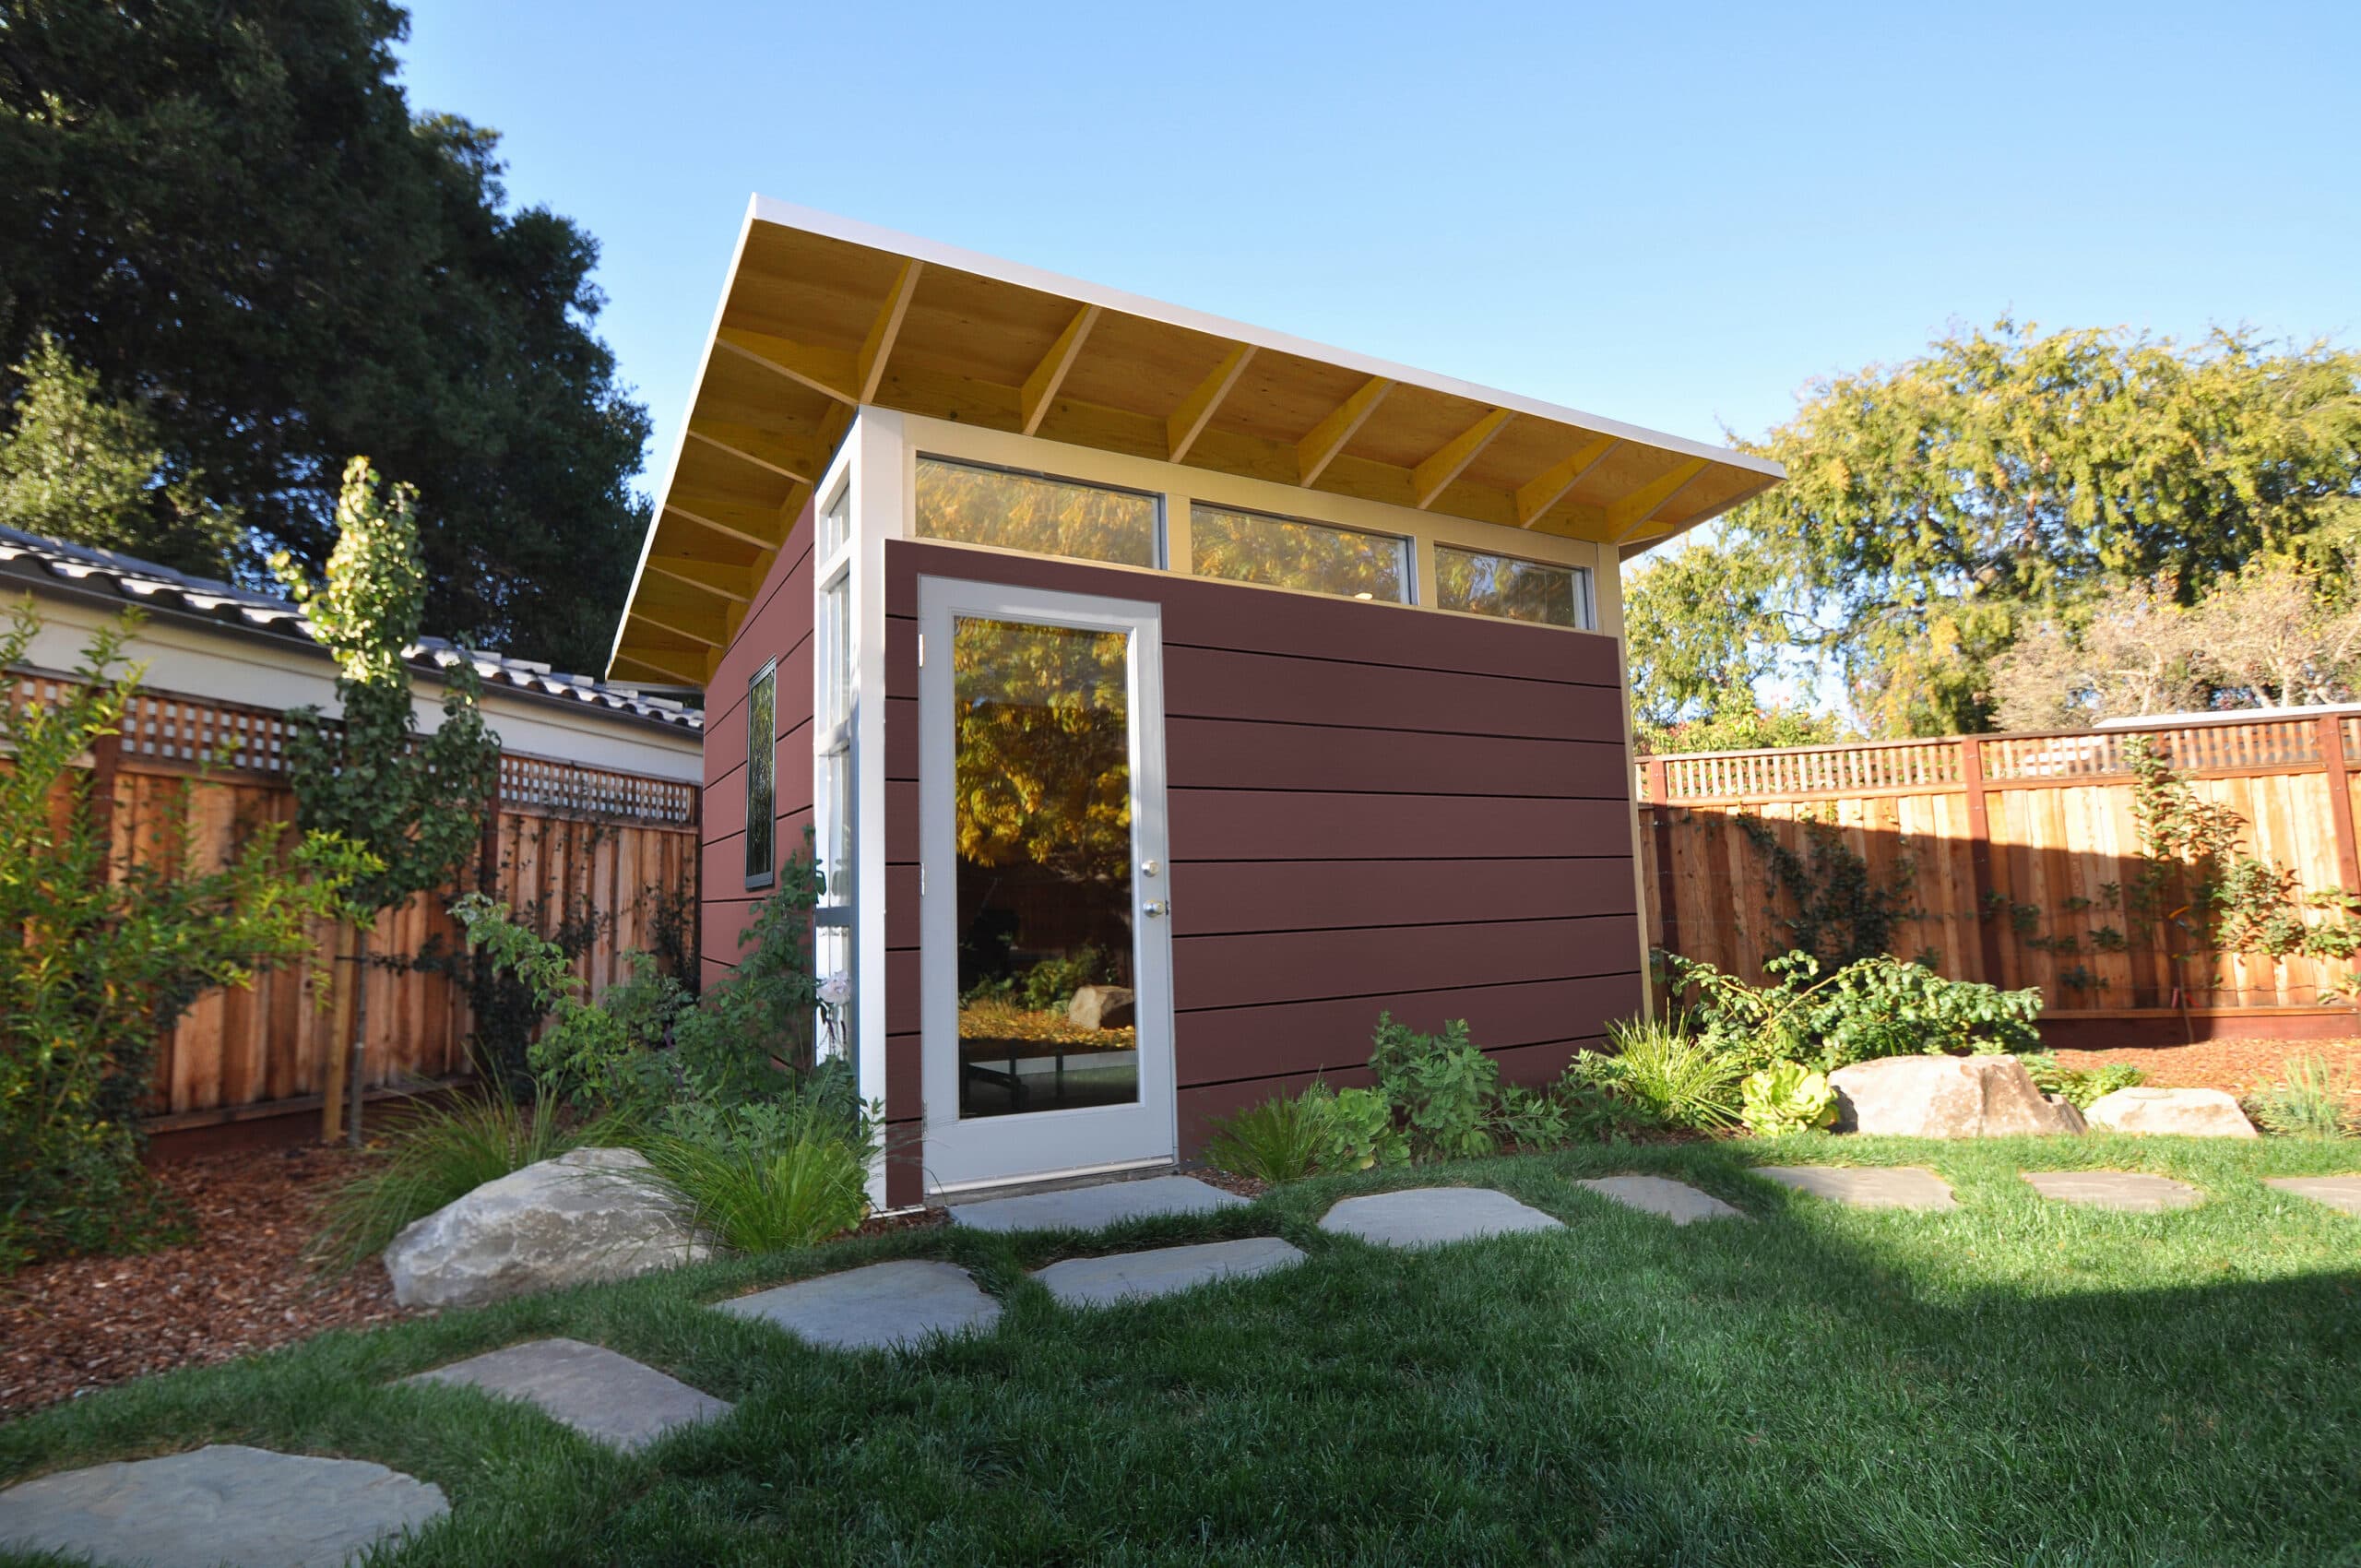
So we pulled the trigger on the order. This wasn’t just the shed, it was a kit that included everything needed to build it and finish out the interior, from the light bulbs to paint to door locks. It was time to get going on the project!
Permitting
No permitting was needed in our neighborhood! I scoured every resource imaginable including reading the entire property deed from 1984, and it clearly stated nothing needed to be done unless the structure being erected was over 15′ tall. That’s an advantage of living in an ETJ (an extra-territorial jurisdiction). We technically reside outside the city limits of Austin by literally less than one block and don’t have to jump through a bunch of dumb hoops when building a structure on the property. There are downsides, especially being one block away from the Google Fiber cutoff, but most of the time it’s advantageous.
Slab
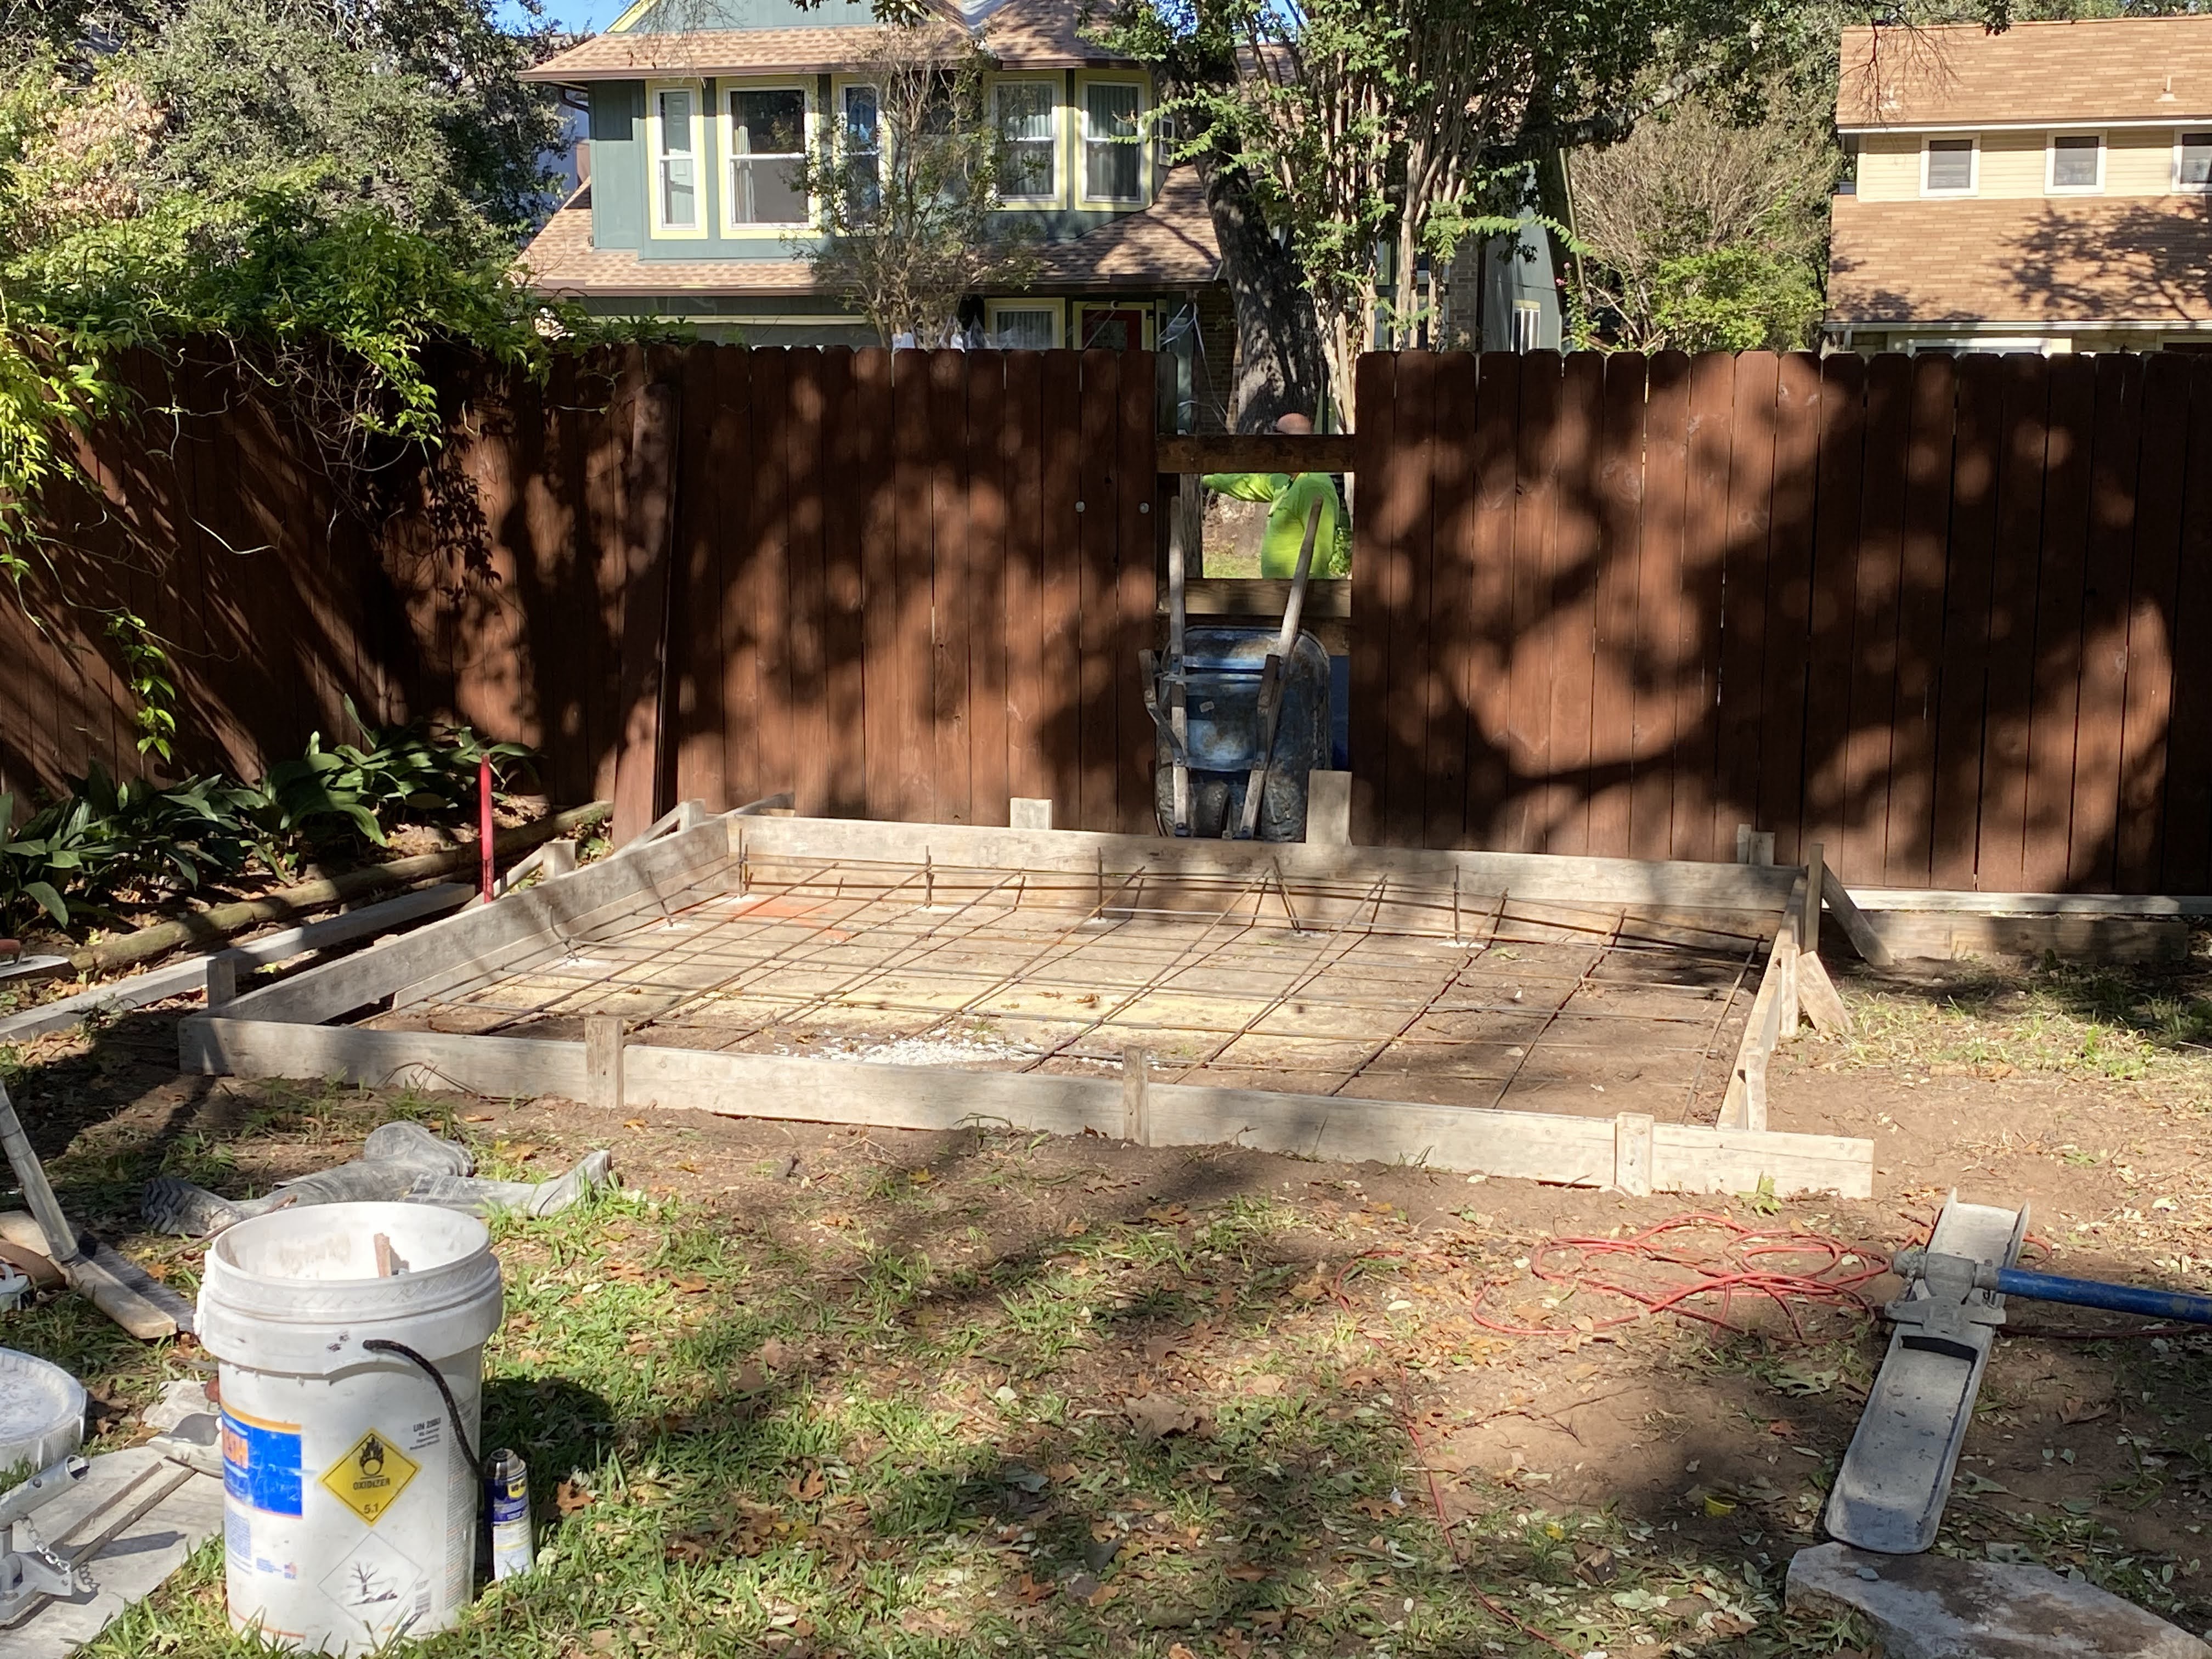
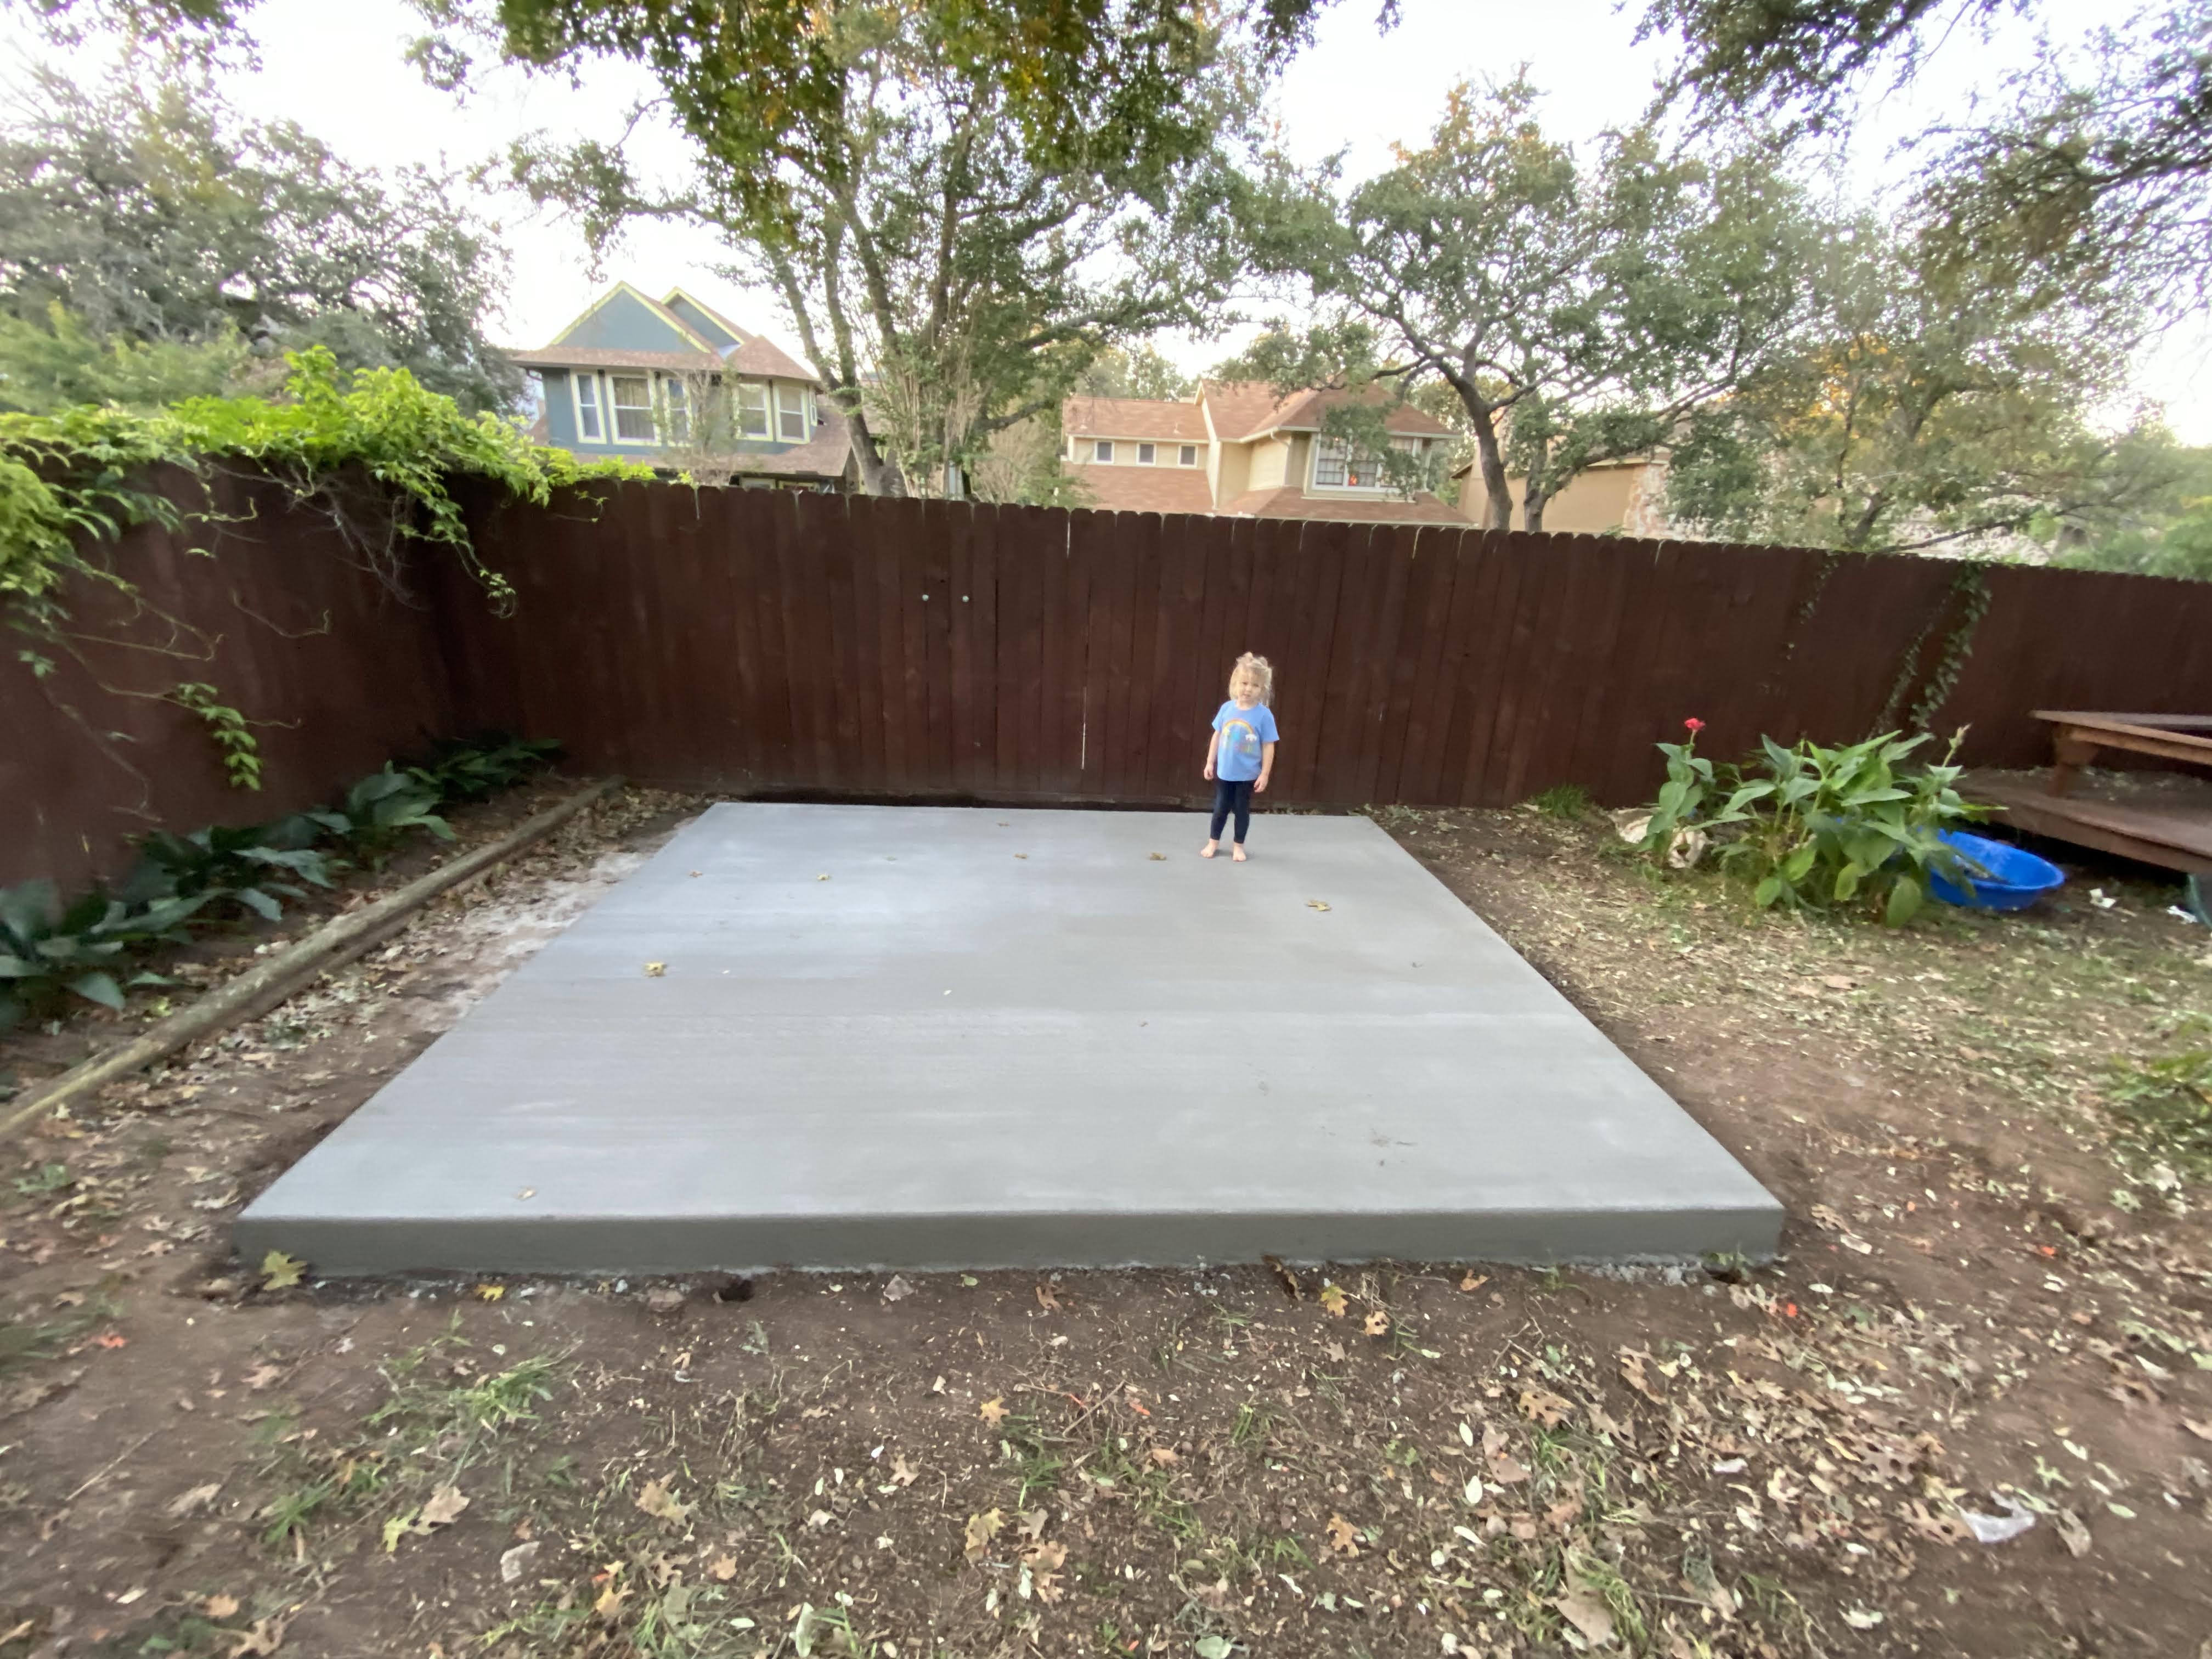
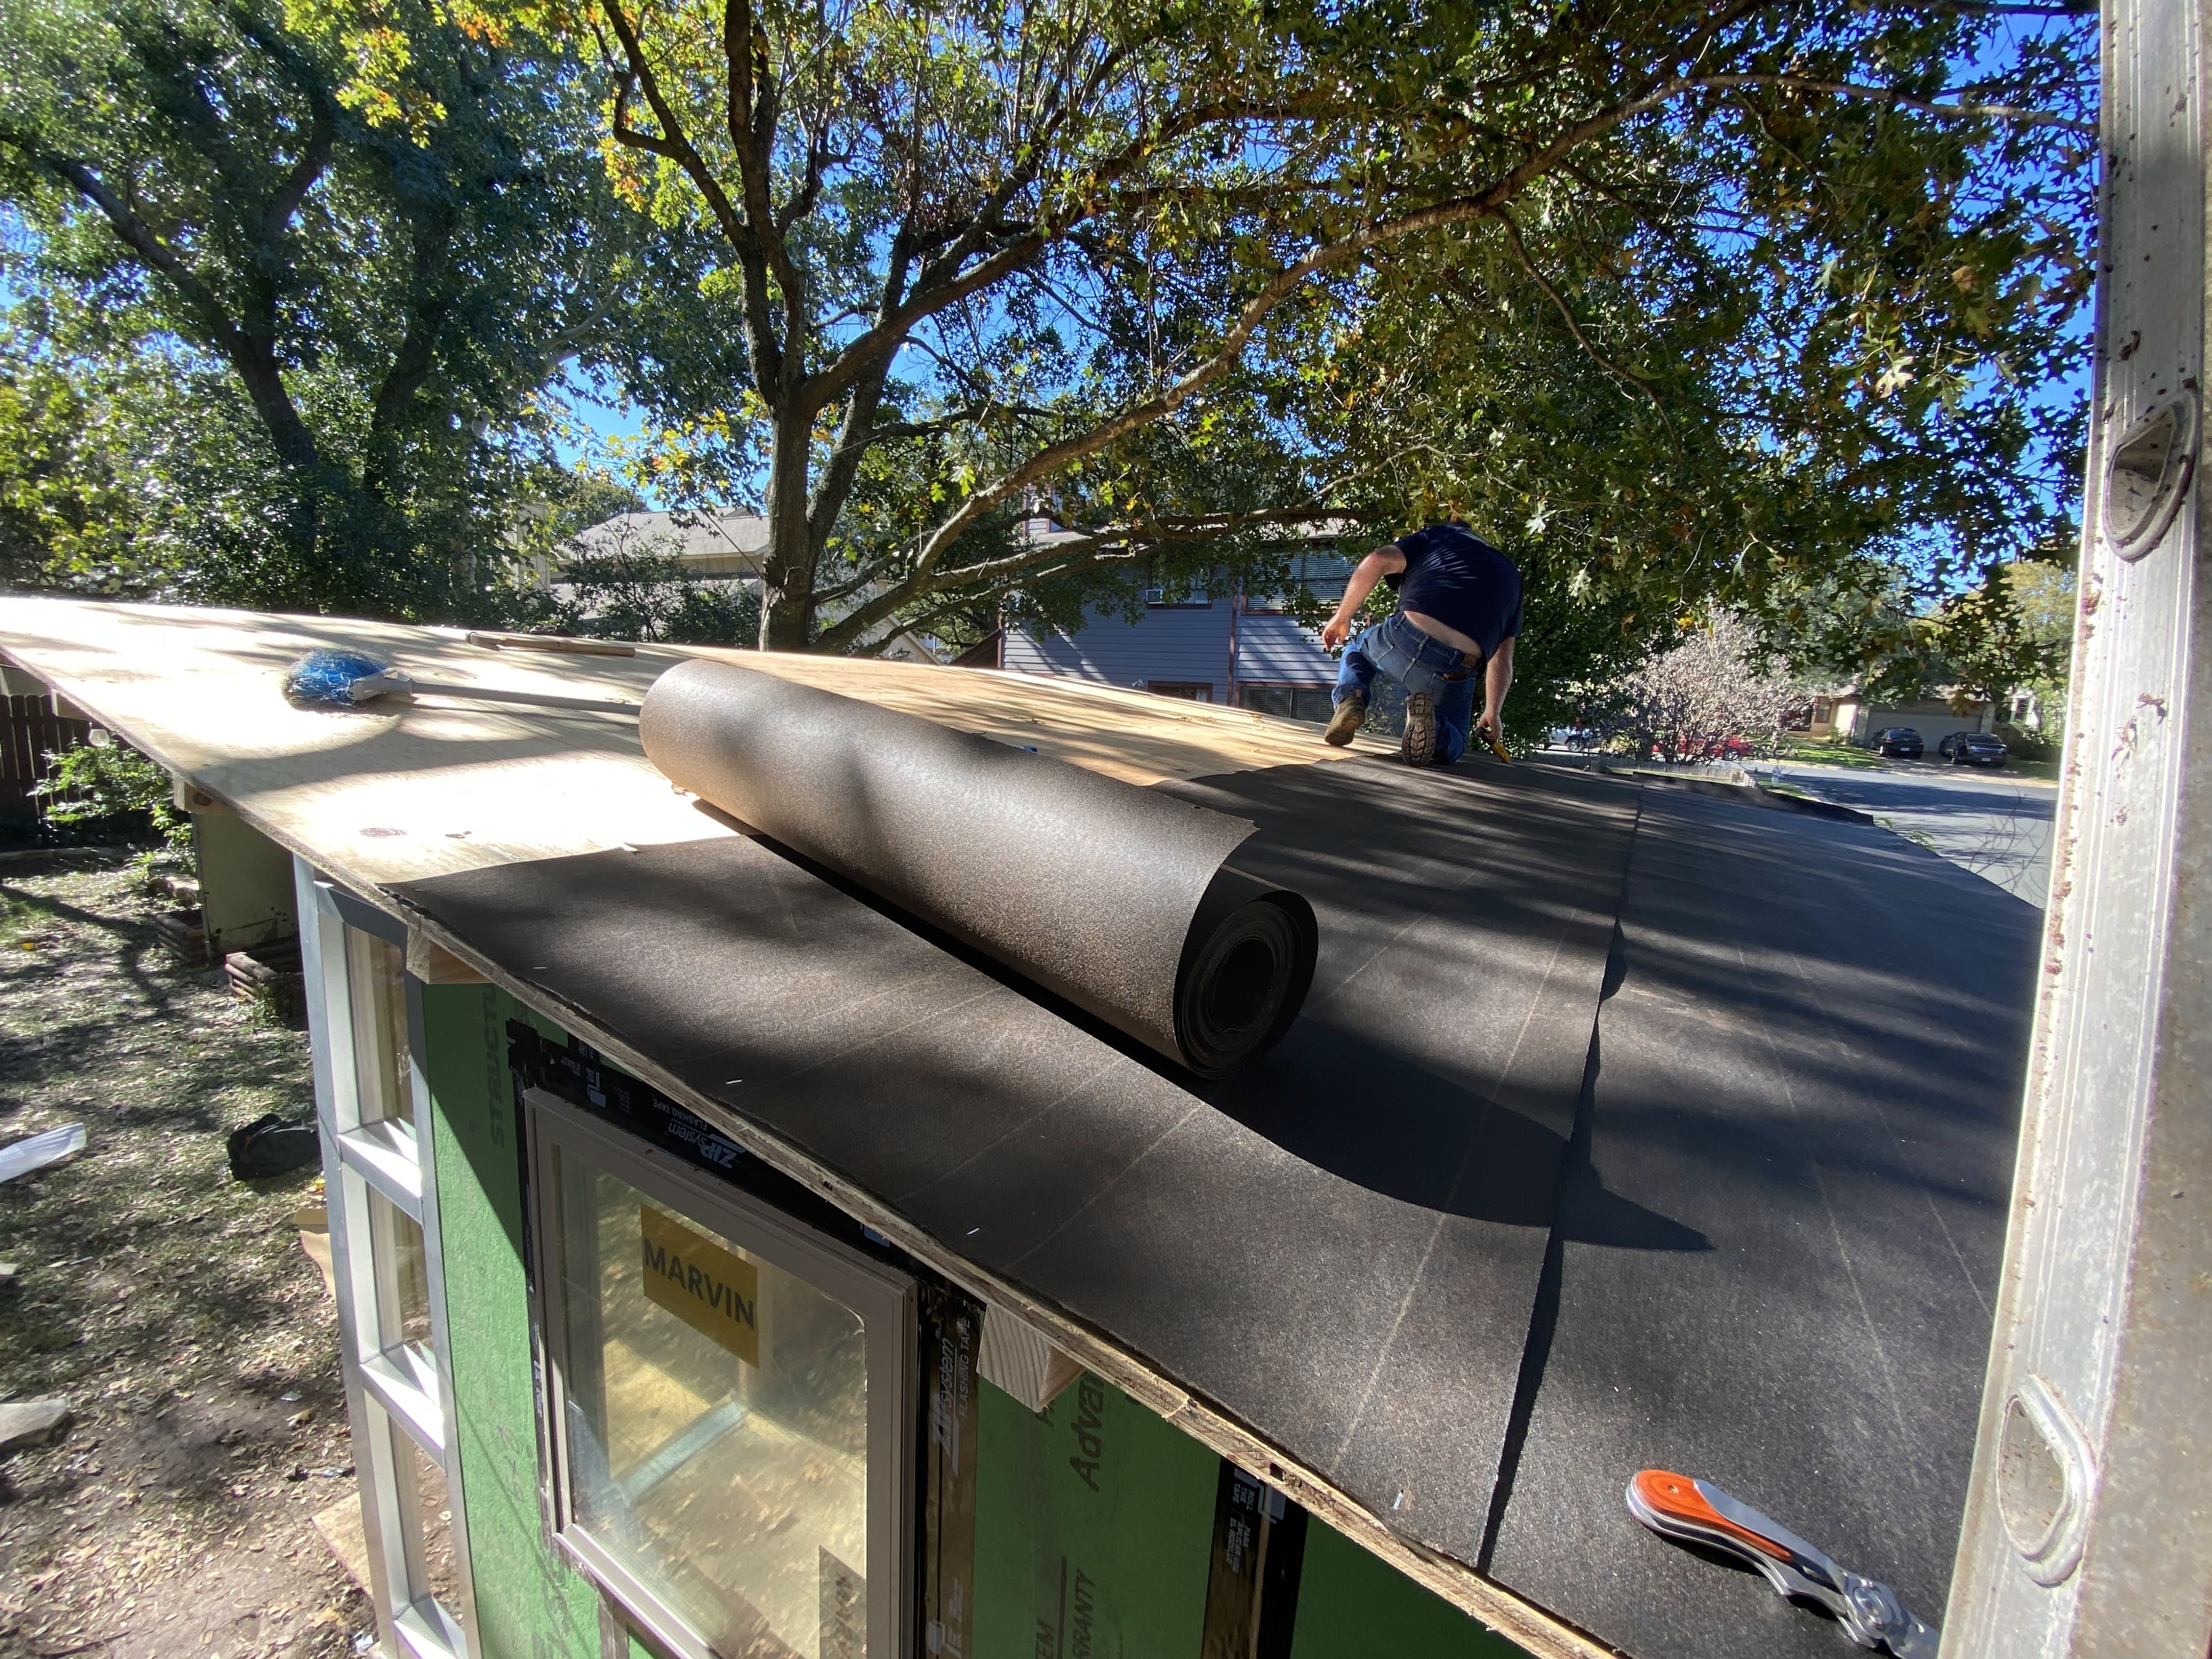
The project started with the laying of the slab, which Studio Shed stated needed to be the identical size of the unit itself, 12×10, and not an inch bigger for fear of water being able to pool on the edges and cause damage. I chose a back corner of the yard near the fence line that already had a concrete pad laid for the location, the only obvious place in the yard to house the shed. I wondered if it would be safe to lay a slab partially on top of existing concrete; apparently it’s not a concern.
Finding a concrete team wasn’t difficult, but the one that came recommended by our usual contractor priced out the project 2x of another company, Bulls Prime. So on Monday, November 1, the slab was poured. It took pretty much the whole day from the time they set up until the time it dried. Since the yard wasn’t exactly even, the slab only sticks out about 7″ on the front end, but 16″ on the back. They said that was nothing to worry about. The job cost about $2,000.

Unloading the Shipment
The Studio Shed team was consistently way at the very front end of every estimate. I originally wasn’t expecting the shed to arrive until December, but it shipped in early November. Then, I was expecting it to take the full 14 days to arrive in Austin after shipment, but it took something crazy like 3 or 4 days, and arrived on November 2, the day after the slab had been poured. And then when it arrived at the facility in Austin and the local team was to deliver to my house, that too was on the earliest possible end of the quote, with the truck arriving at 8am when I was quoted sometime between 8am and 2pm.
That all was great. I’d rather things be early than late! But it didn’t exactly give me much time to prepare a crew to help unload the truck, which arrived on a Tuesday morning. The instructions said it needed to be done by hand, and would require about three able-bodied adults. The truck driver arrived and parked on my street and, sensing how overwhelmed I looked, decided to just leave it parked there, so he unhooked the trailer and off he went.
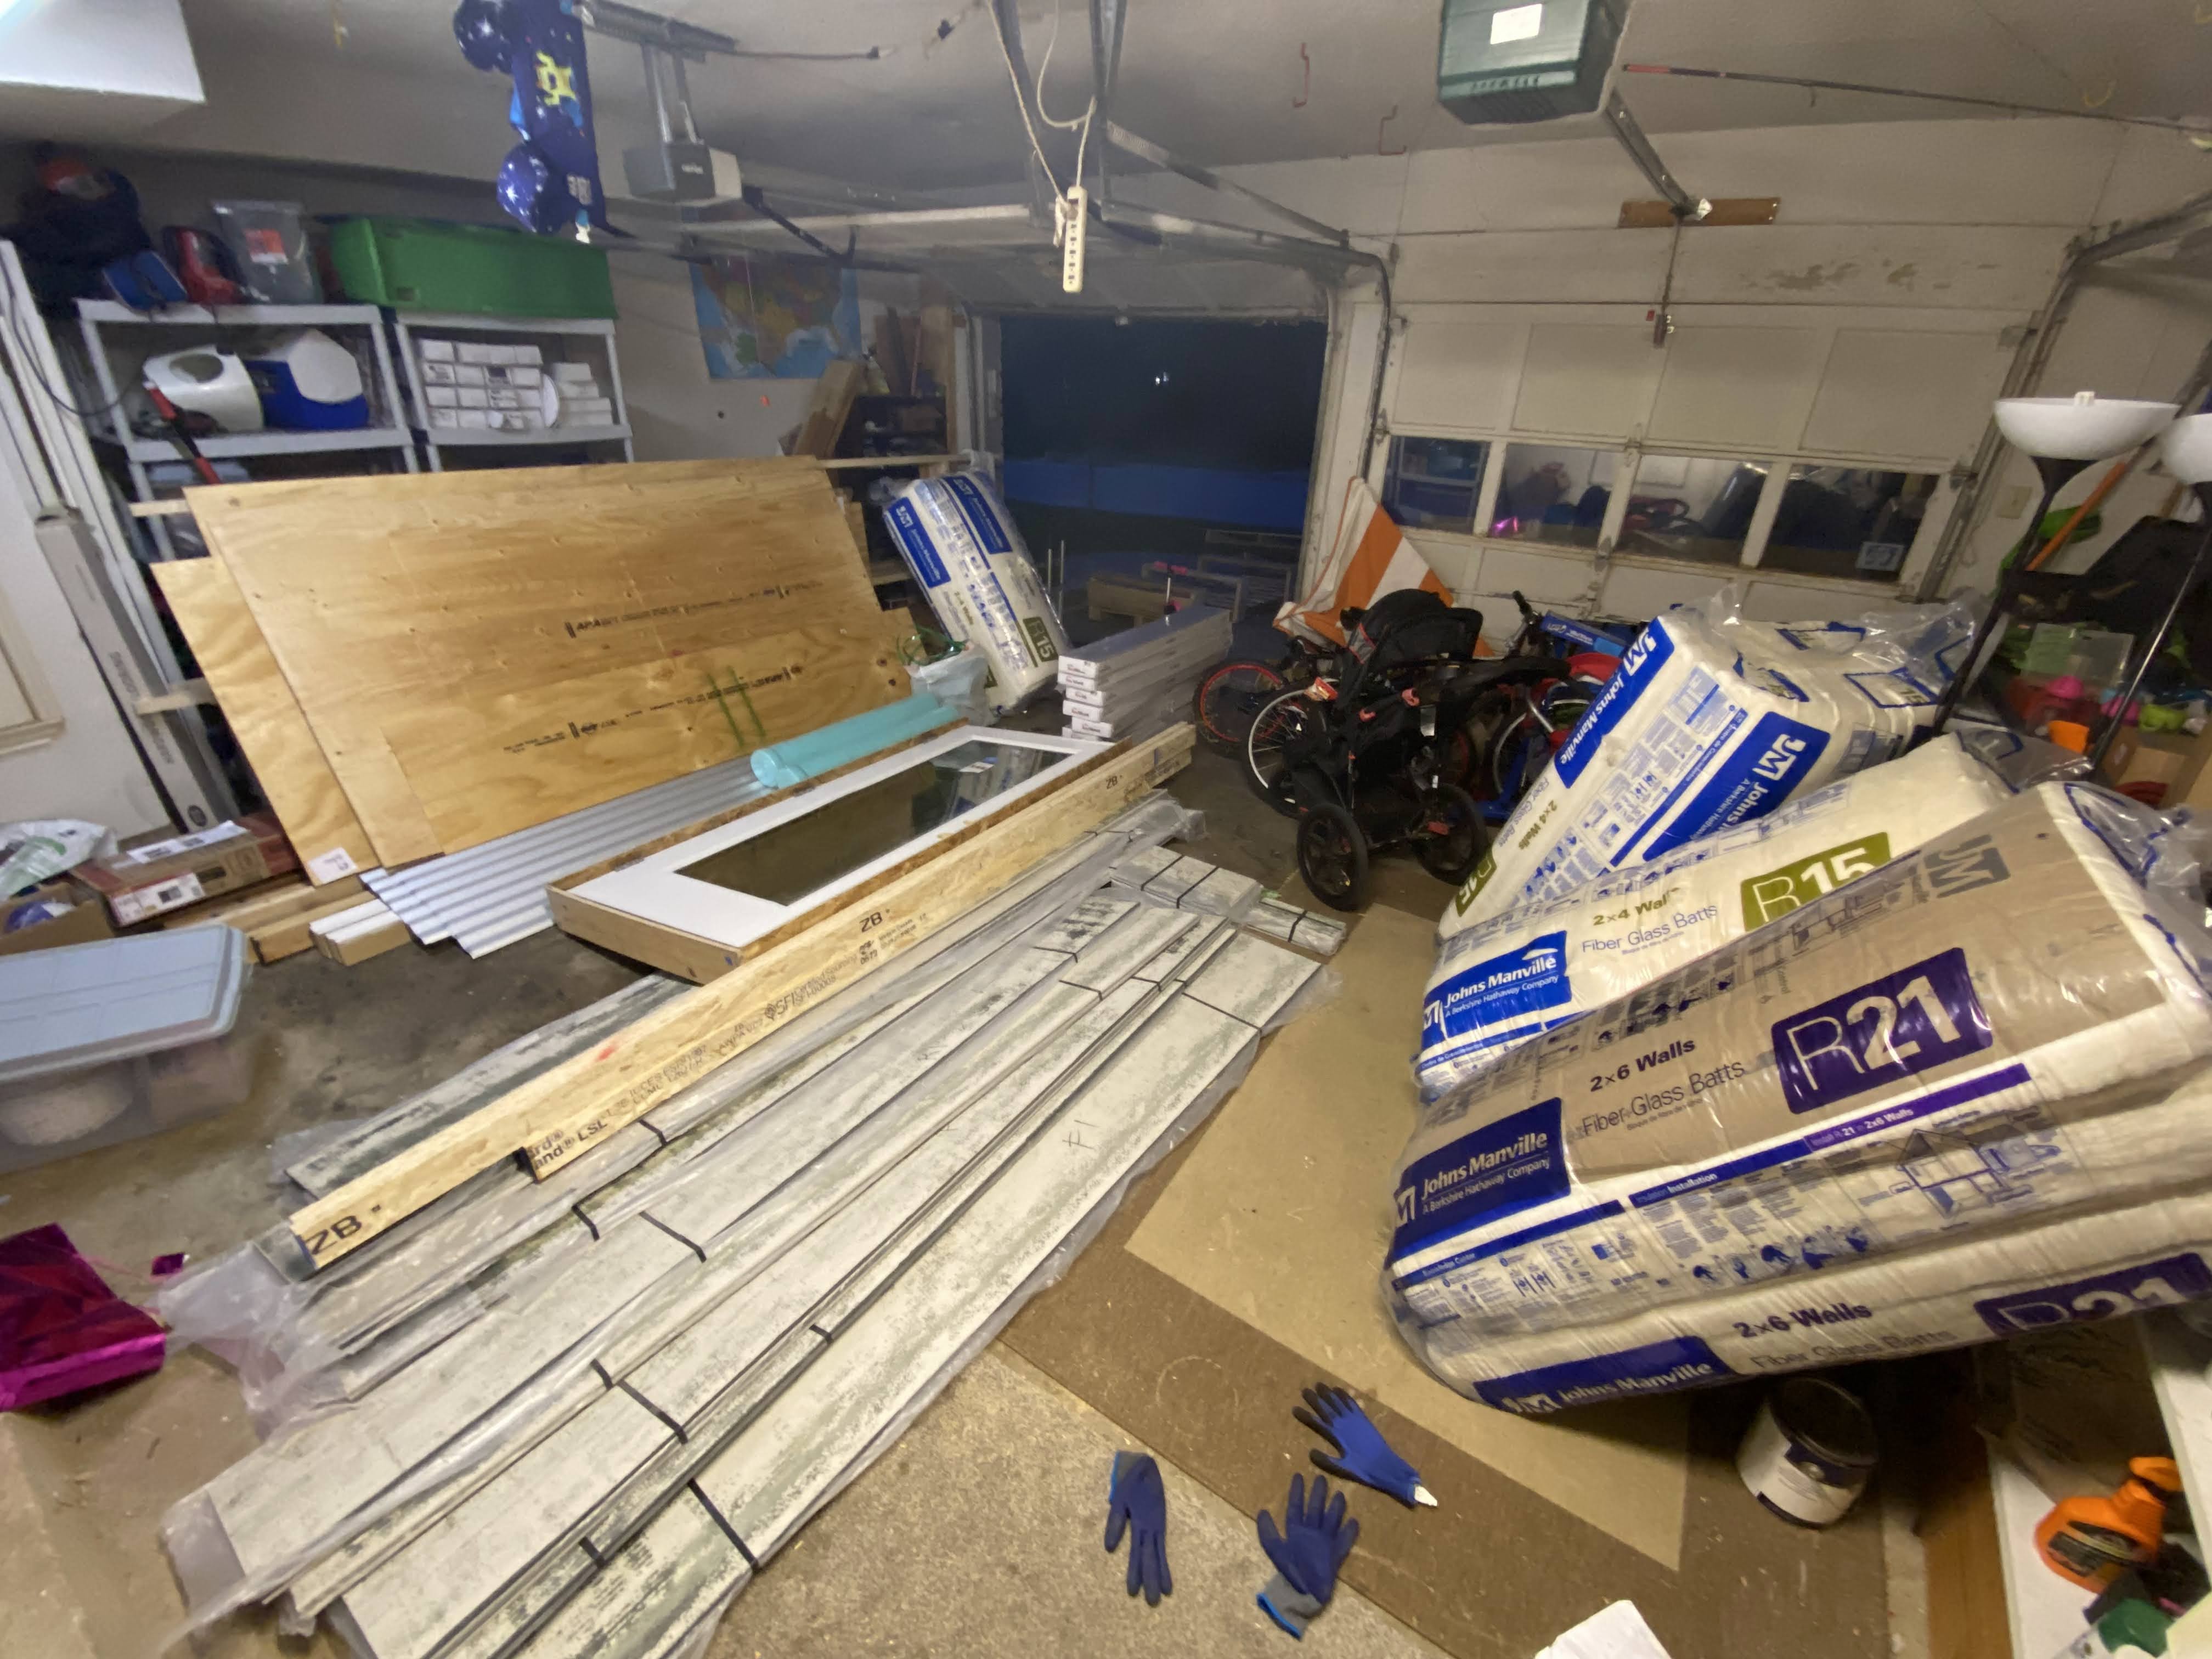
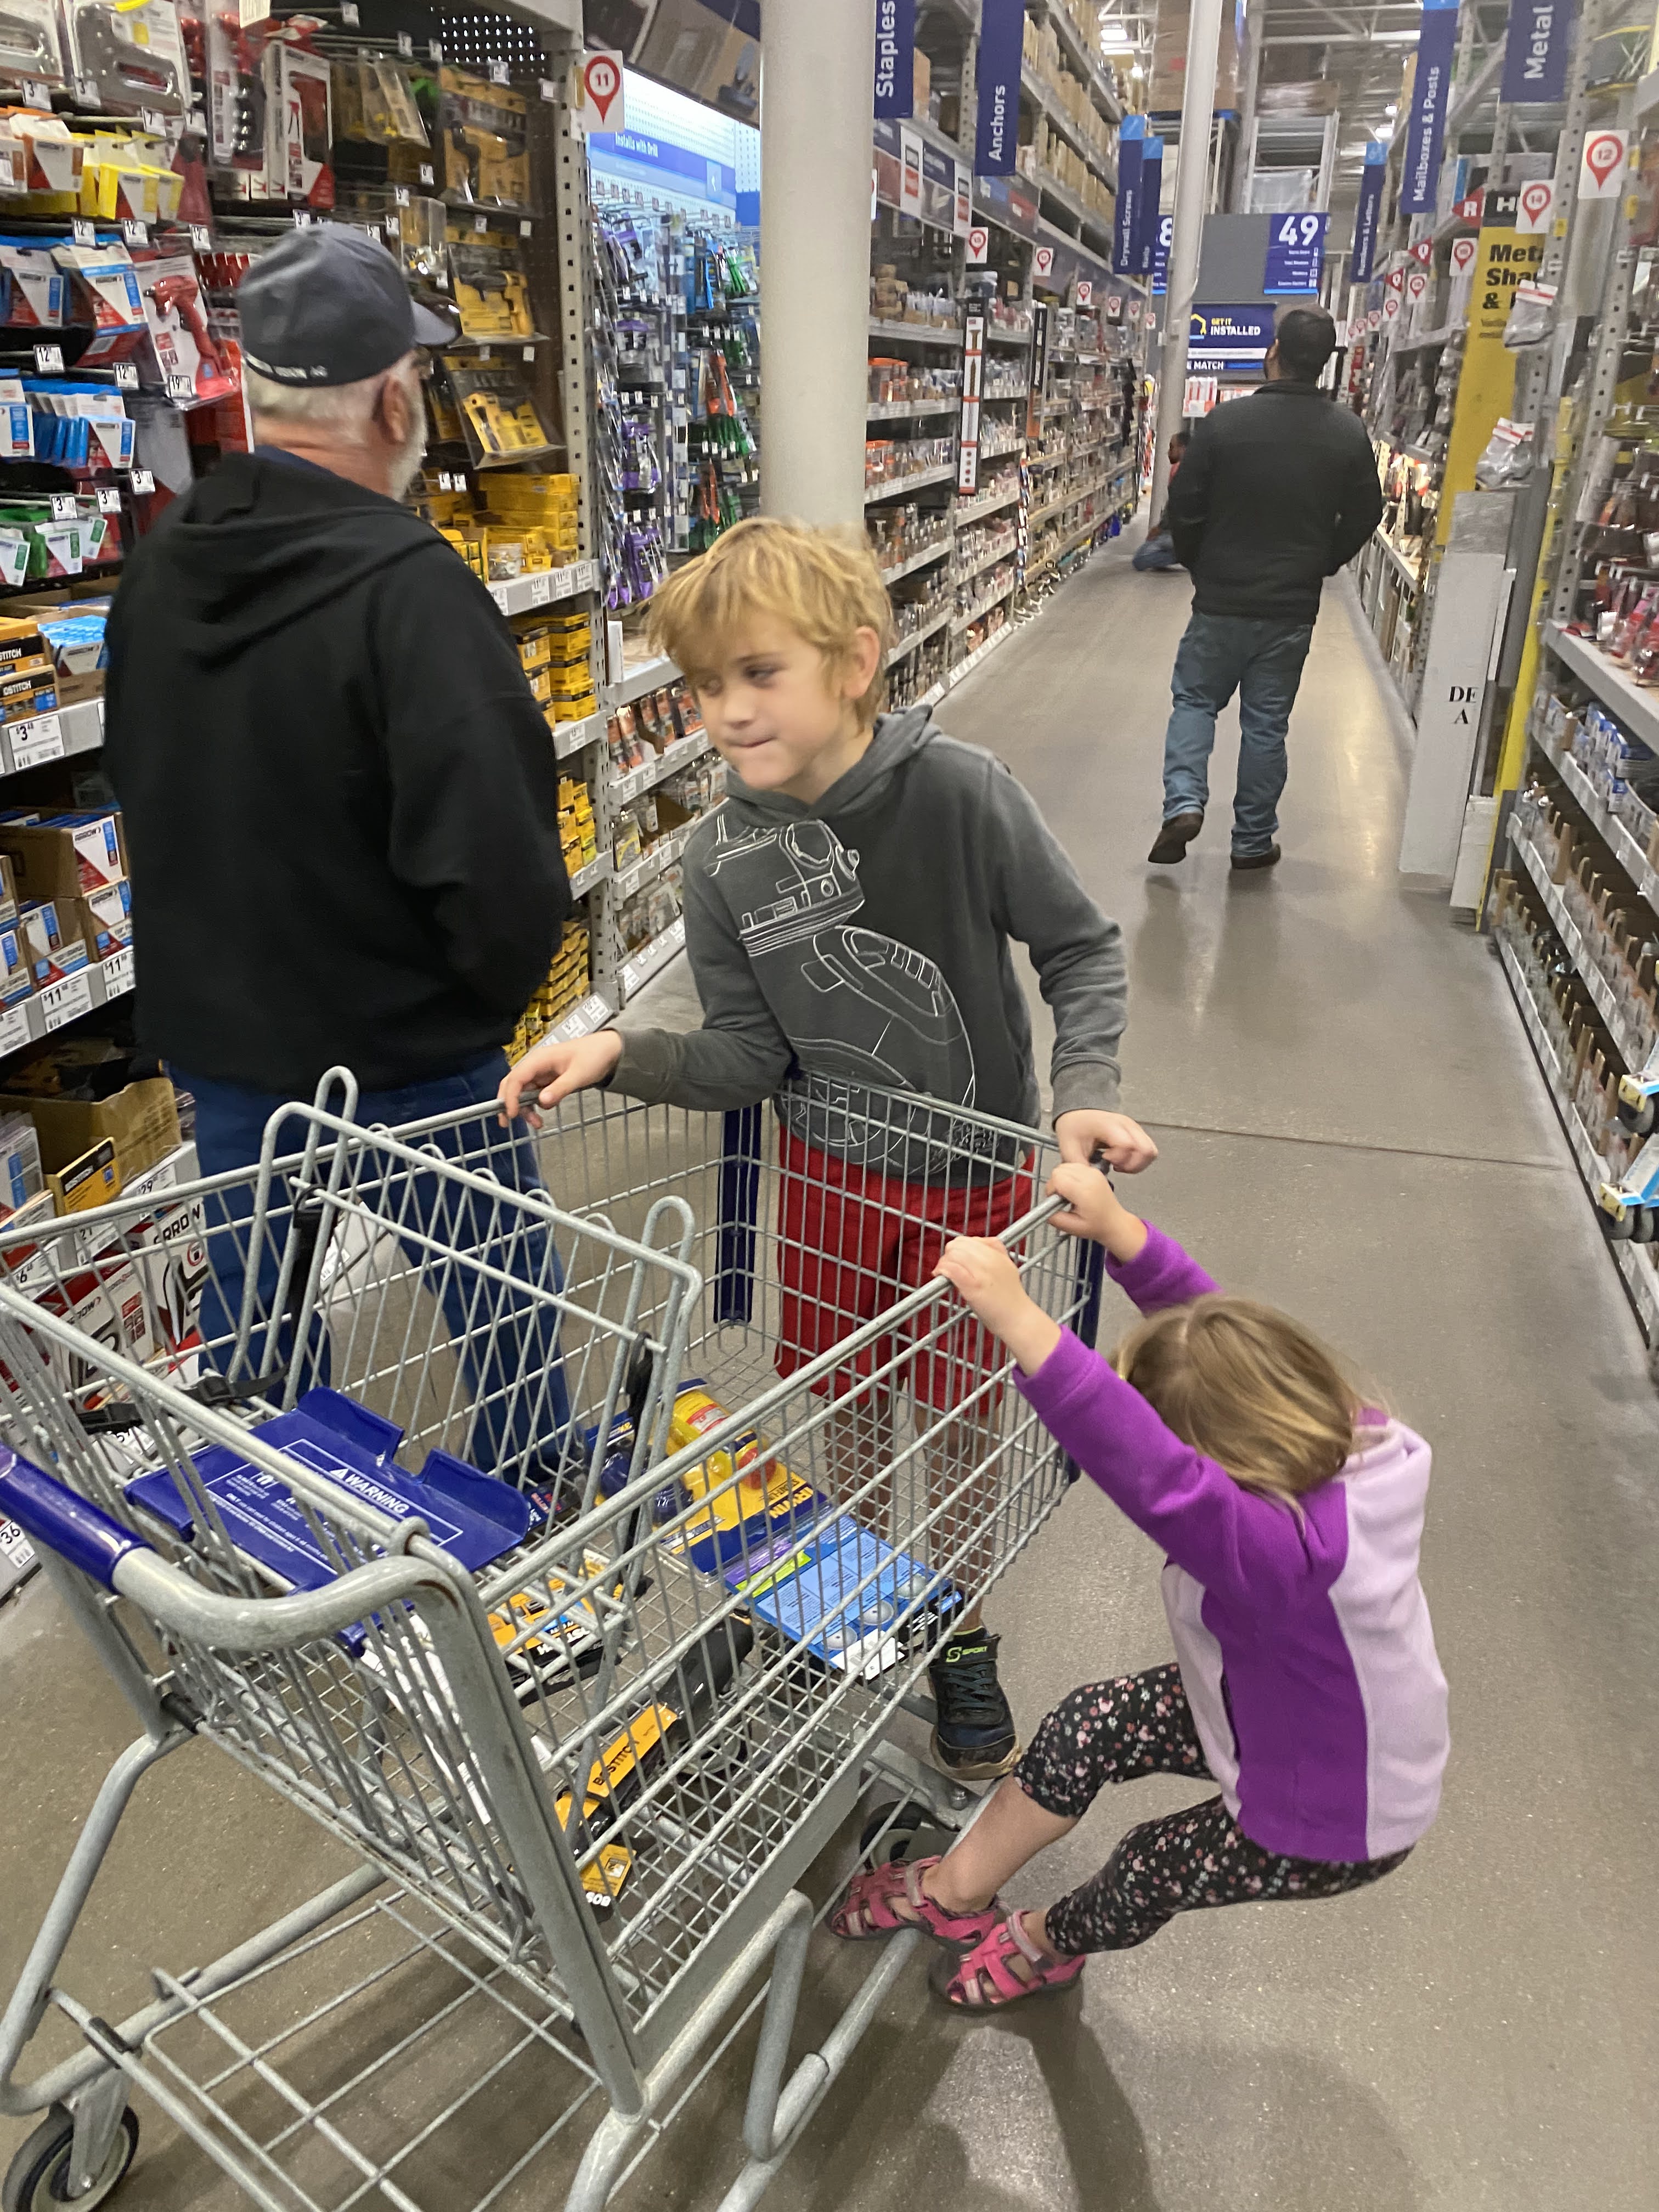
I started unloading the smaller items alone and put them in the driveway, but it immediately became very clear I would need help. I called or texted every local friend, but to no surprise, no one was available on zero notice on a Tuesday during the work week. I resorted to Facebook, where I placed an ad on our neighborhood page offering $50 to anyone who could help. One woman took advantage, but not even that was enough. Soon several neighbors on my street saw the action and jumped in to help. And finally a pair of contractors on their way to a job saw us working and stopped. All in all, it took seven of us about two hours to unload everything and move it to the garage or backyard. It was exhausting. Only the two contractors wanted to be paid. I gave them each $75 as it was far more work than we had envisioned.
The very day we unloaded, we received an extremely rare lengthy rainstorm in Austin. I raced to Home Depot and bought several tarps to cover the pieces left outdoors, and it paid off. This almost never happens here, but it rained for almost 24 straight hours. Glad the shipment arrived when it was dry, at least!


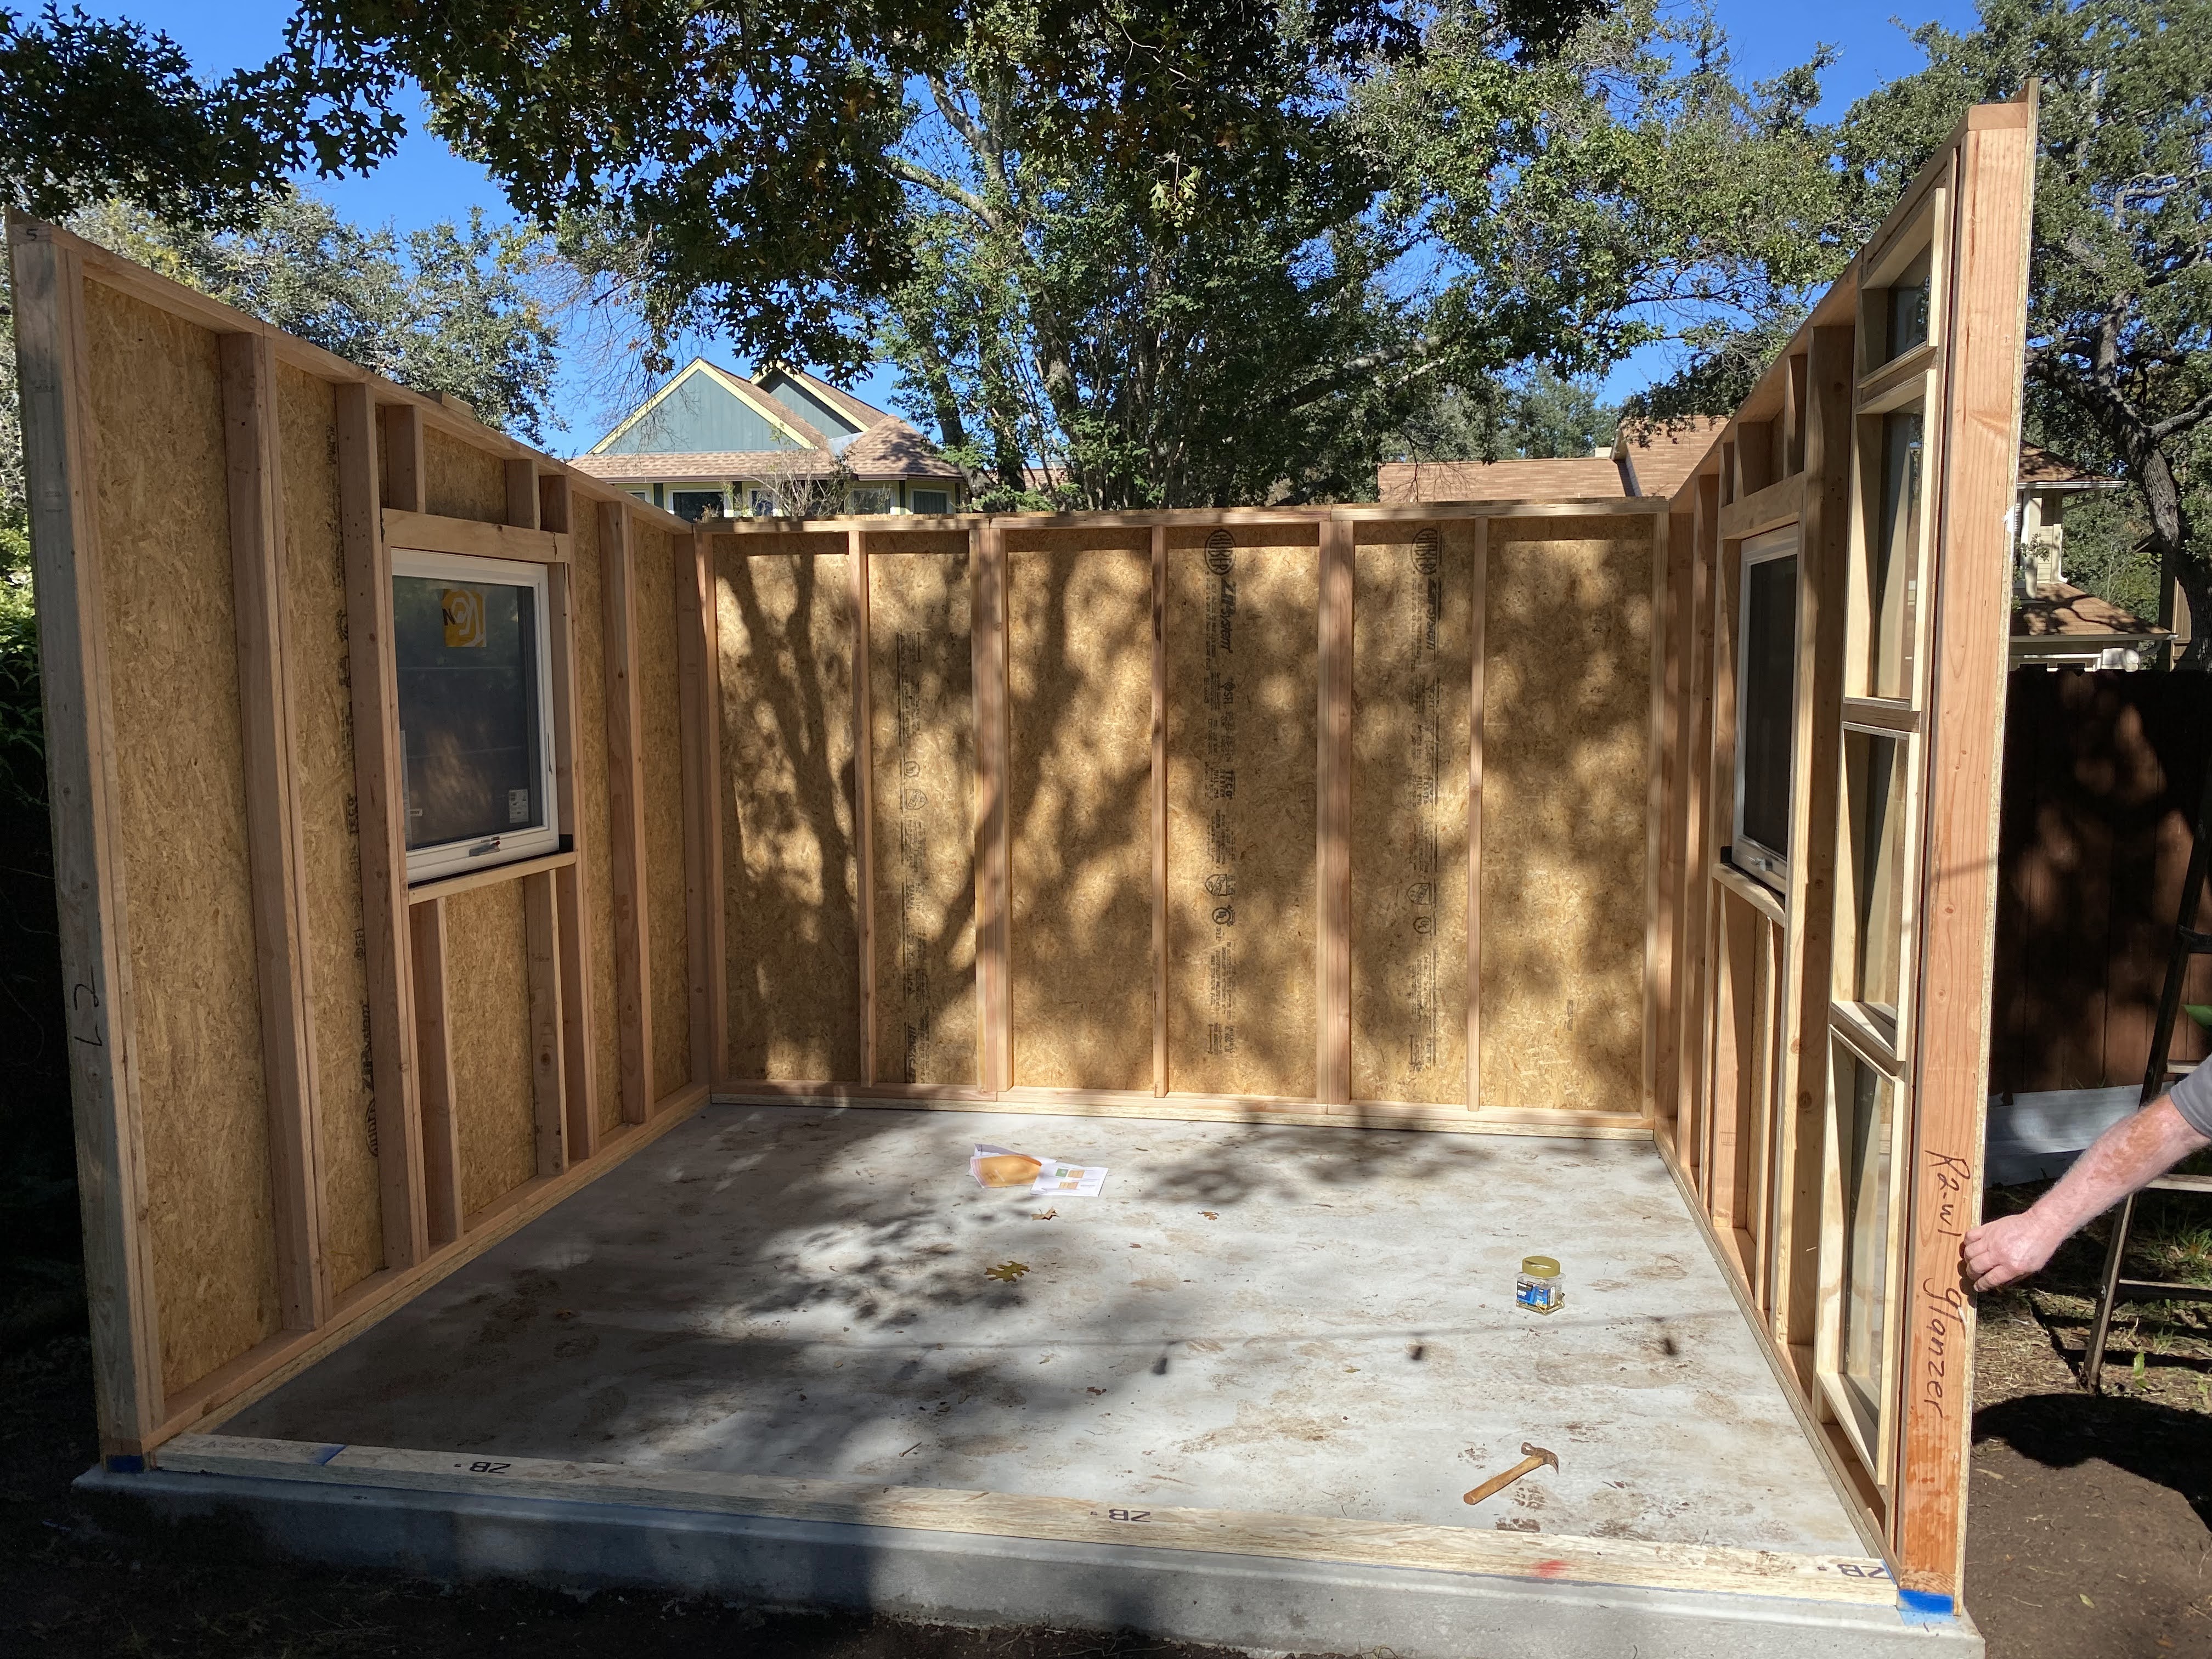
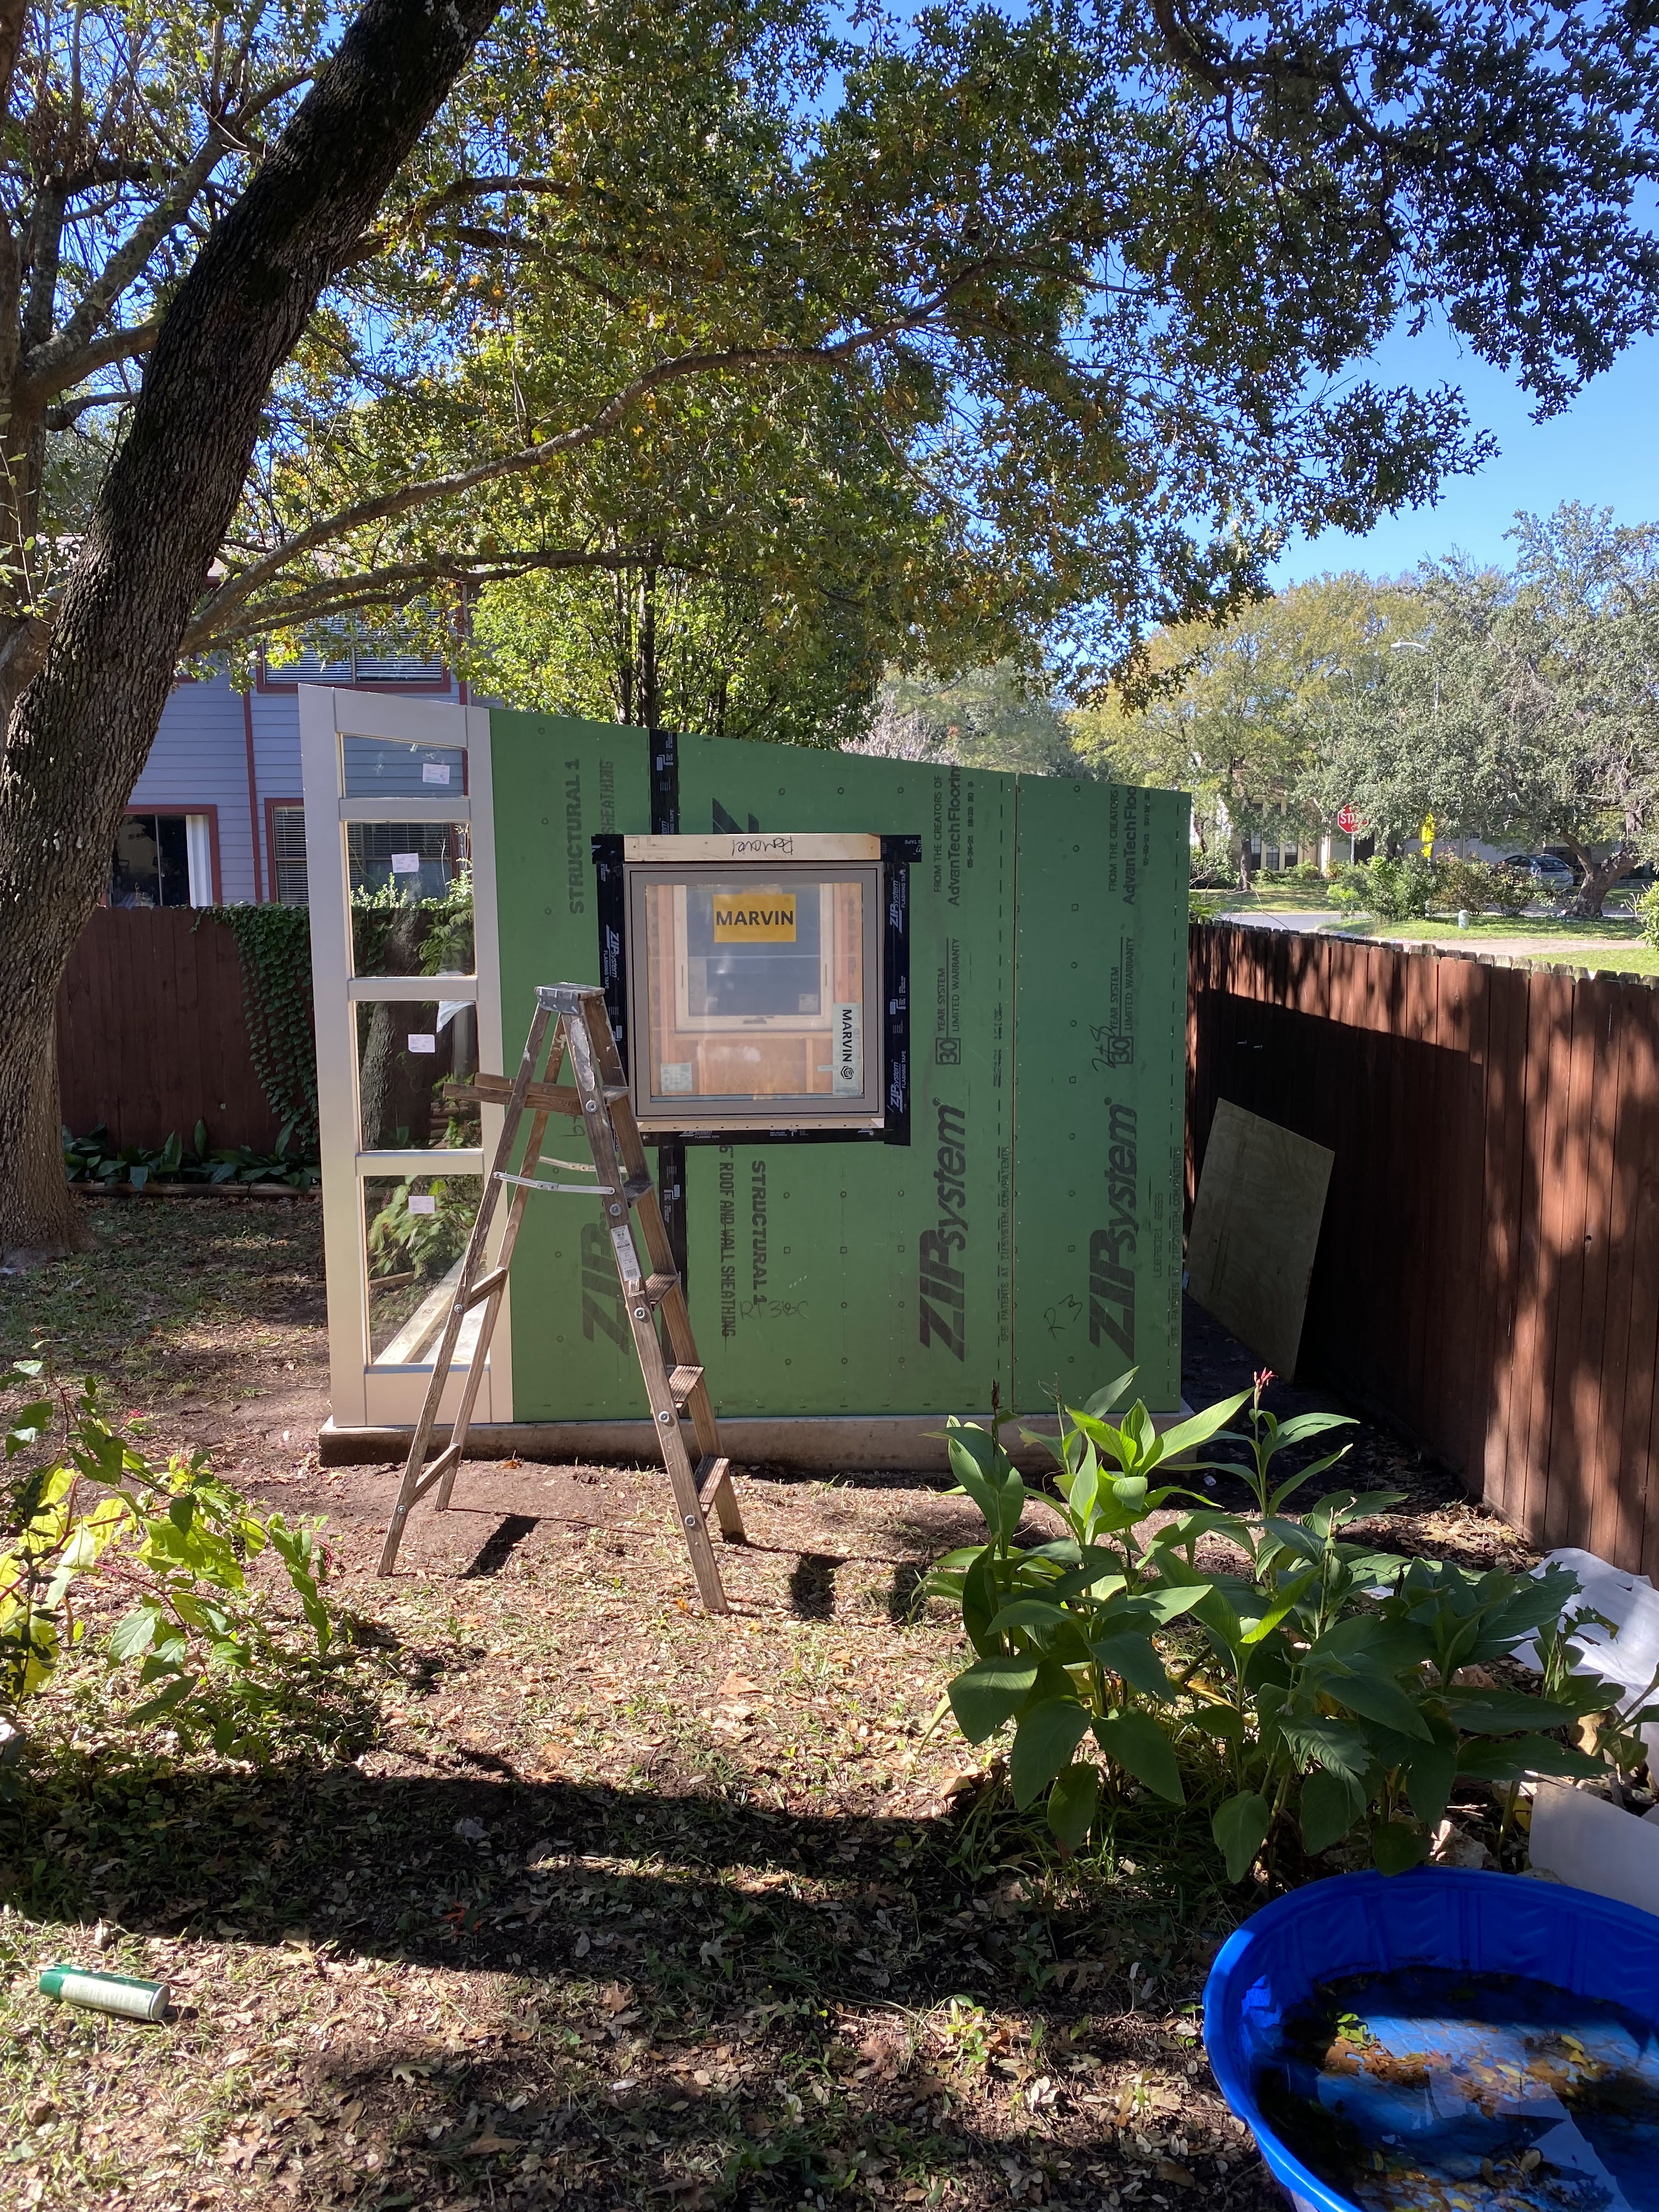
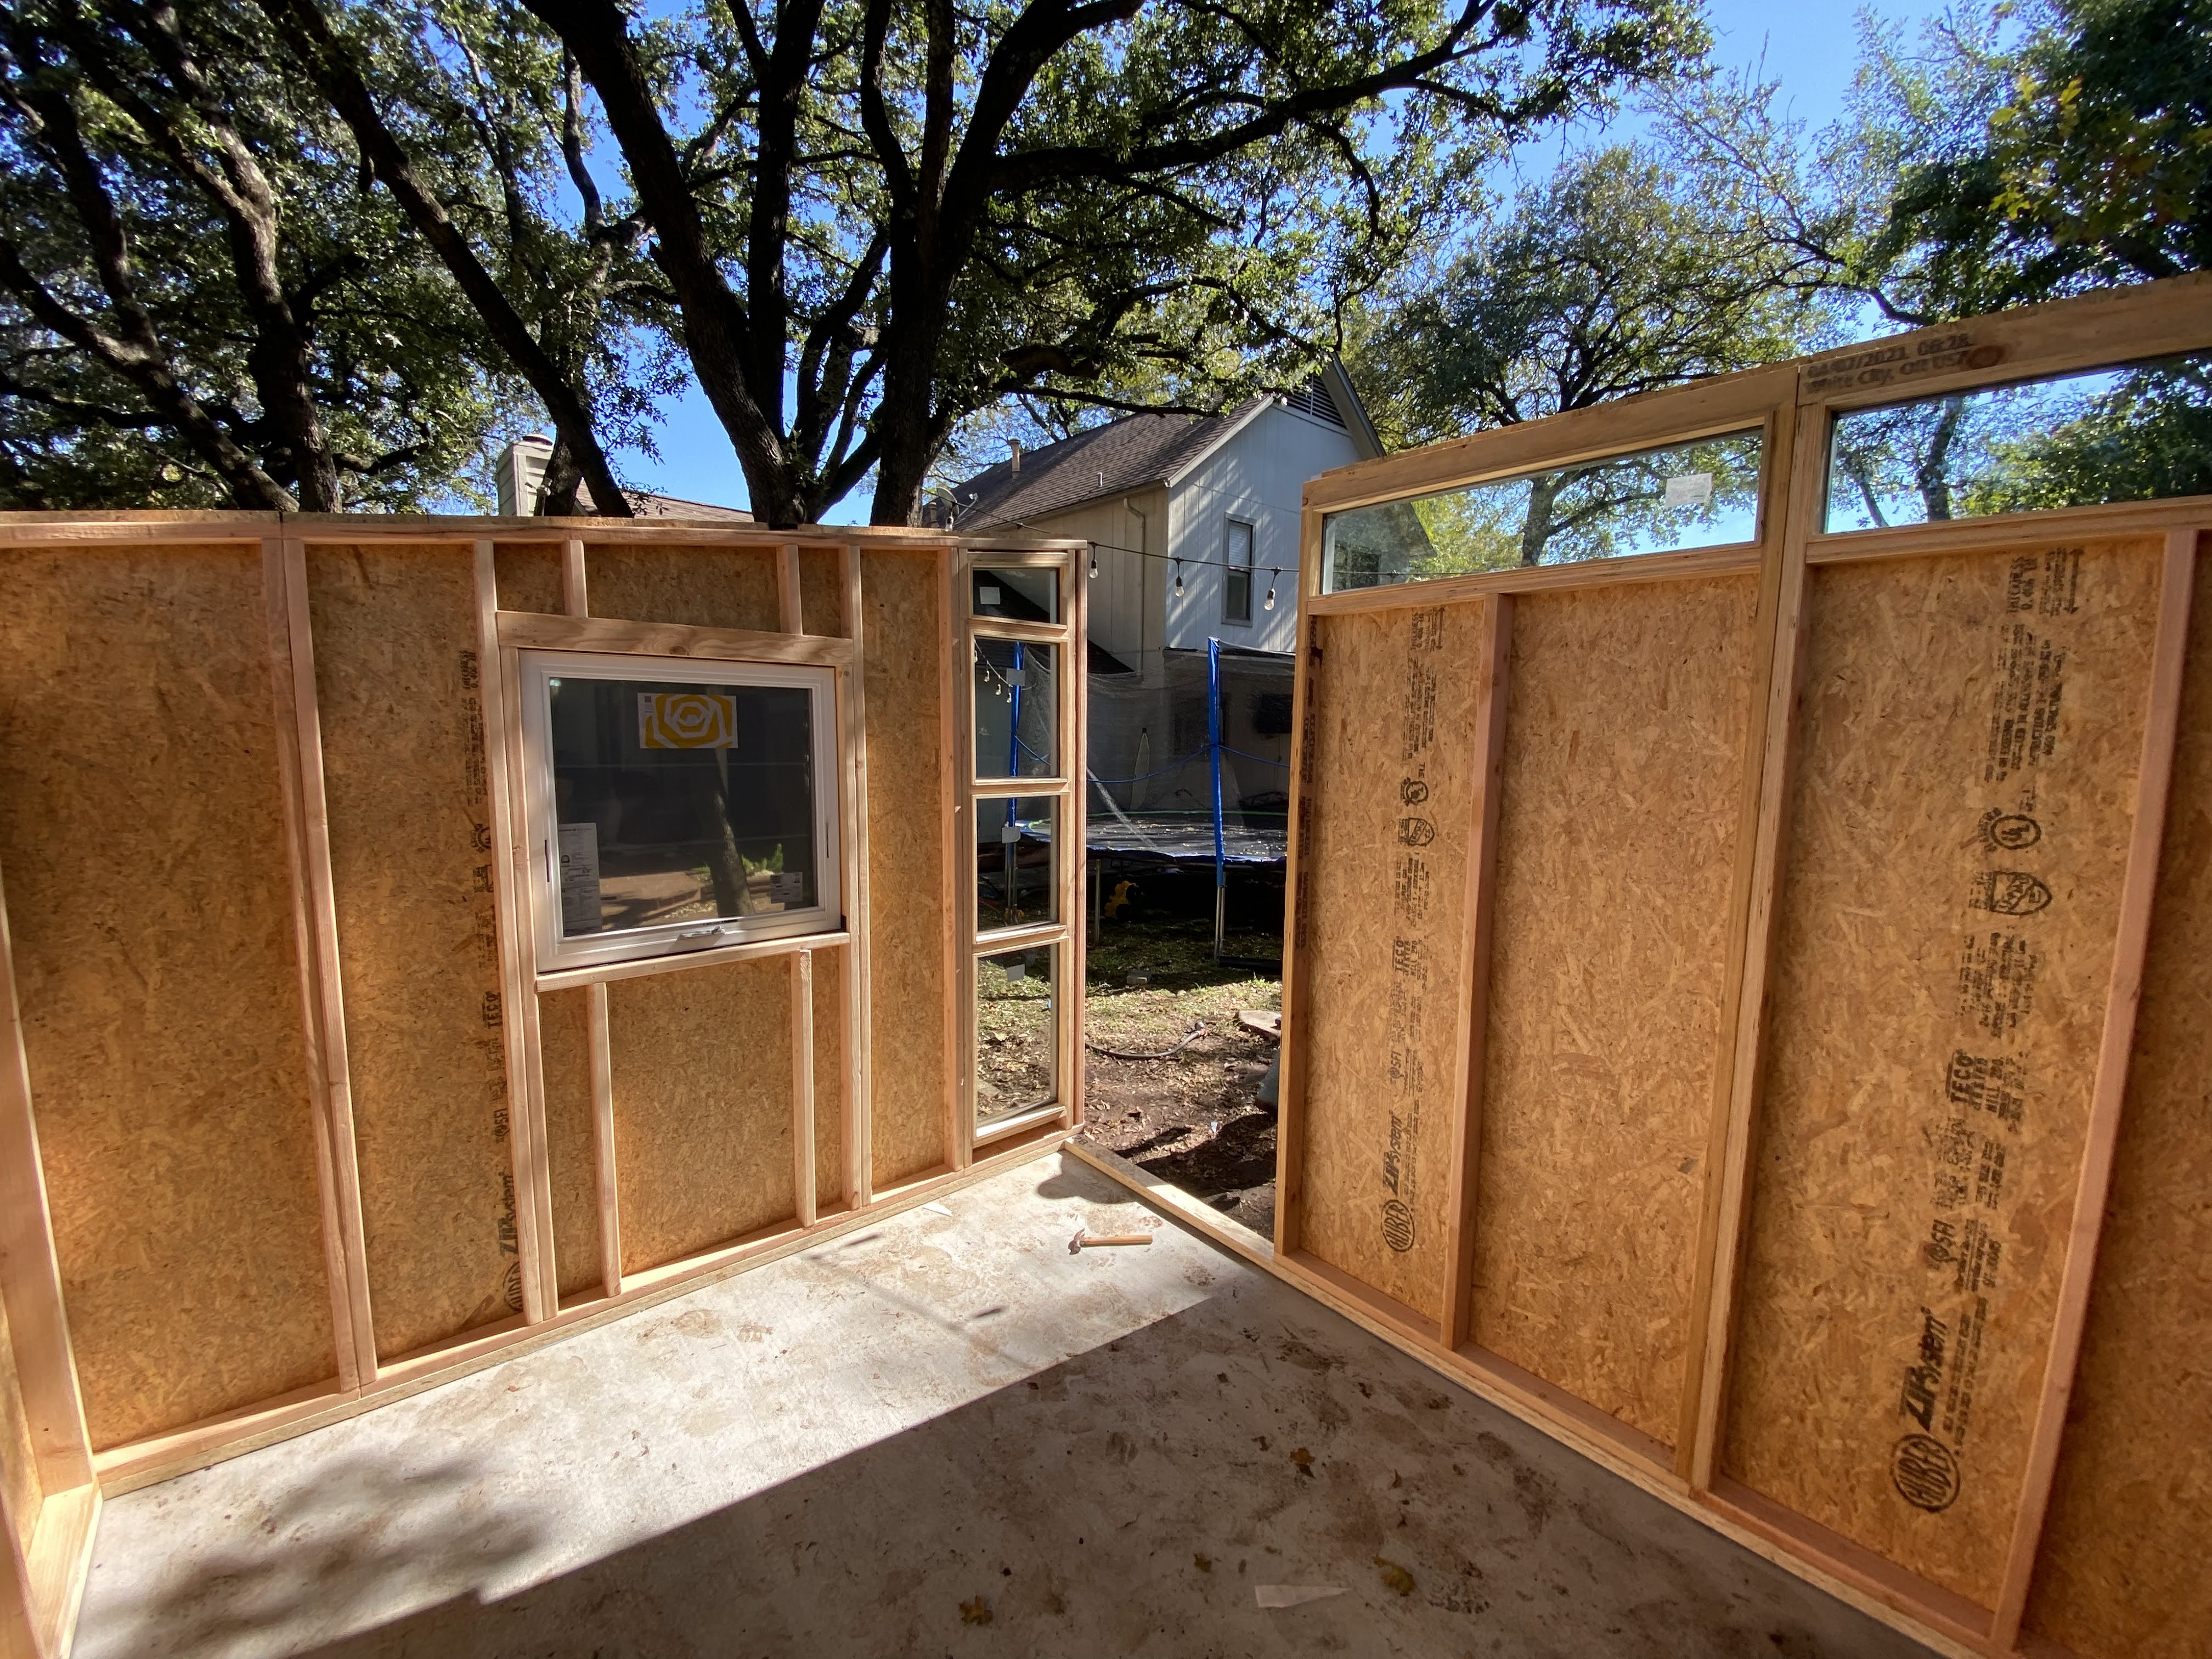
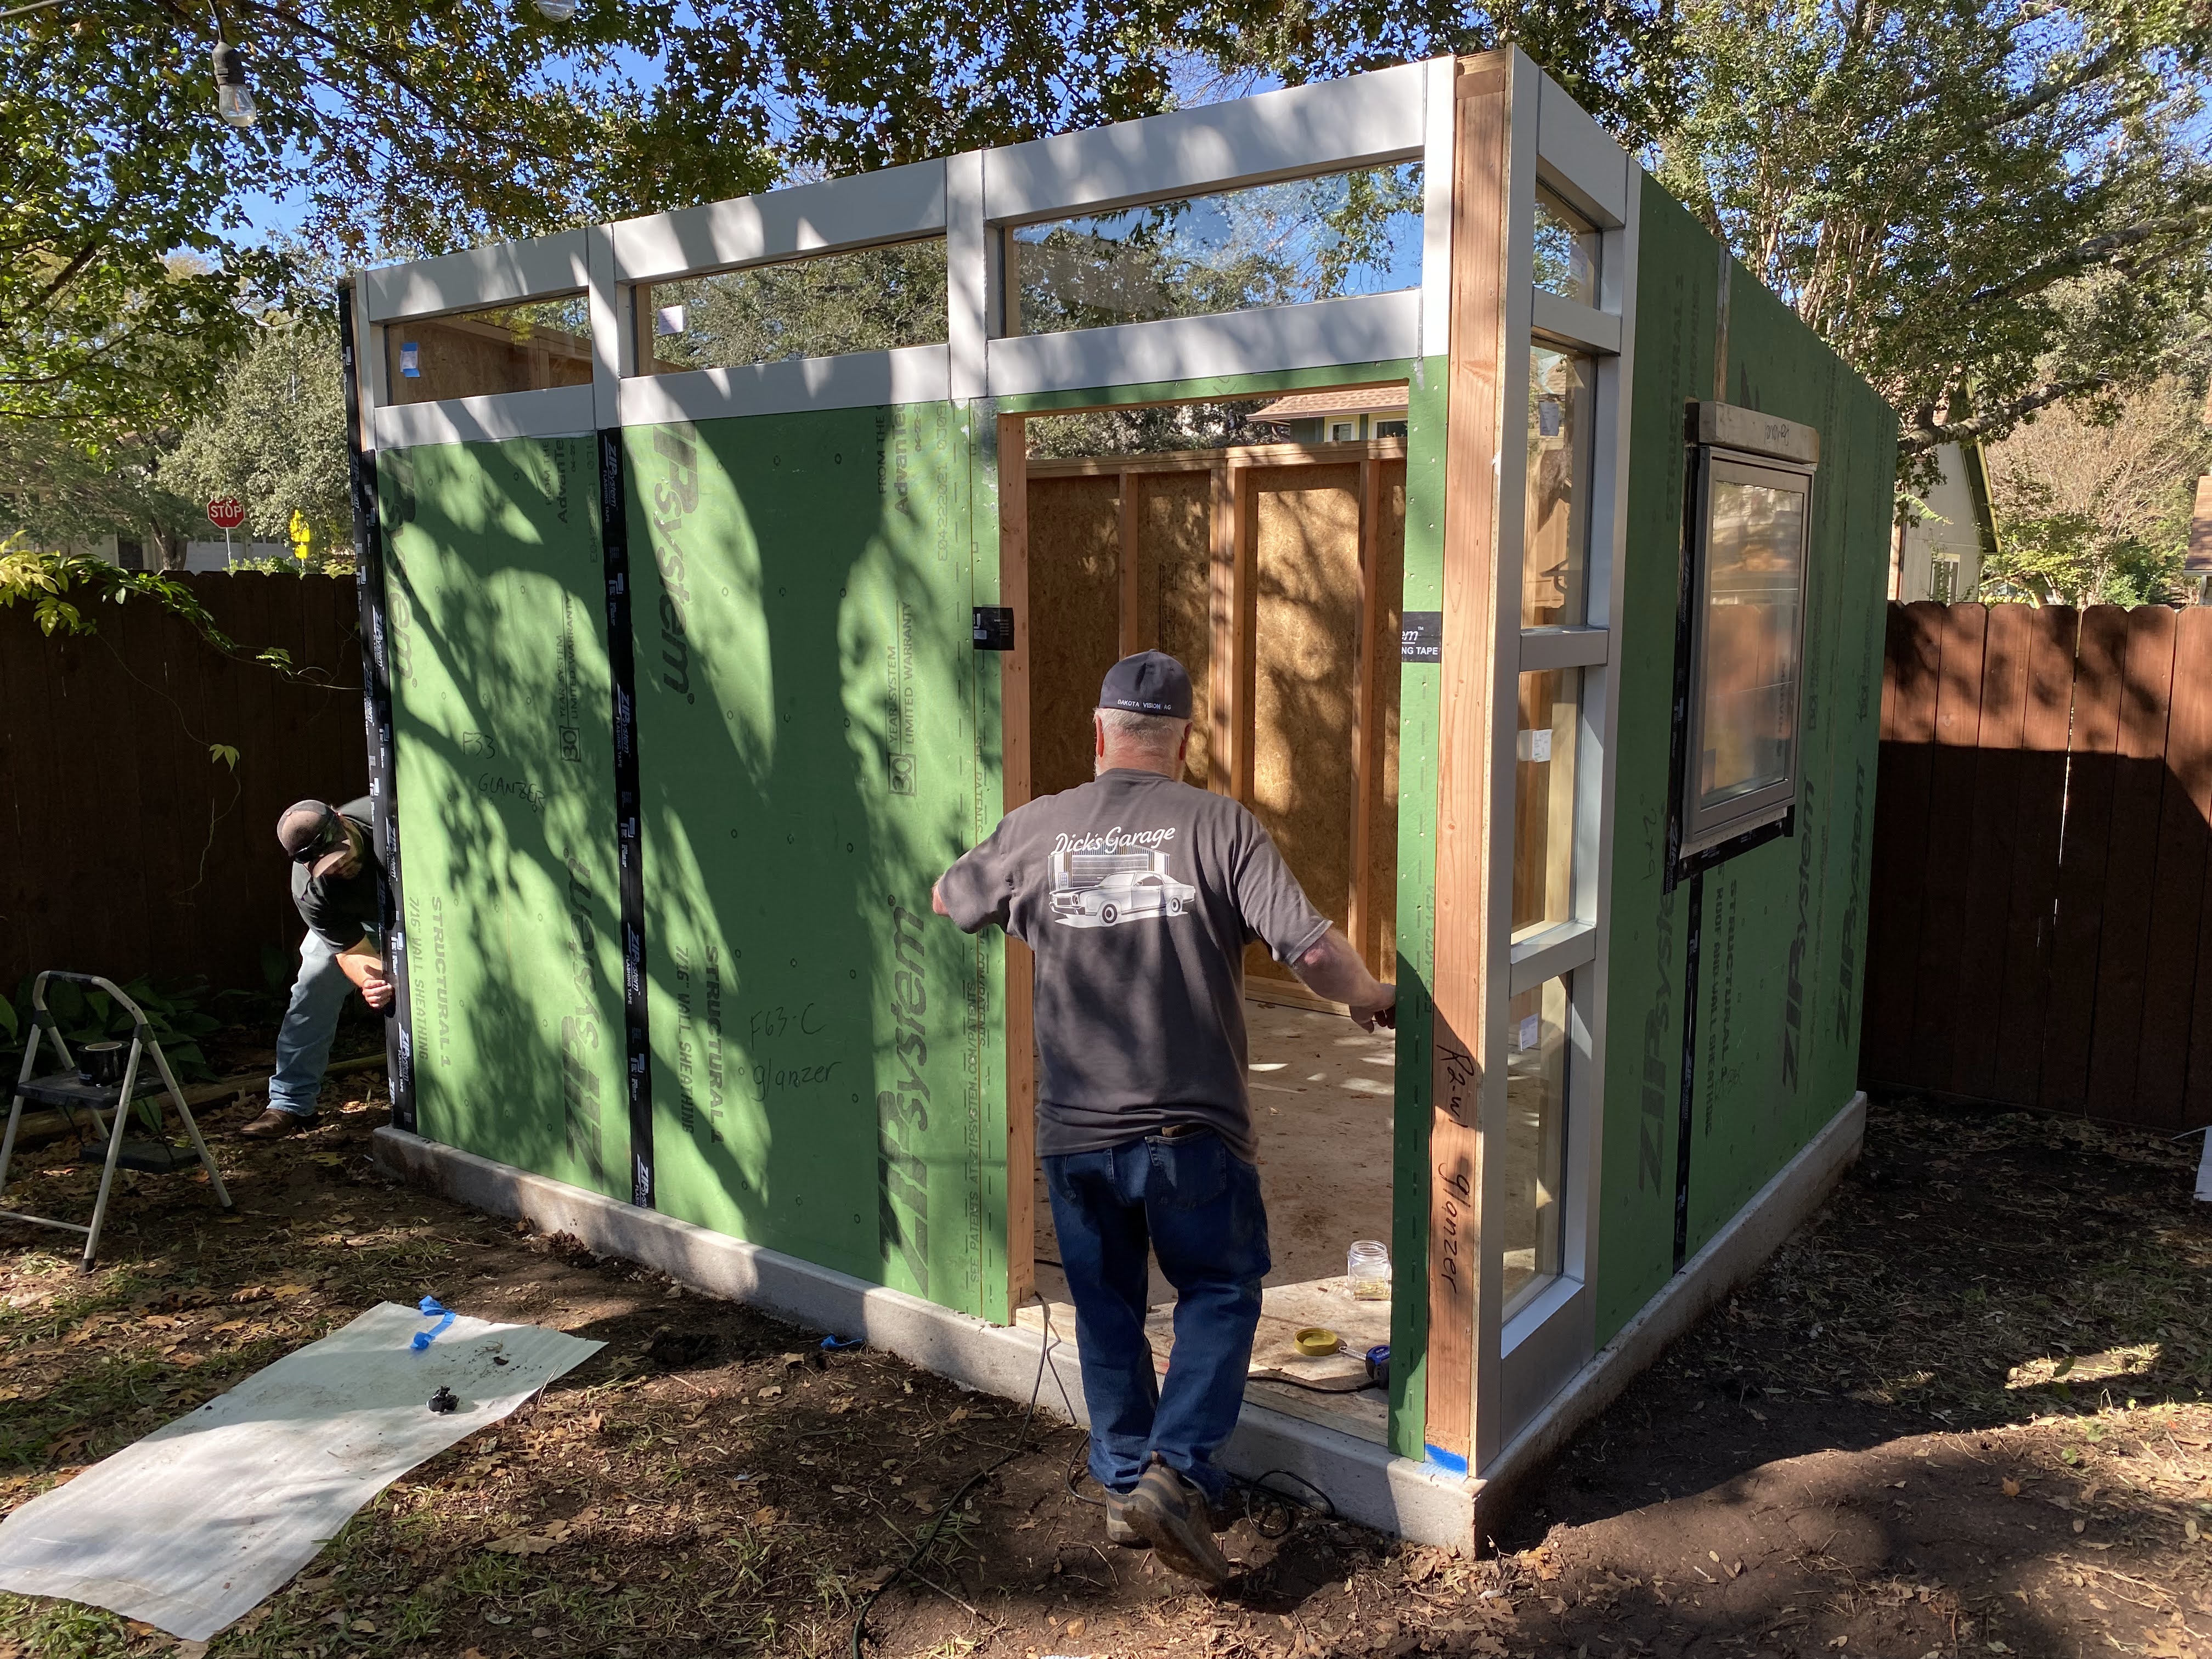
Construction
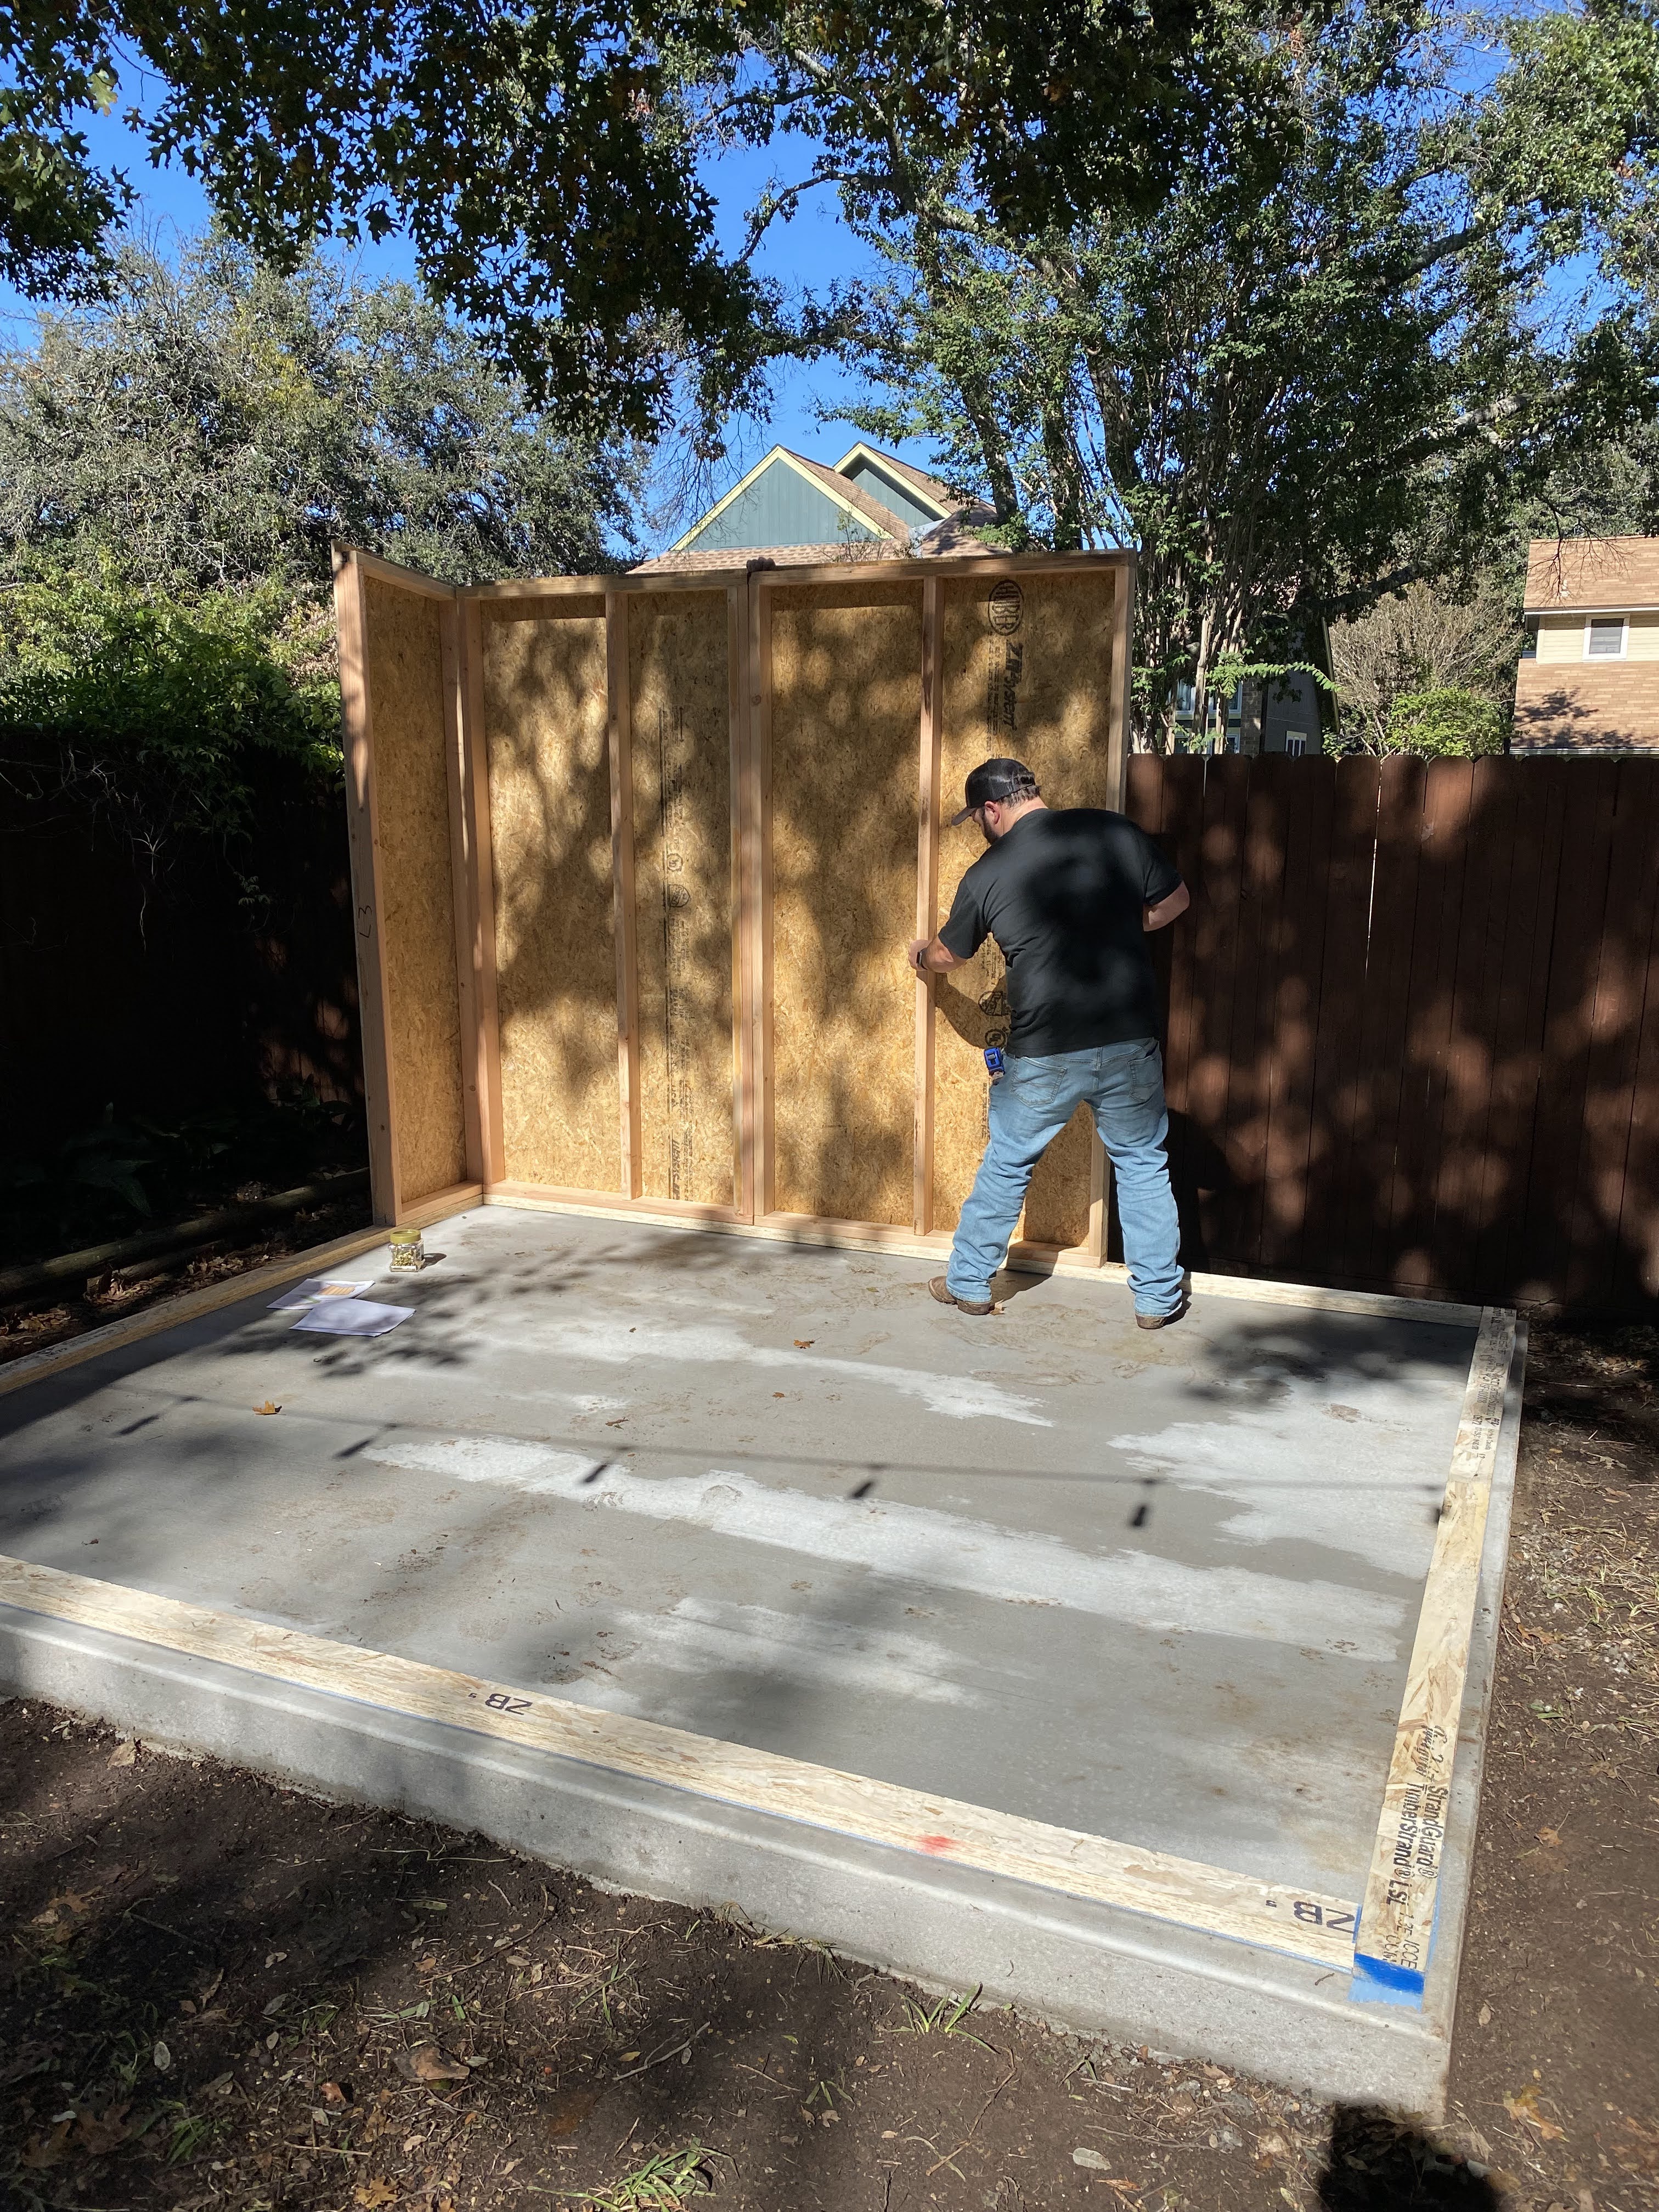
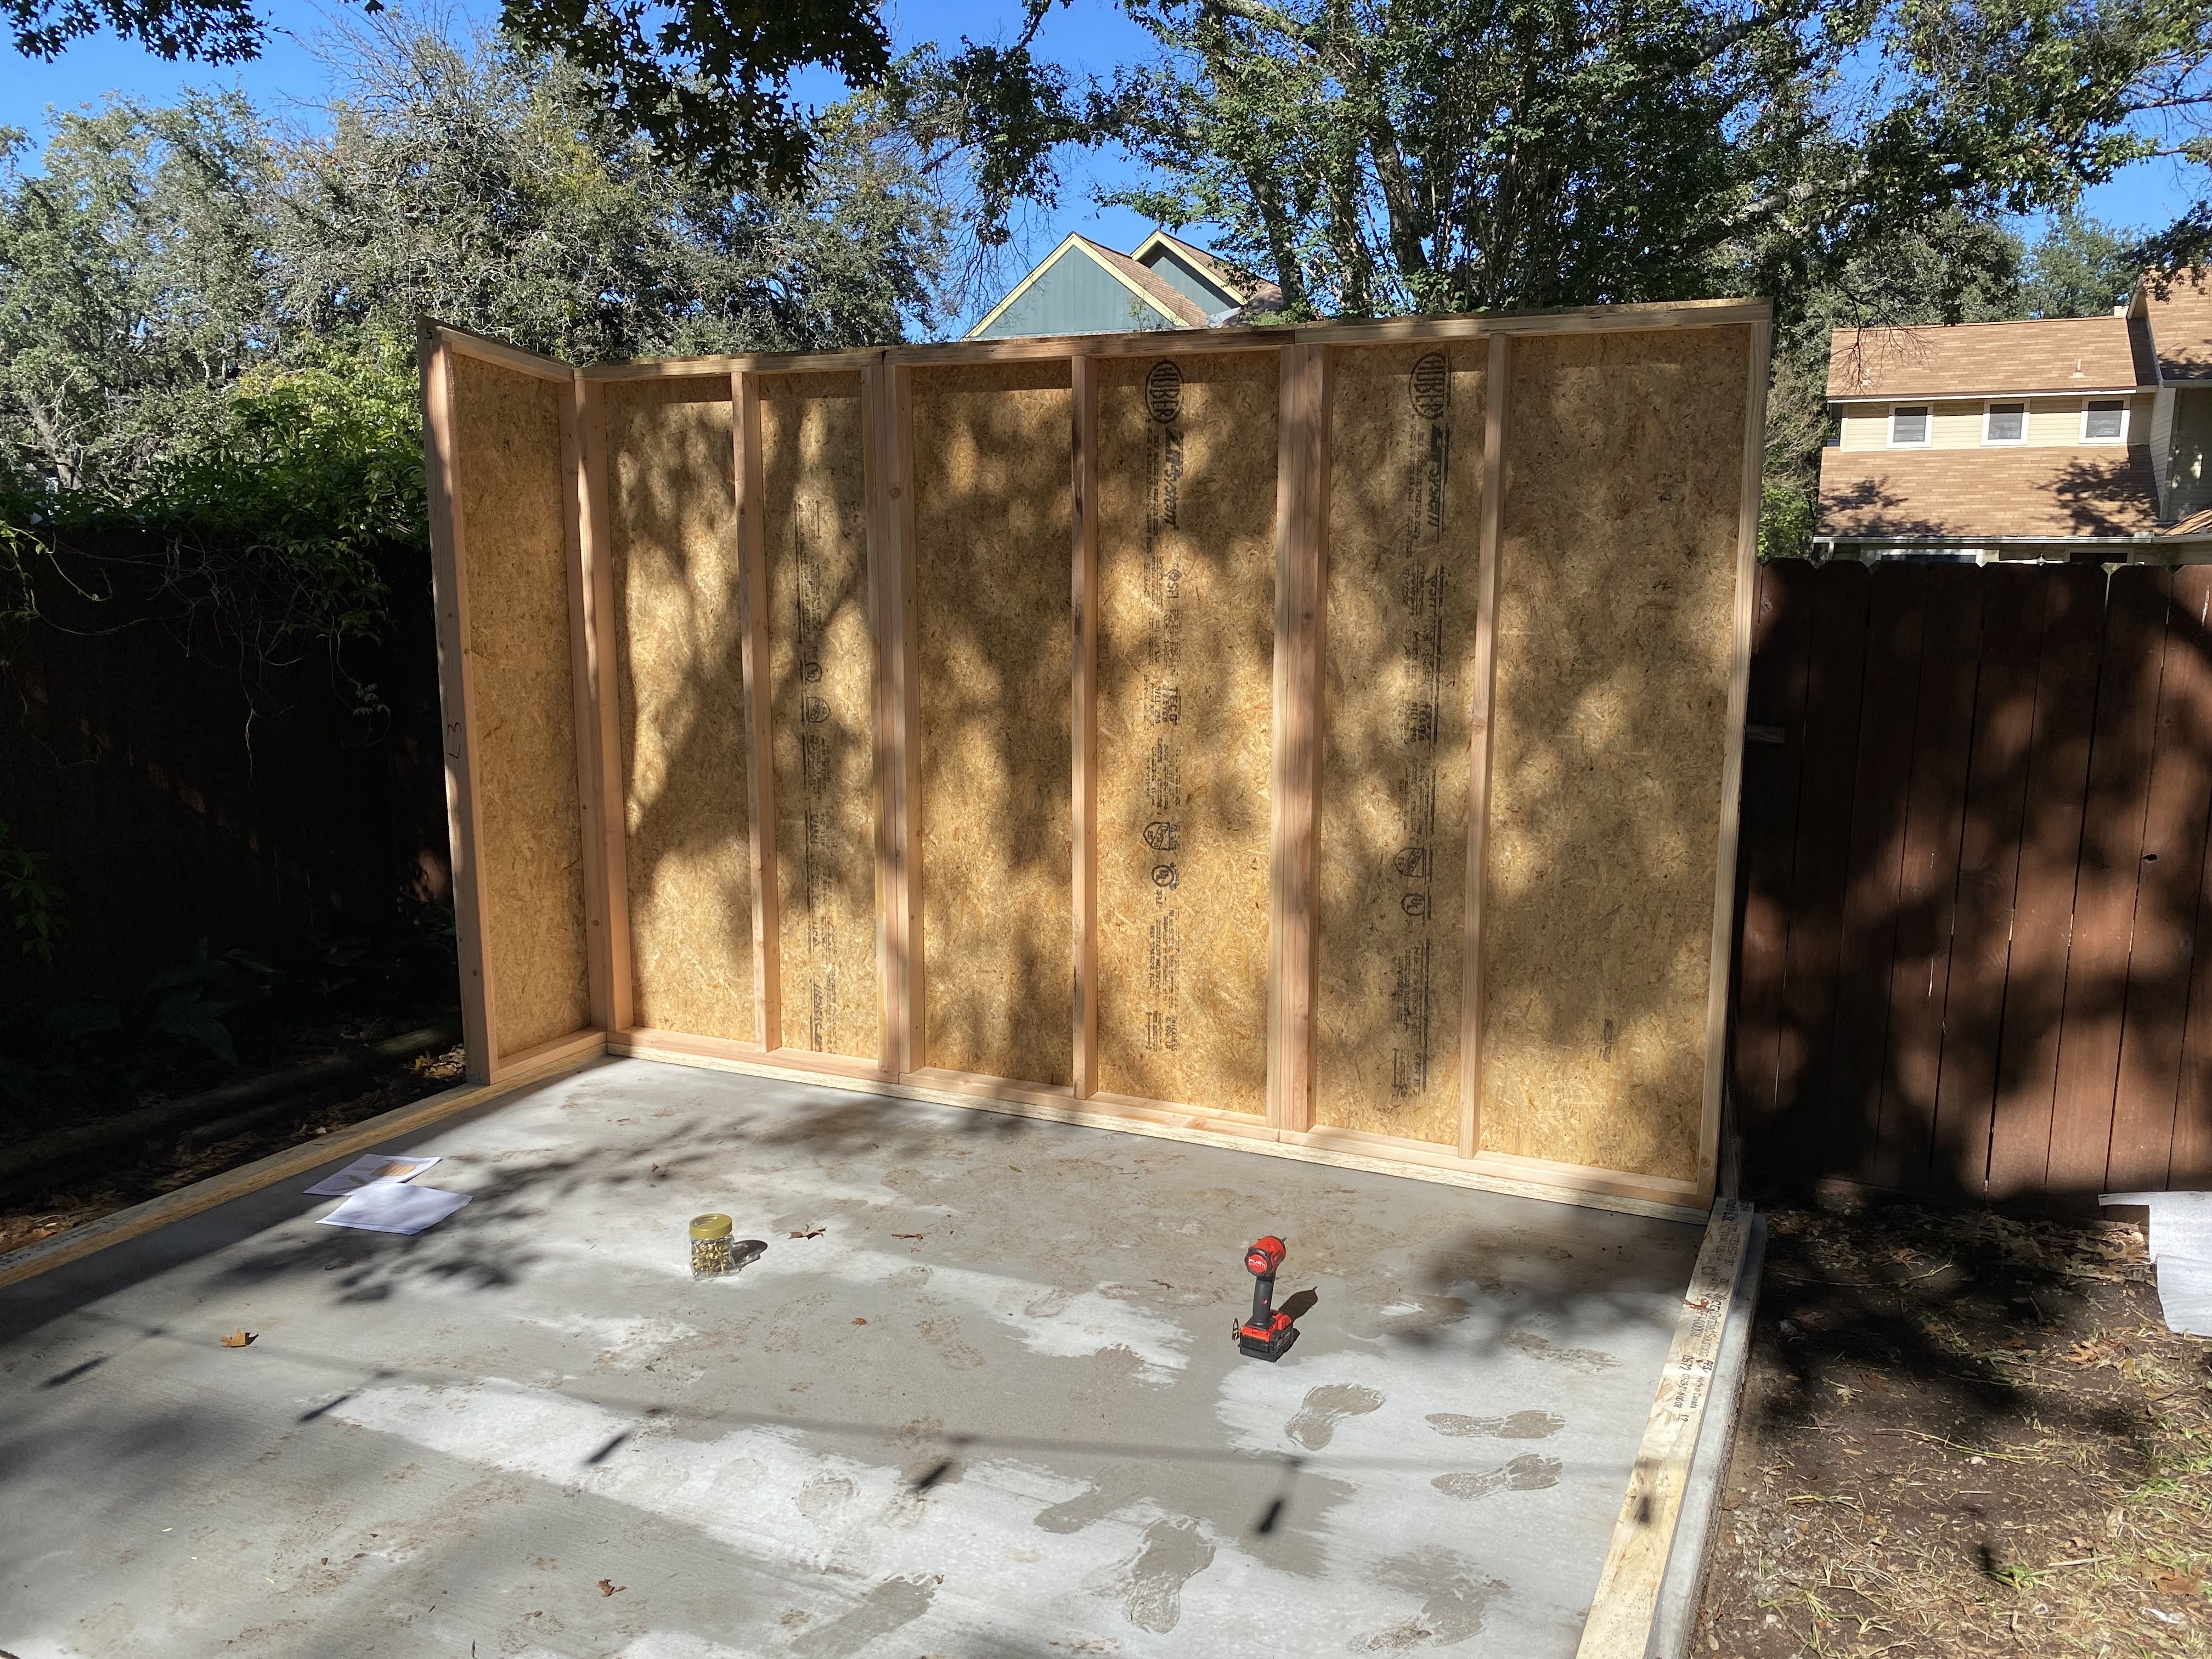
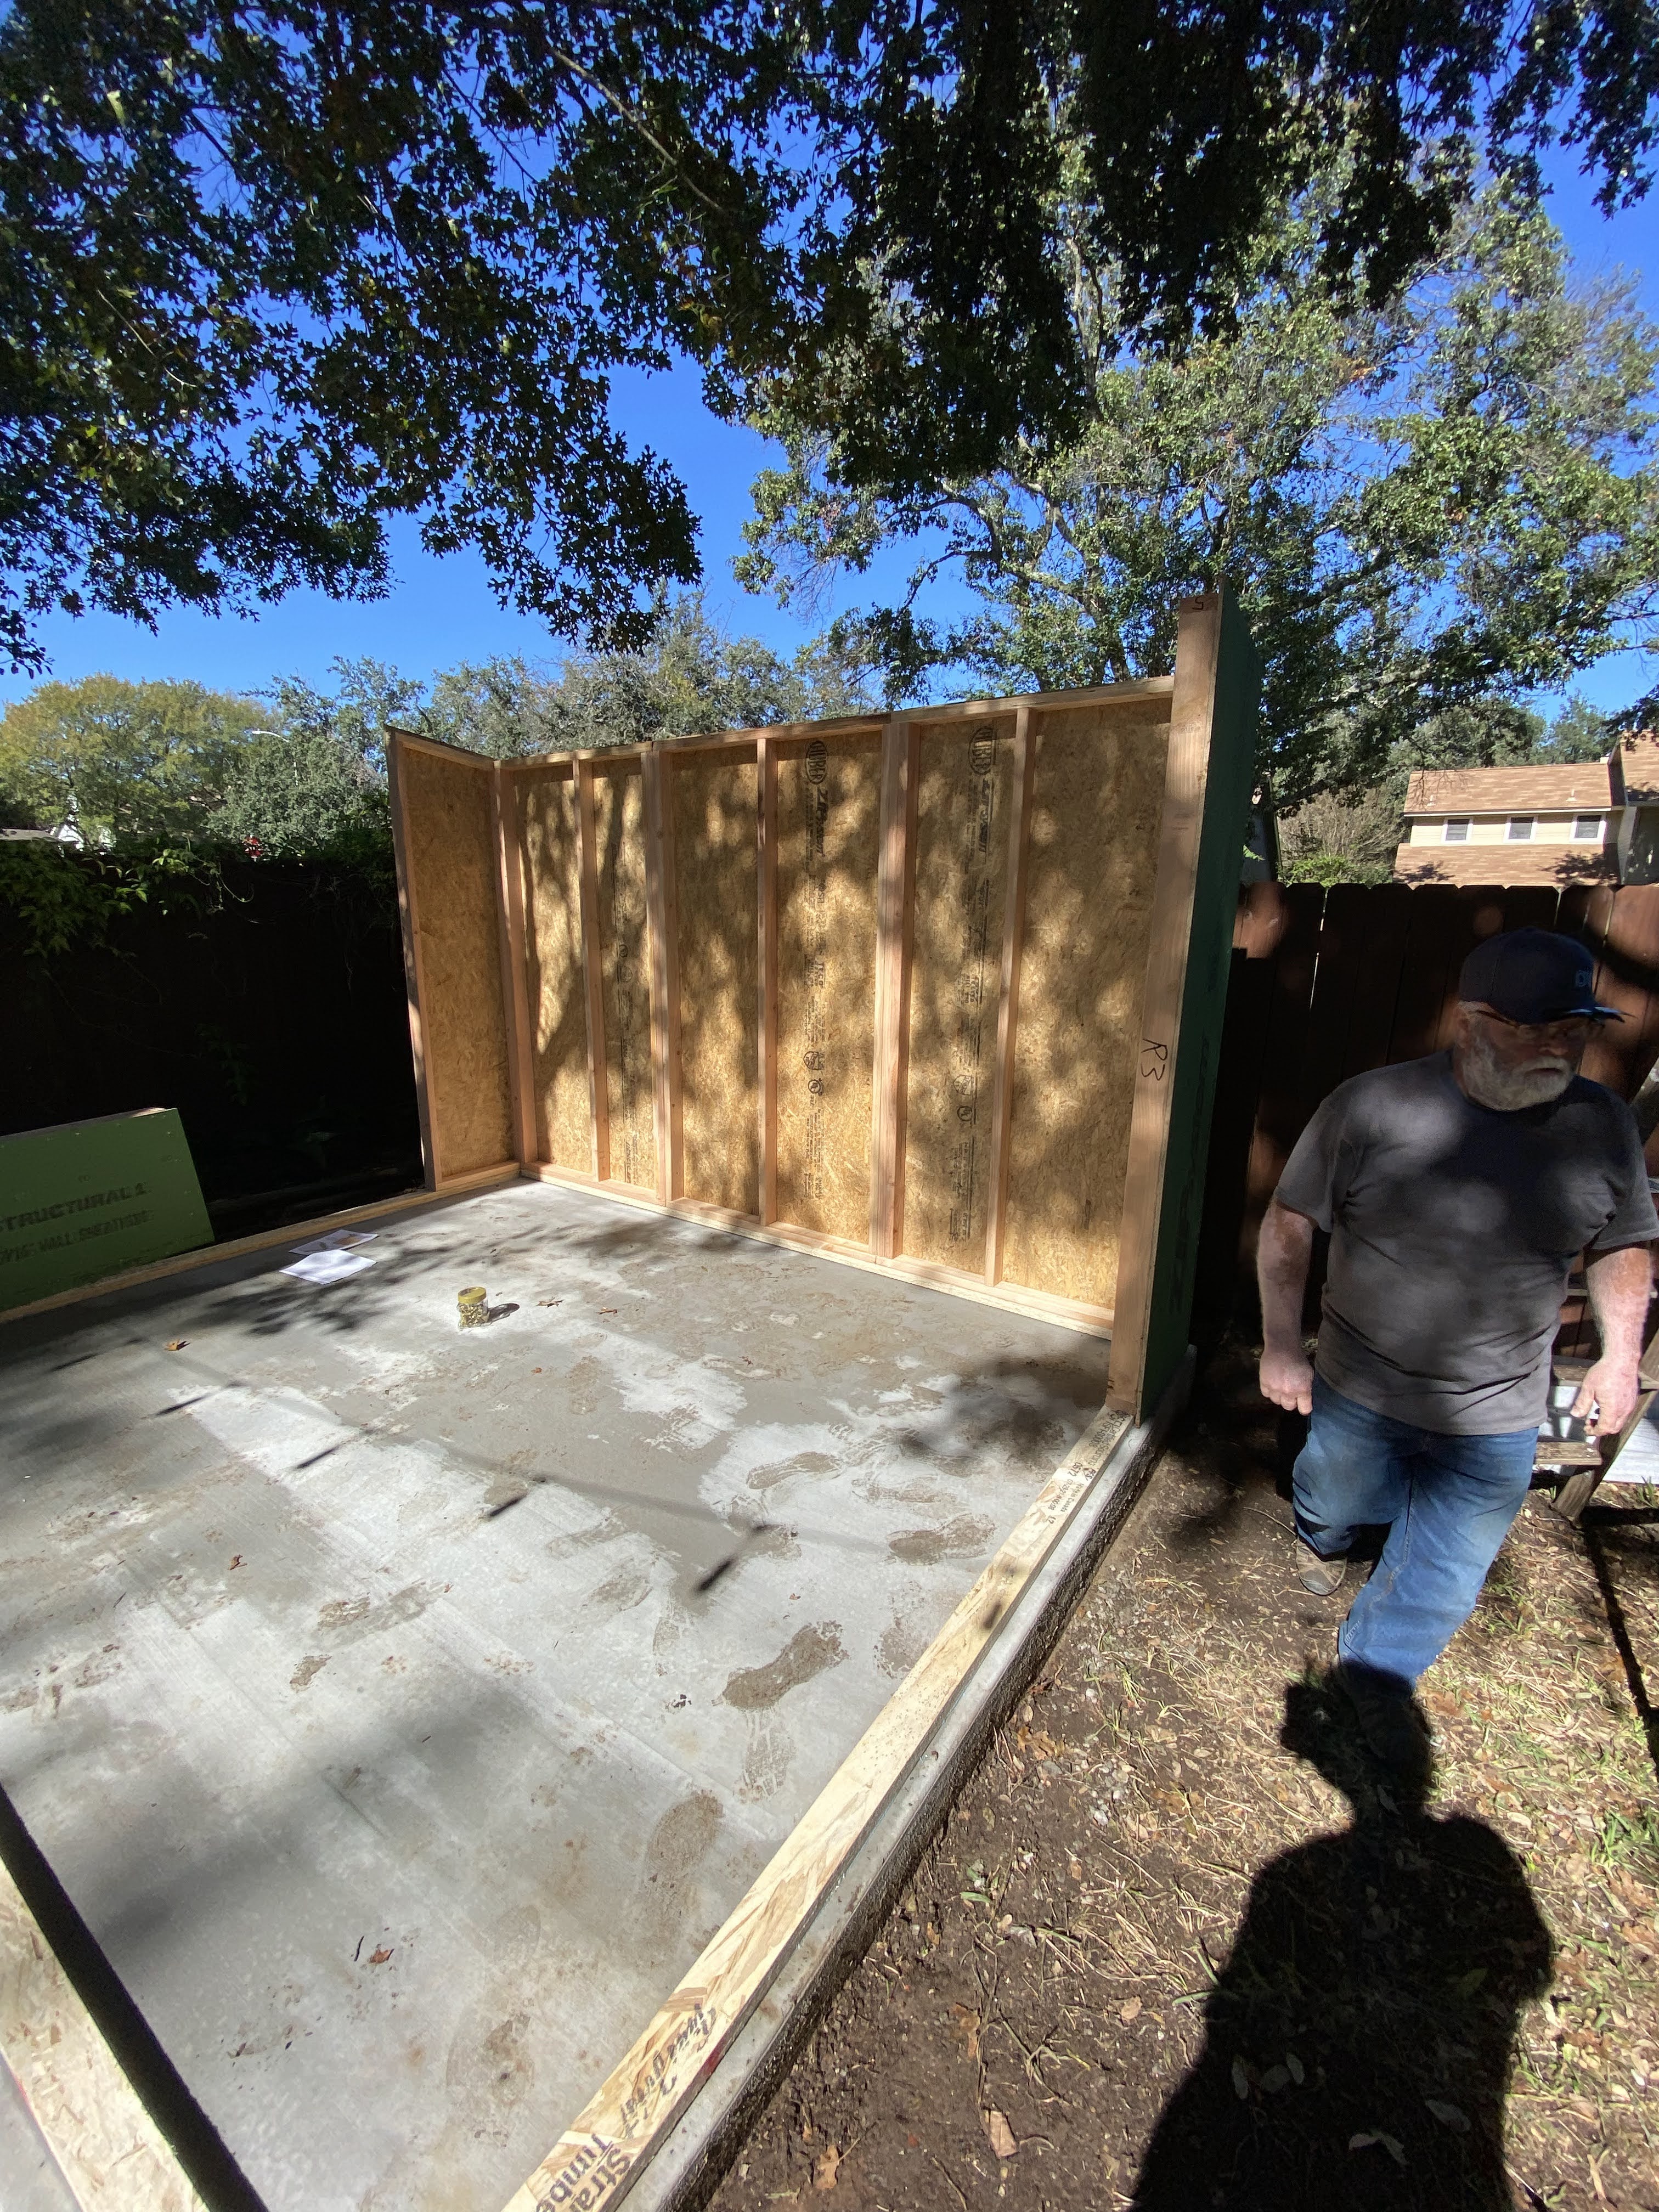
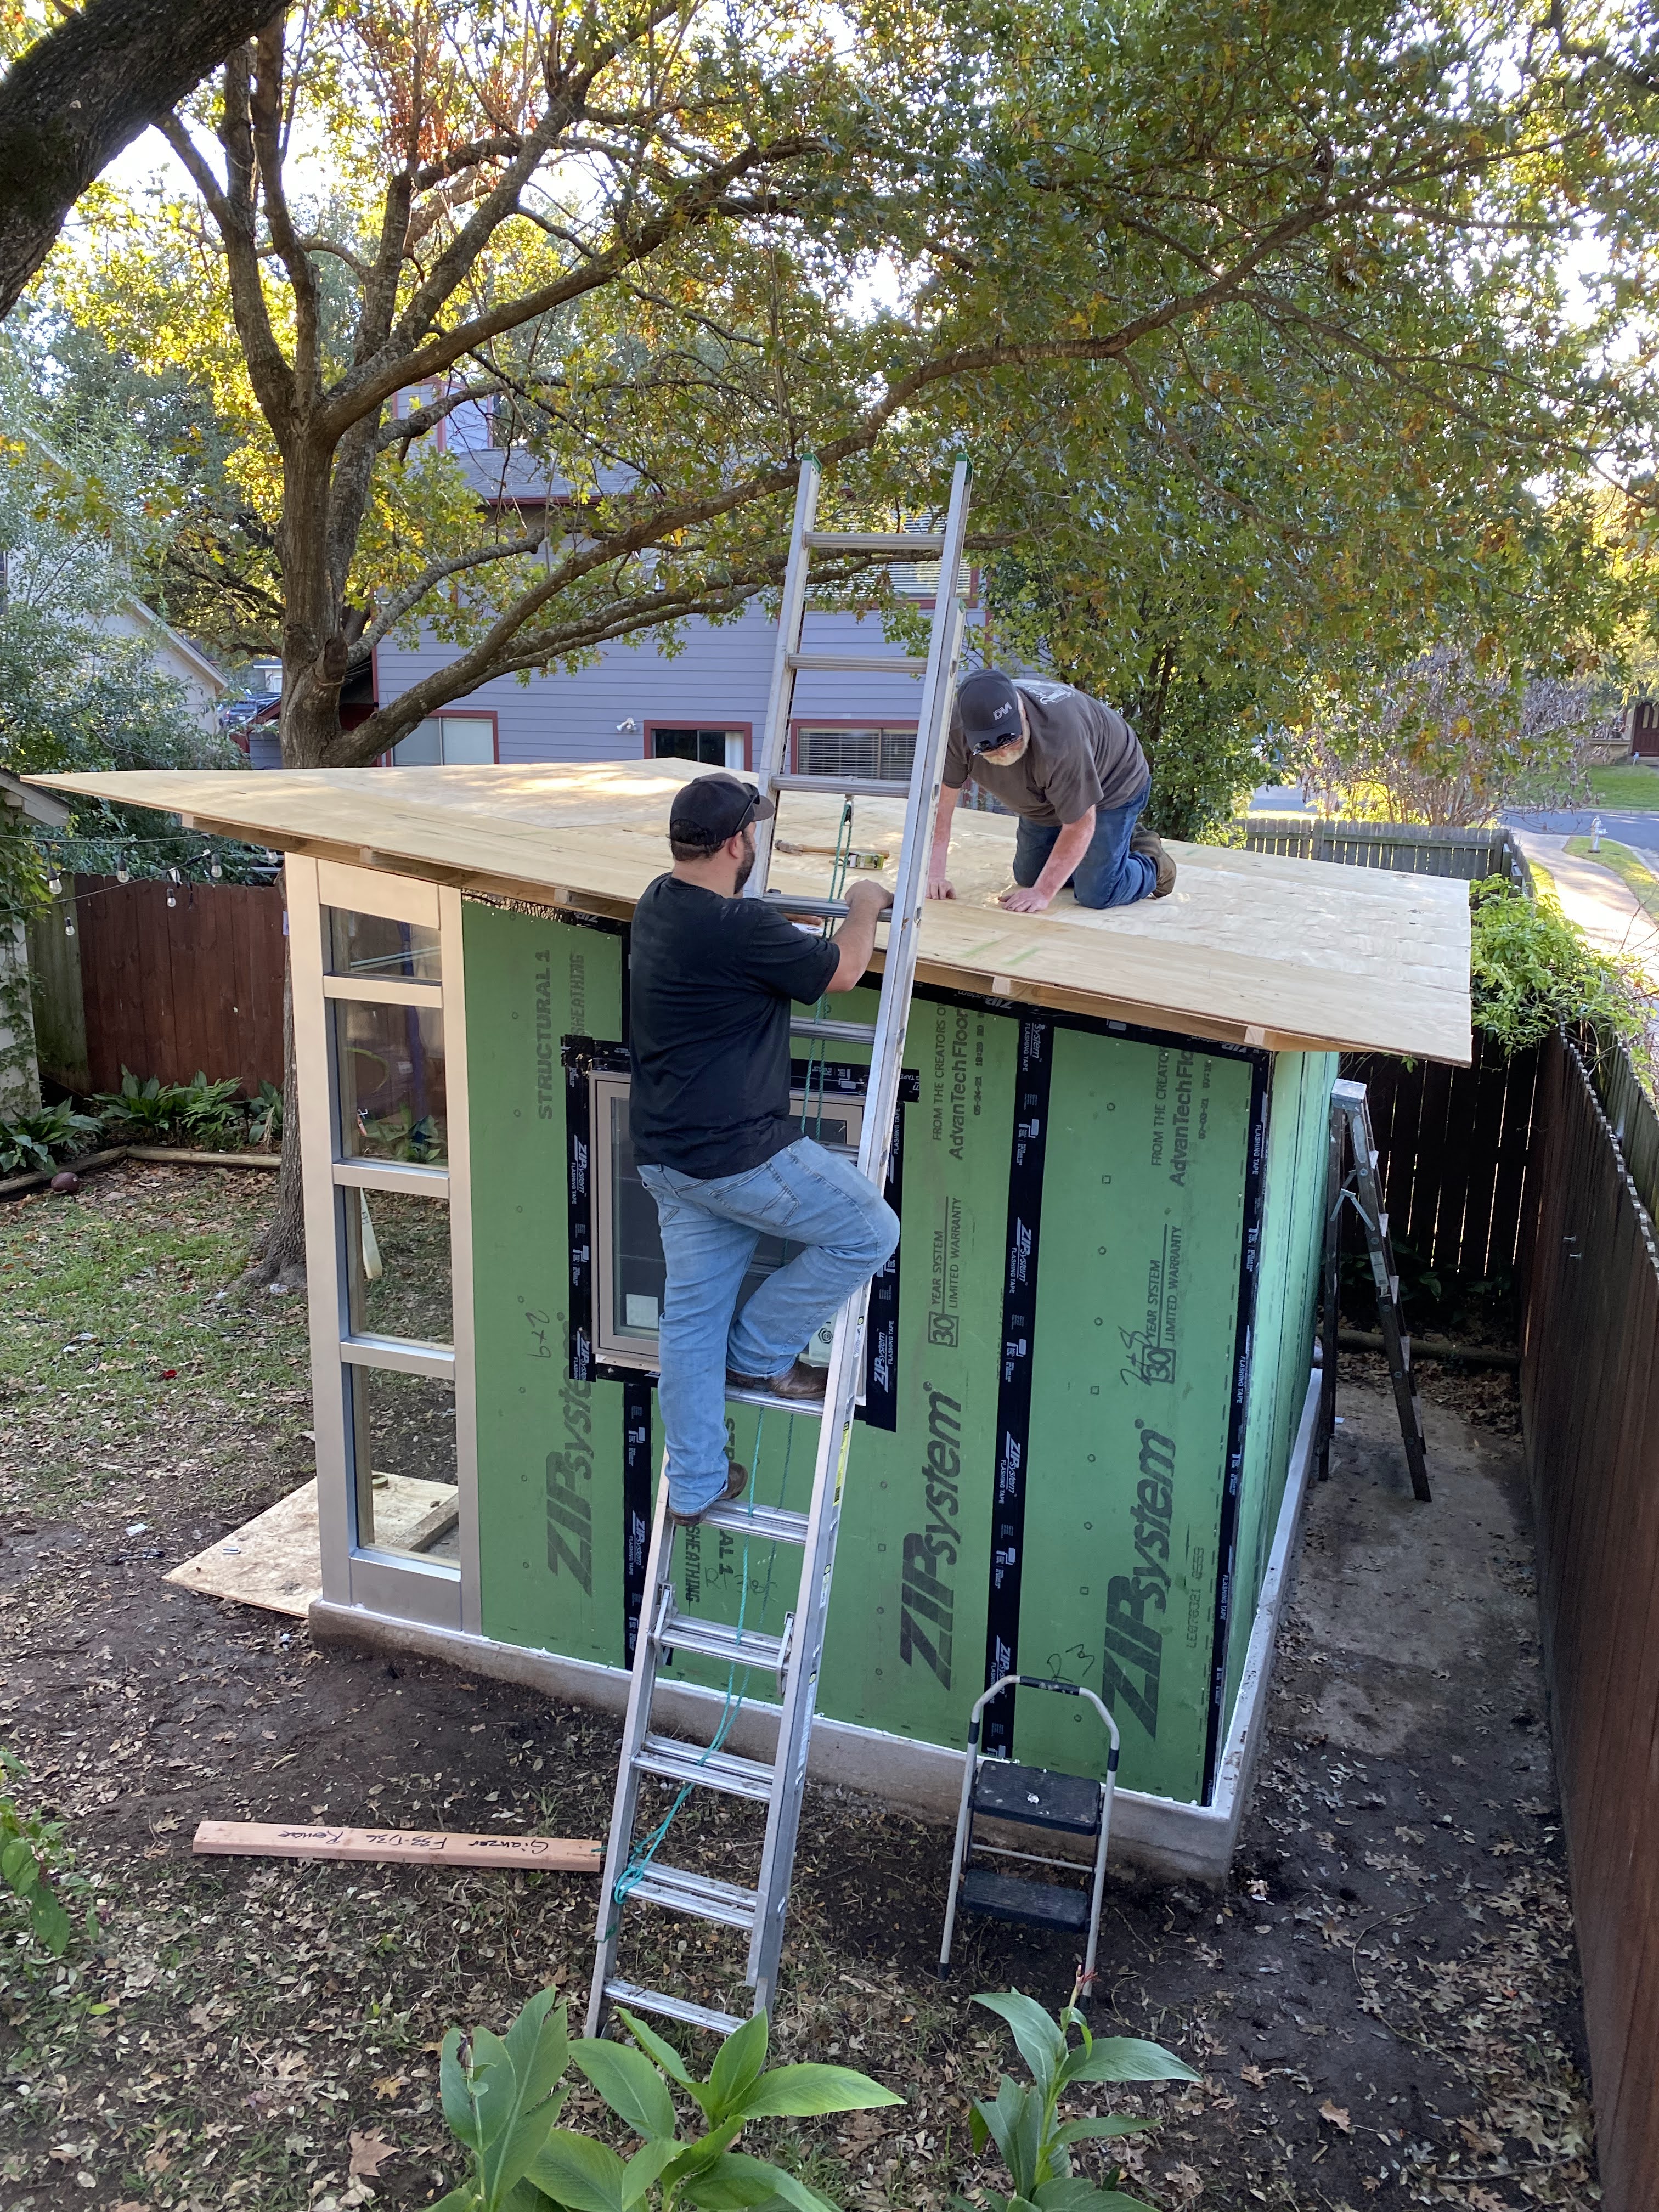
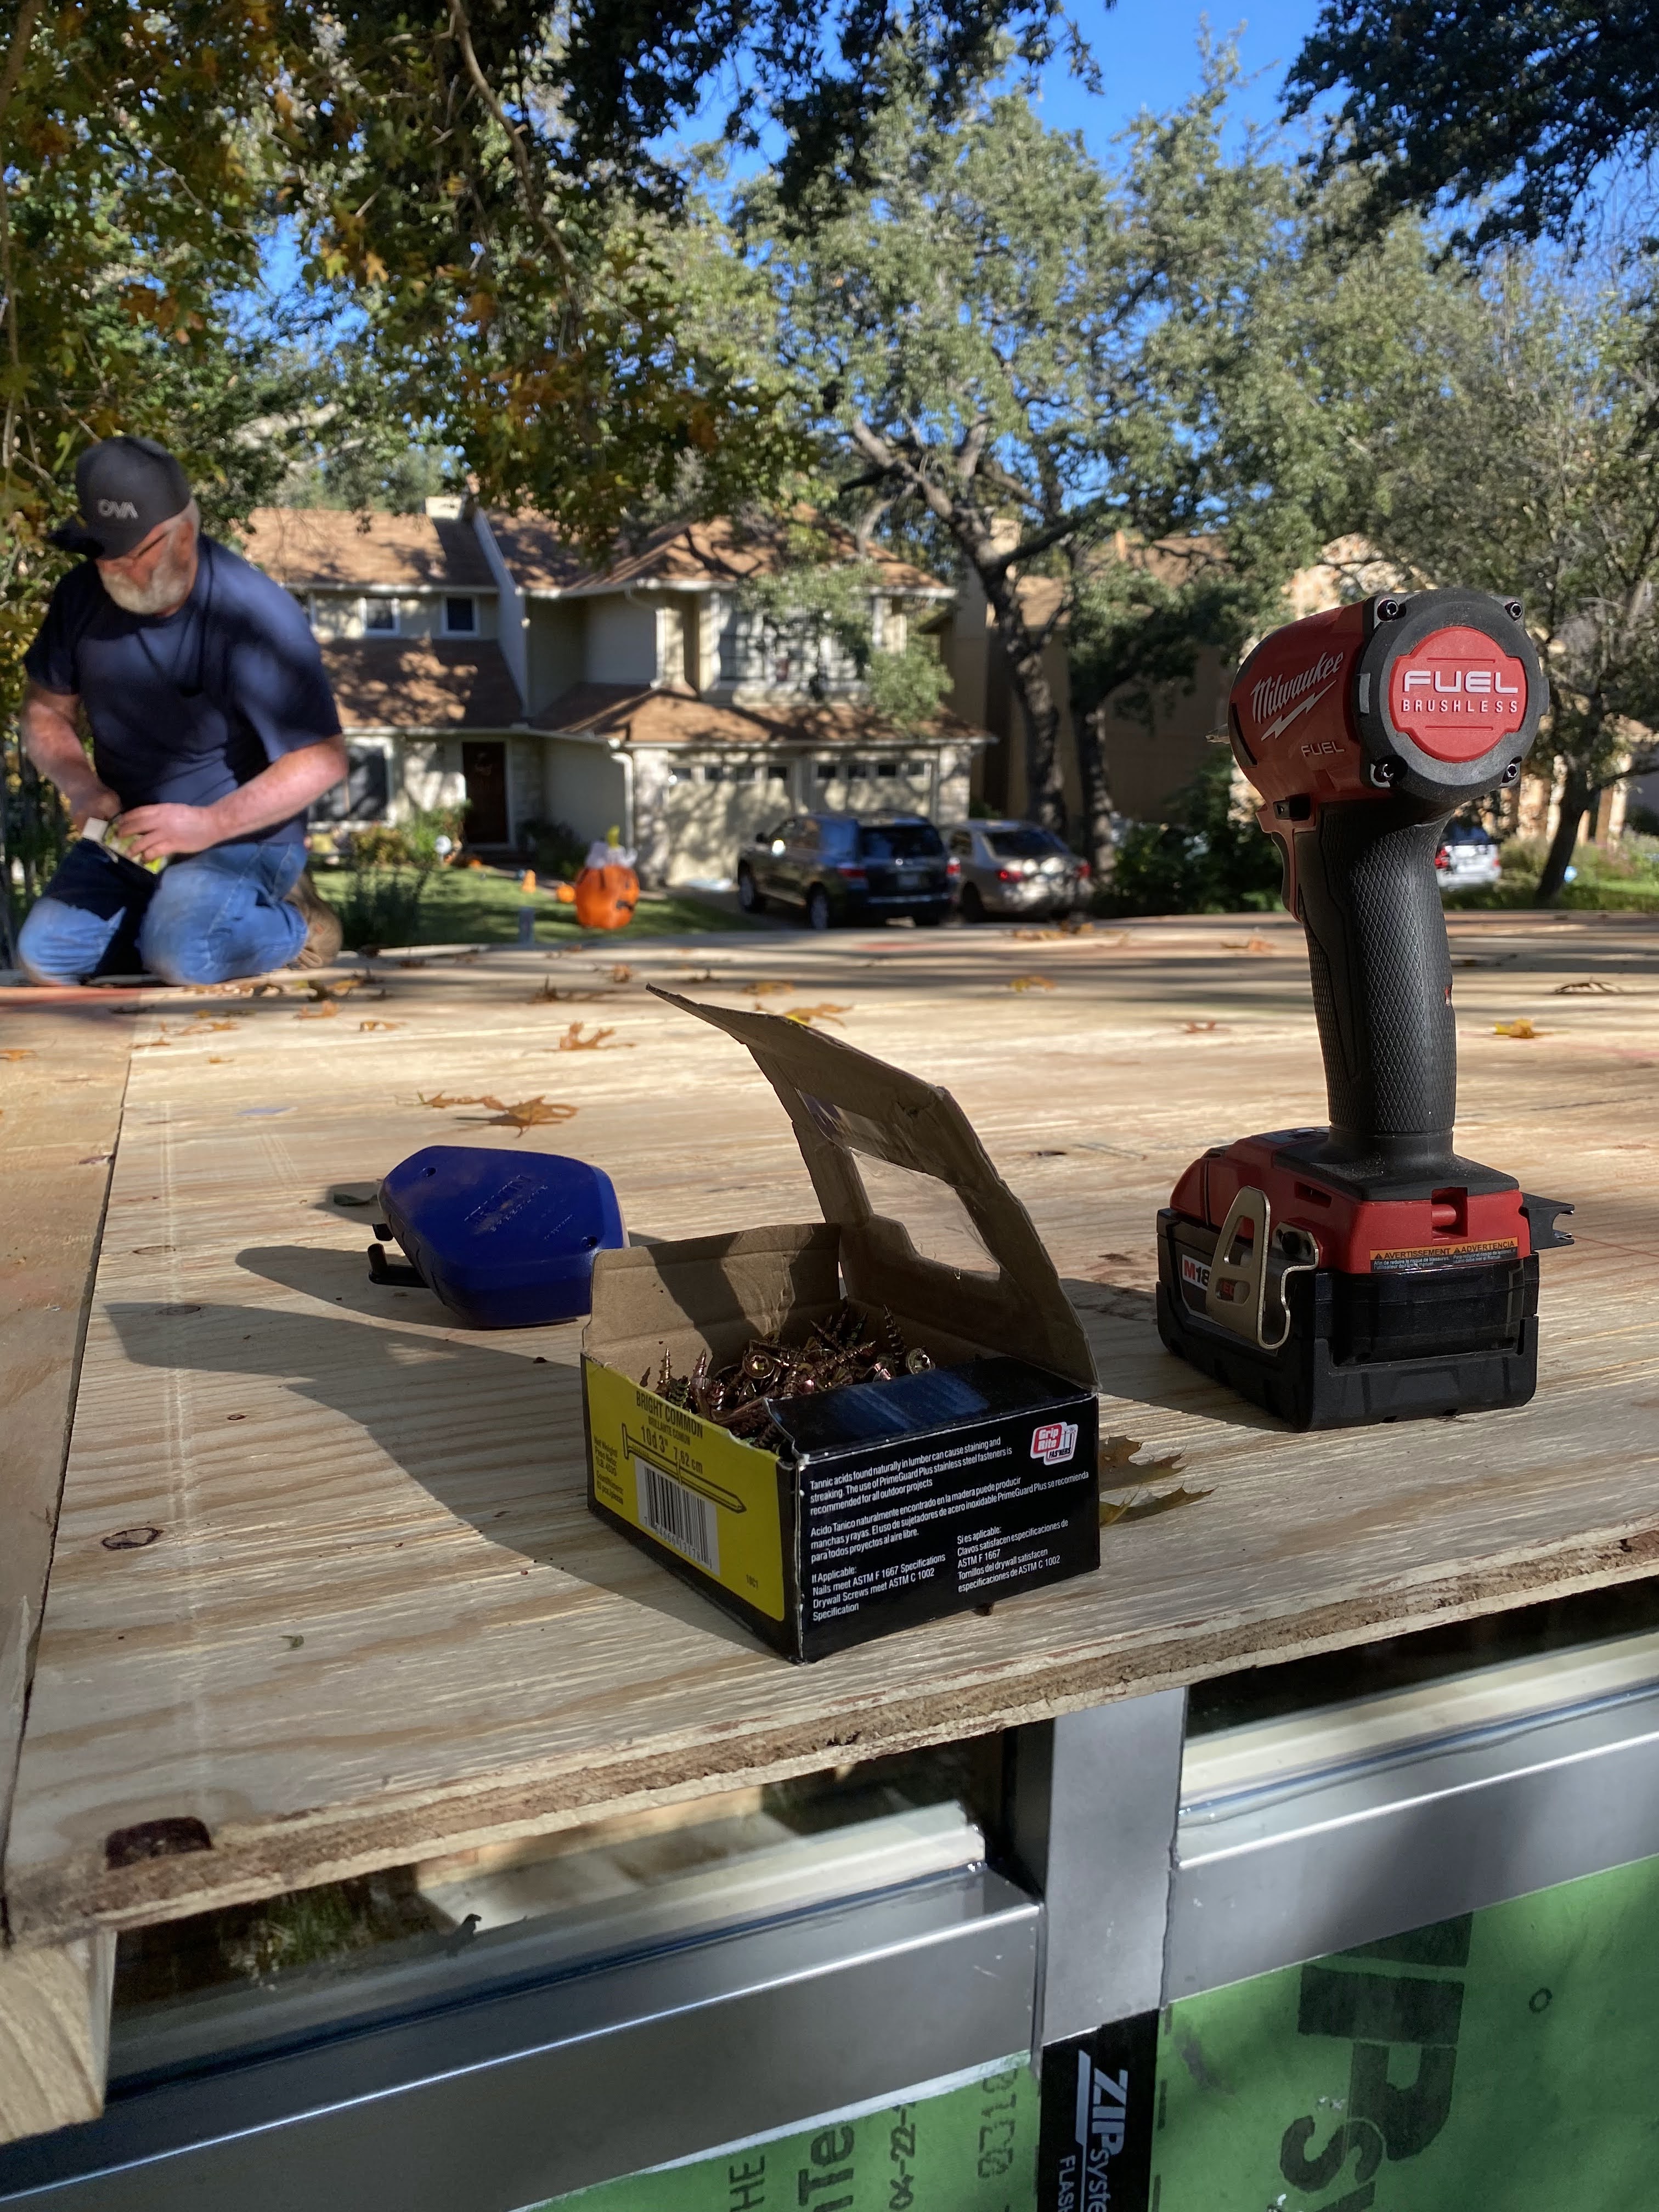
I was in a bit of a bind. The pieces to the shed were littering our yard and garage, and I wanted this thing built as soon as possible. However, I had only a couple of local volunteers, and none who I imagine would be able to devote several full days to the job. So on a whim, I flew my dad and brother down to Austin from Carpenter, South Dakota. As farmers, their availability is very limited, but they had a little downtime that weekend only. I bought plane tickets, and they flew down on just a couple days’ notice.
Thank god for those two volunteering. For whatever reason they both just have this innate knowledge of how to do any imaginable trade type task. I am handy with woodworking, but most else is mostly lost on me. They just flipped open the instructions and got to work. I helped, of course, but I was hardly leading the show.
They arrived on a Friday night and flew out on Monday night, giving us essentially three entire days to get the shell of the structure up, and it really did take the full amount of time, sun up to sun down.


Injury!


I hit myself in the thumb with a framing hammer causing it to gash open and blood splatter everywhere. So I started holding the nails with my index and middle finger and then bashed my index finger on the very next swing even worse! I did not know about the pin needle blood release trick, so I will lose that nail sooner or later.
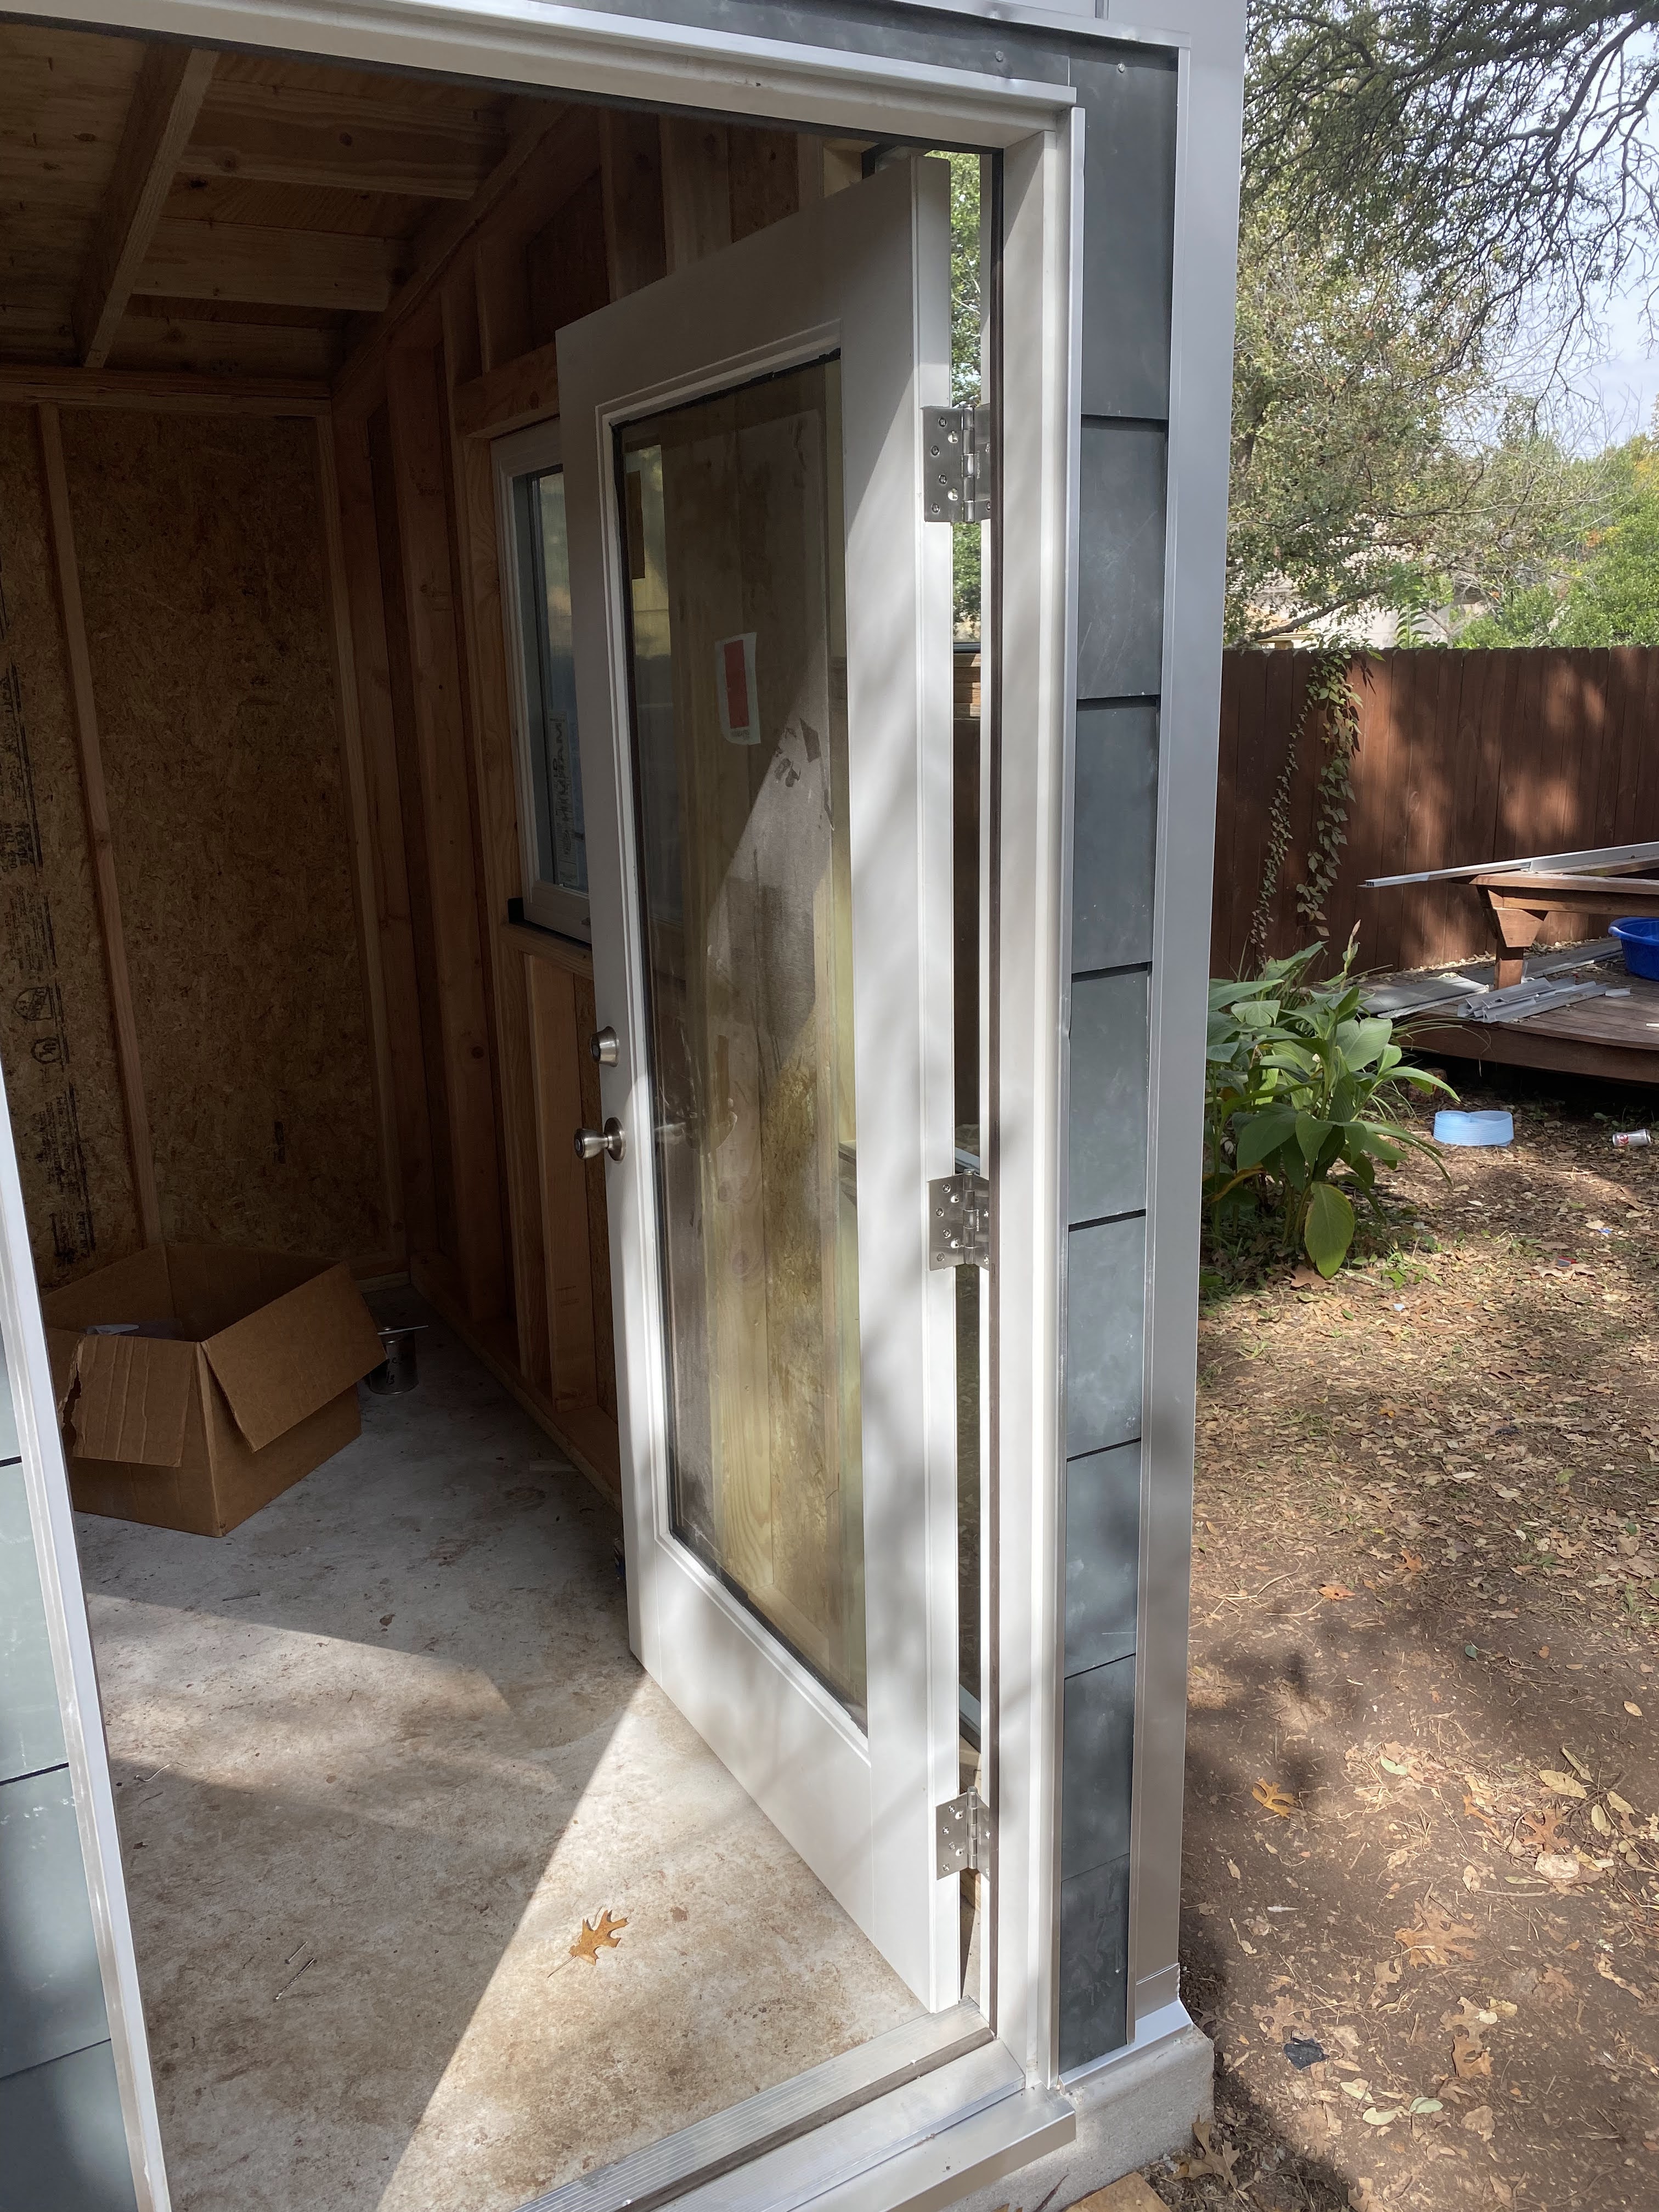
Door Challenge
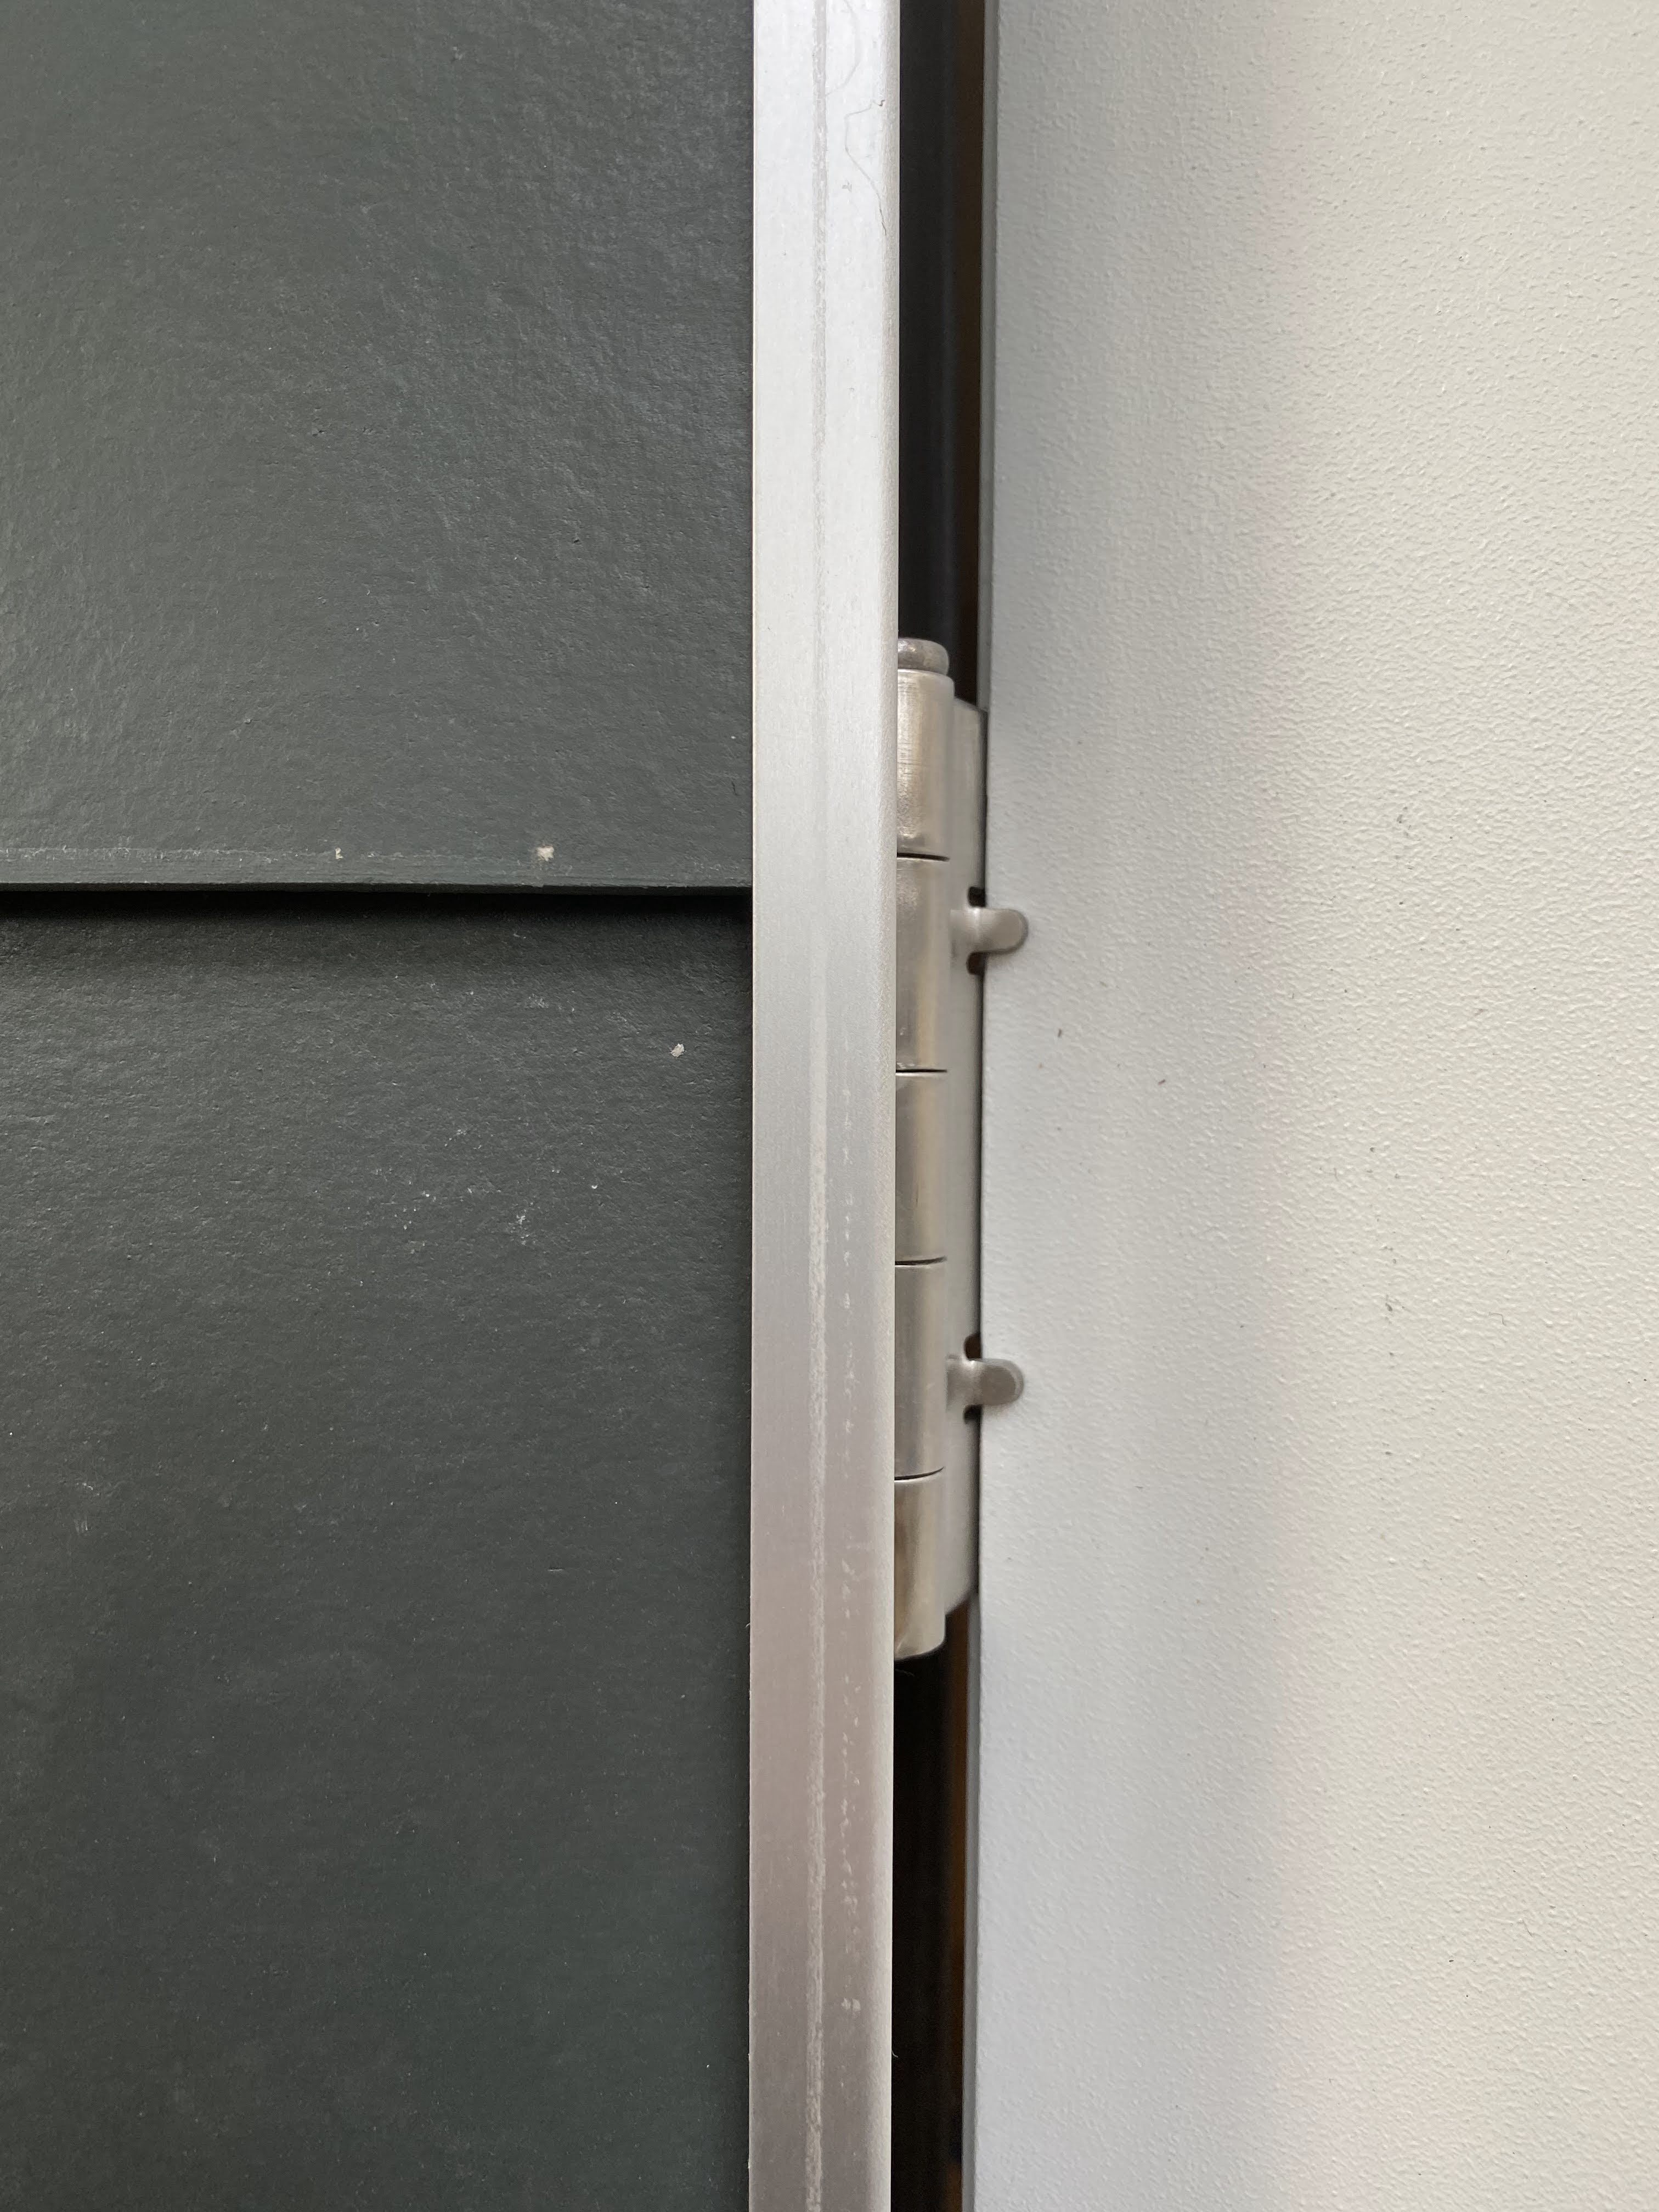
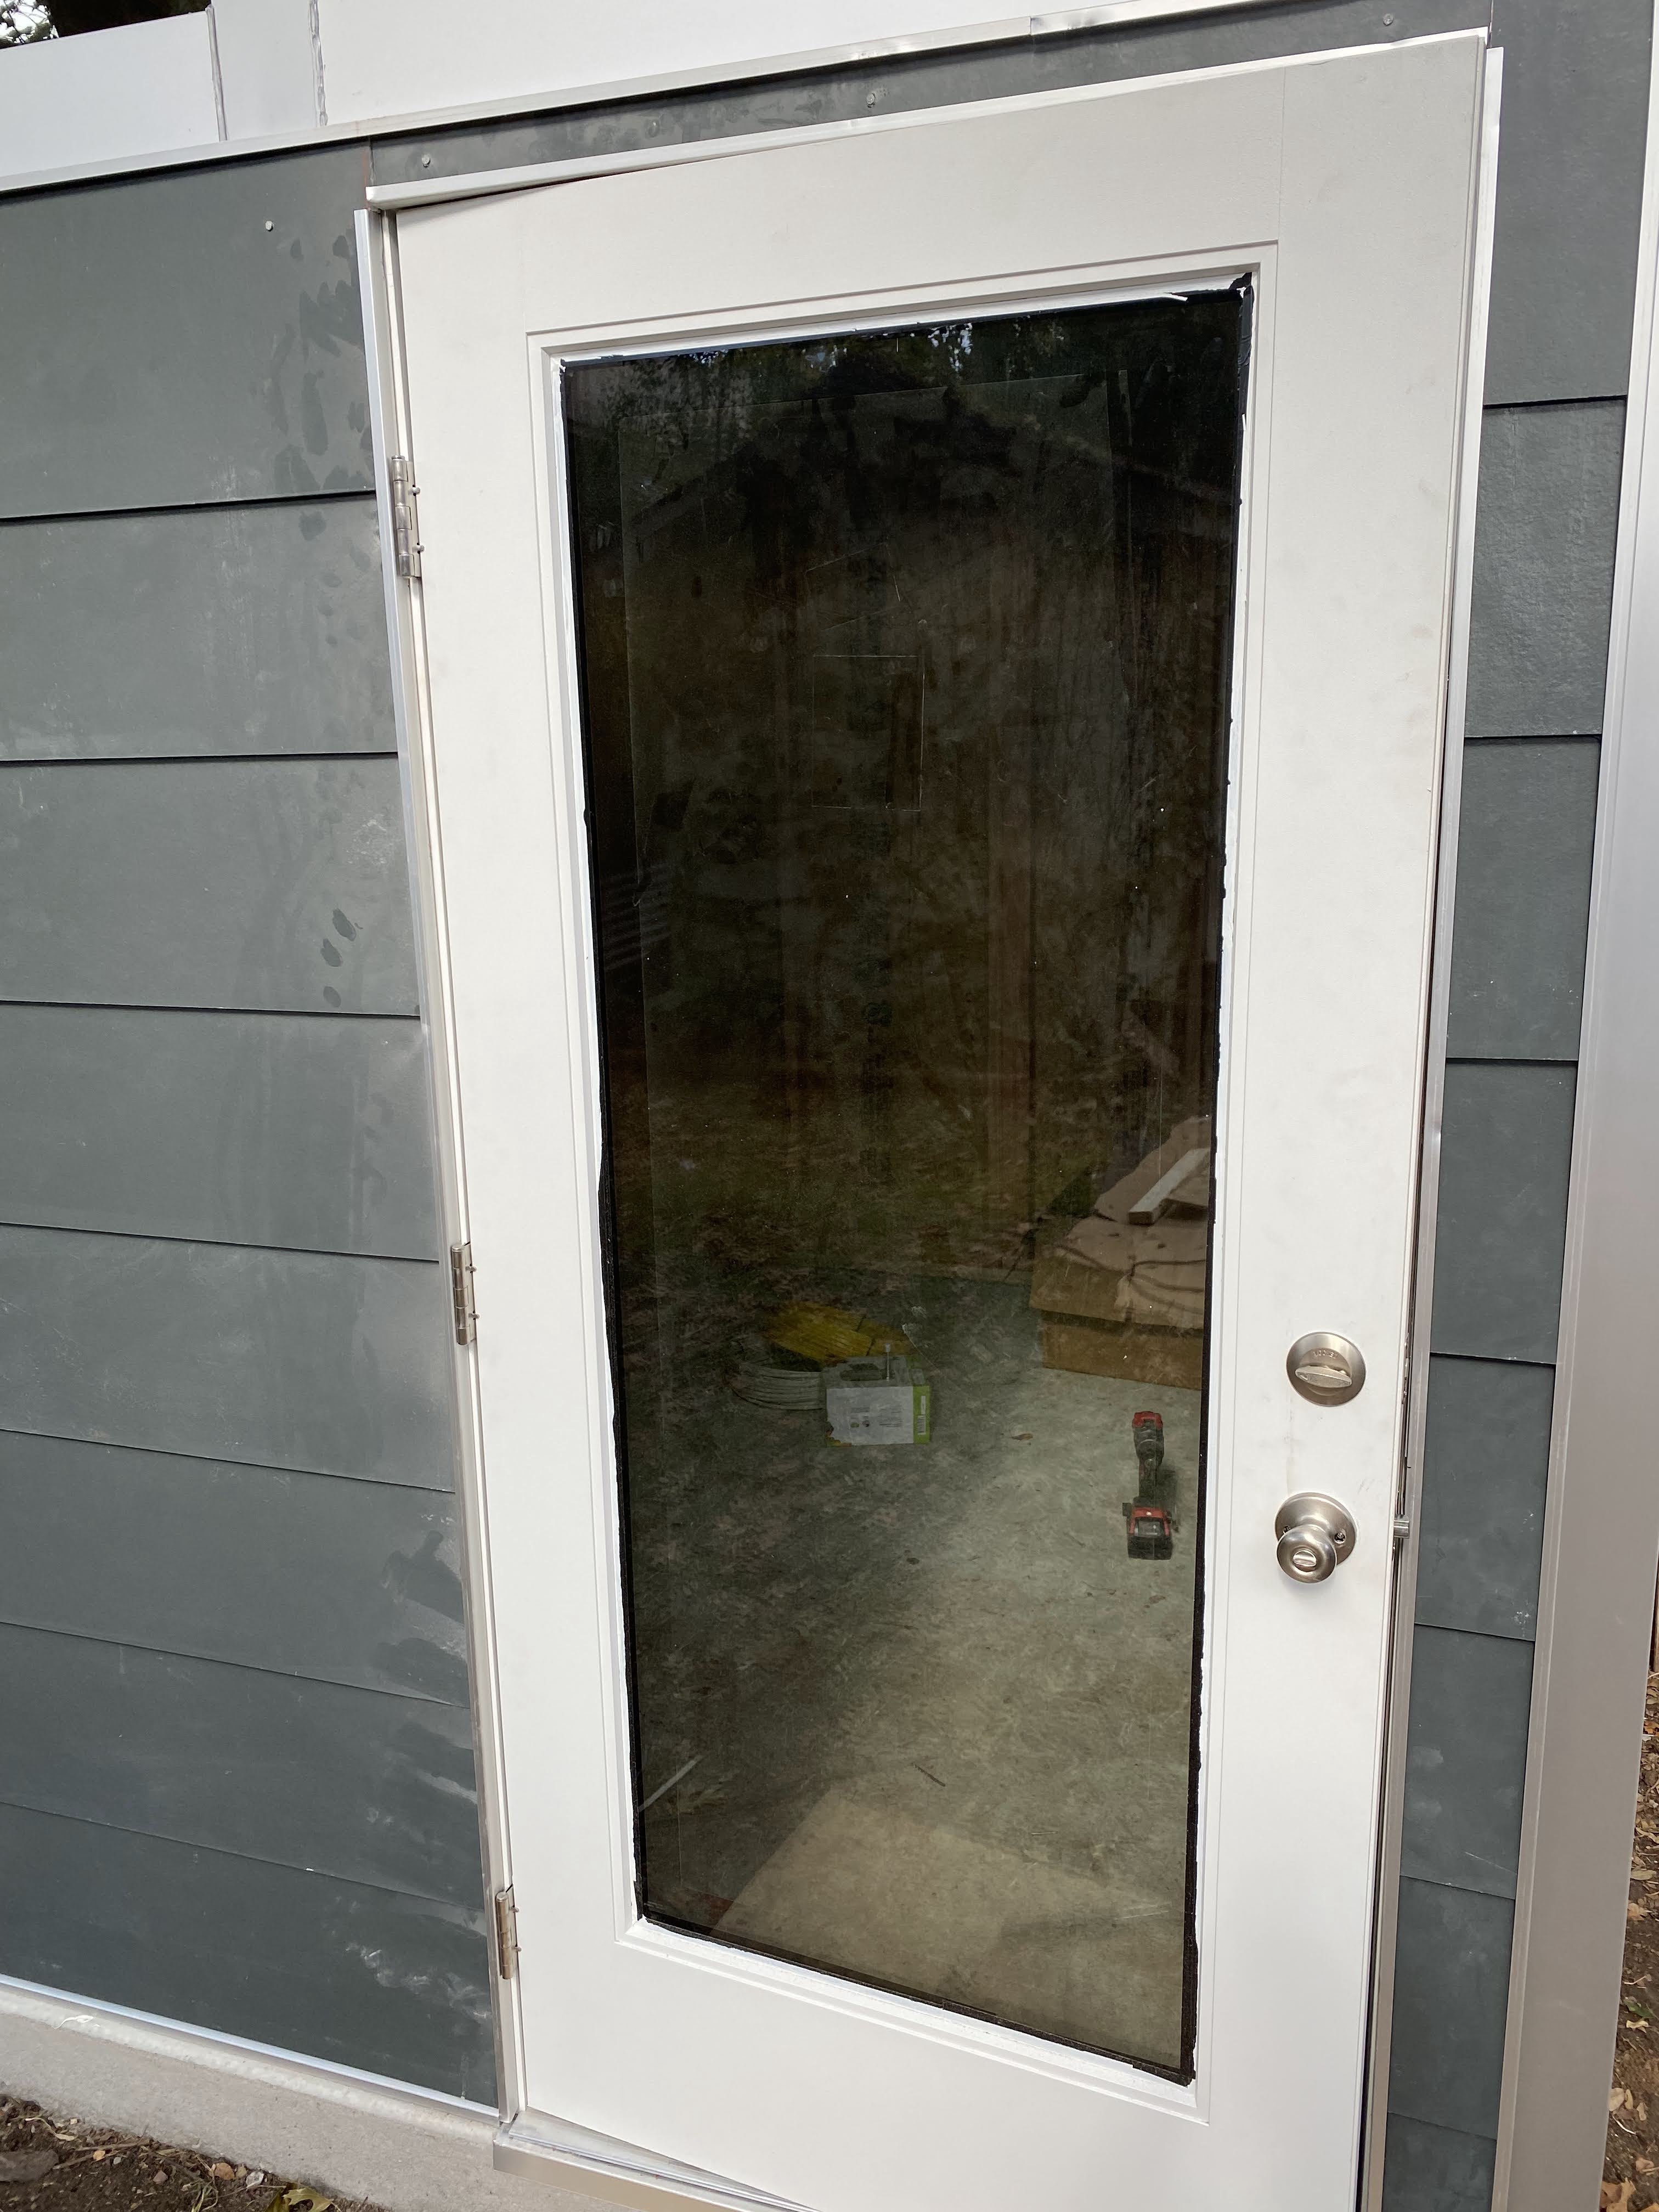
The only thing about the process that gave us a challenge was the door. It had a sticker on it saying “this side in”, and we installed as instructed with the door pushing inward. After inspection though, it just felt wrong, and I contacted the folks at Studio Shed. They agreed that the door had been installed wrong, but also that they sent the wrong door. Most of their doors open to the outside with the handle on the right, swinging open to the left. This one swung the other way, and the sticker was also apparently placed on the wrong side. This caused a bit of a hiccup as I had to backtrack and uninstall the door after my family had gone back home.
I flipped the door, but it wouldn’t quite fit right with the hinges now on the opposite side. I would have to shave away an inch of siding, a very difficult task given the J-moulding was already nailed in. I used an oscillator tool and a handsaw to cut the nails off from behind the siding, then used the same oscillator to cut off the appropriate amount of siding, then reinstalled the moulding. The latch also wouldn’t go over the J-moulding on the opposite side, so I had to snip a weird little notch in it. It’s not really a thing of beauty, but the door is functional and no one would ever really notice.
Electrical Work
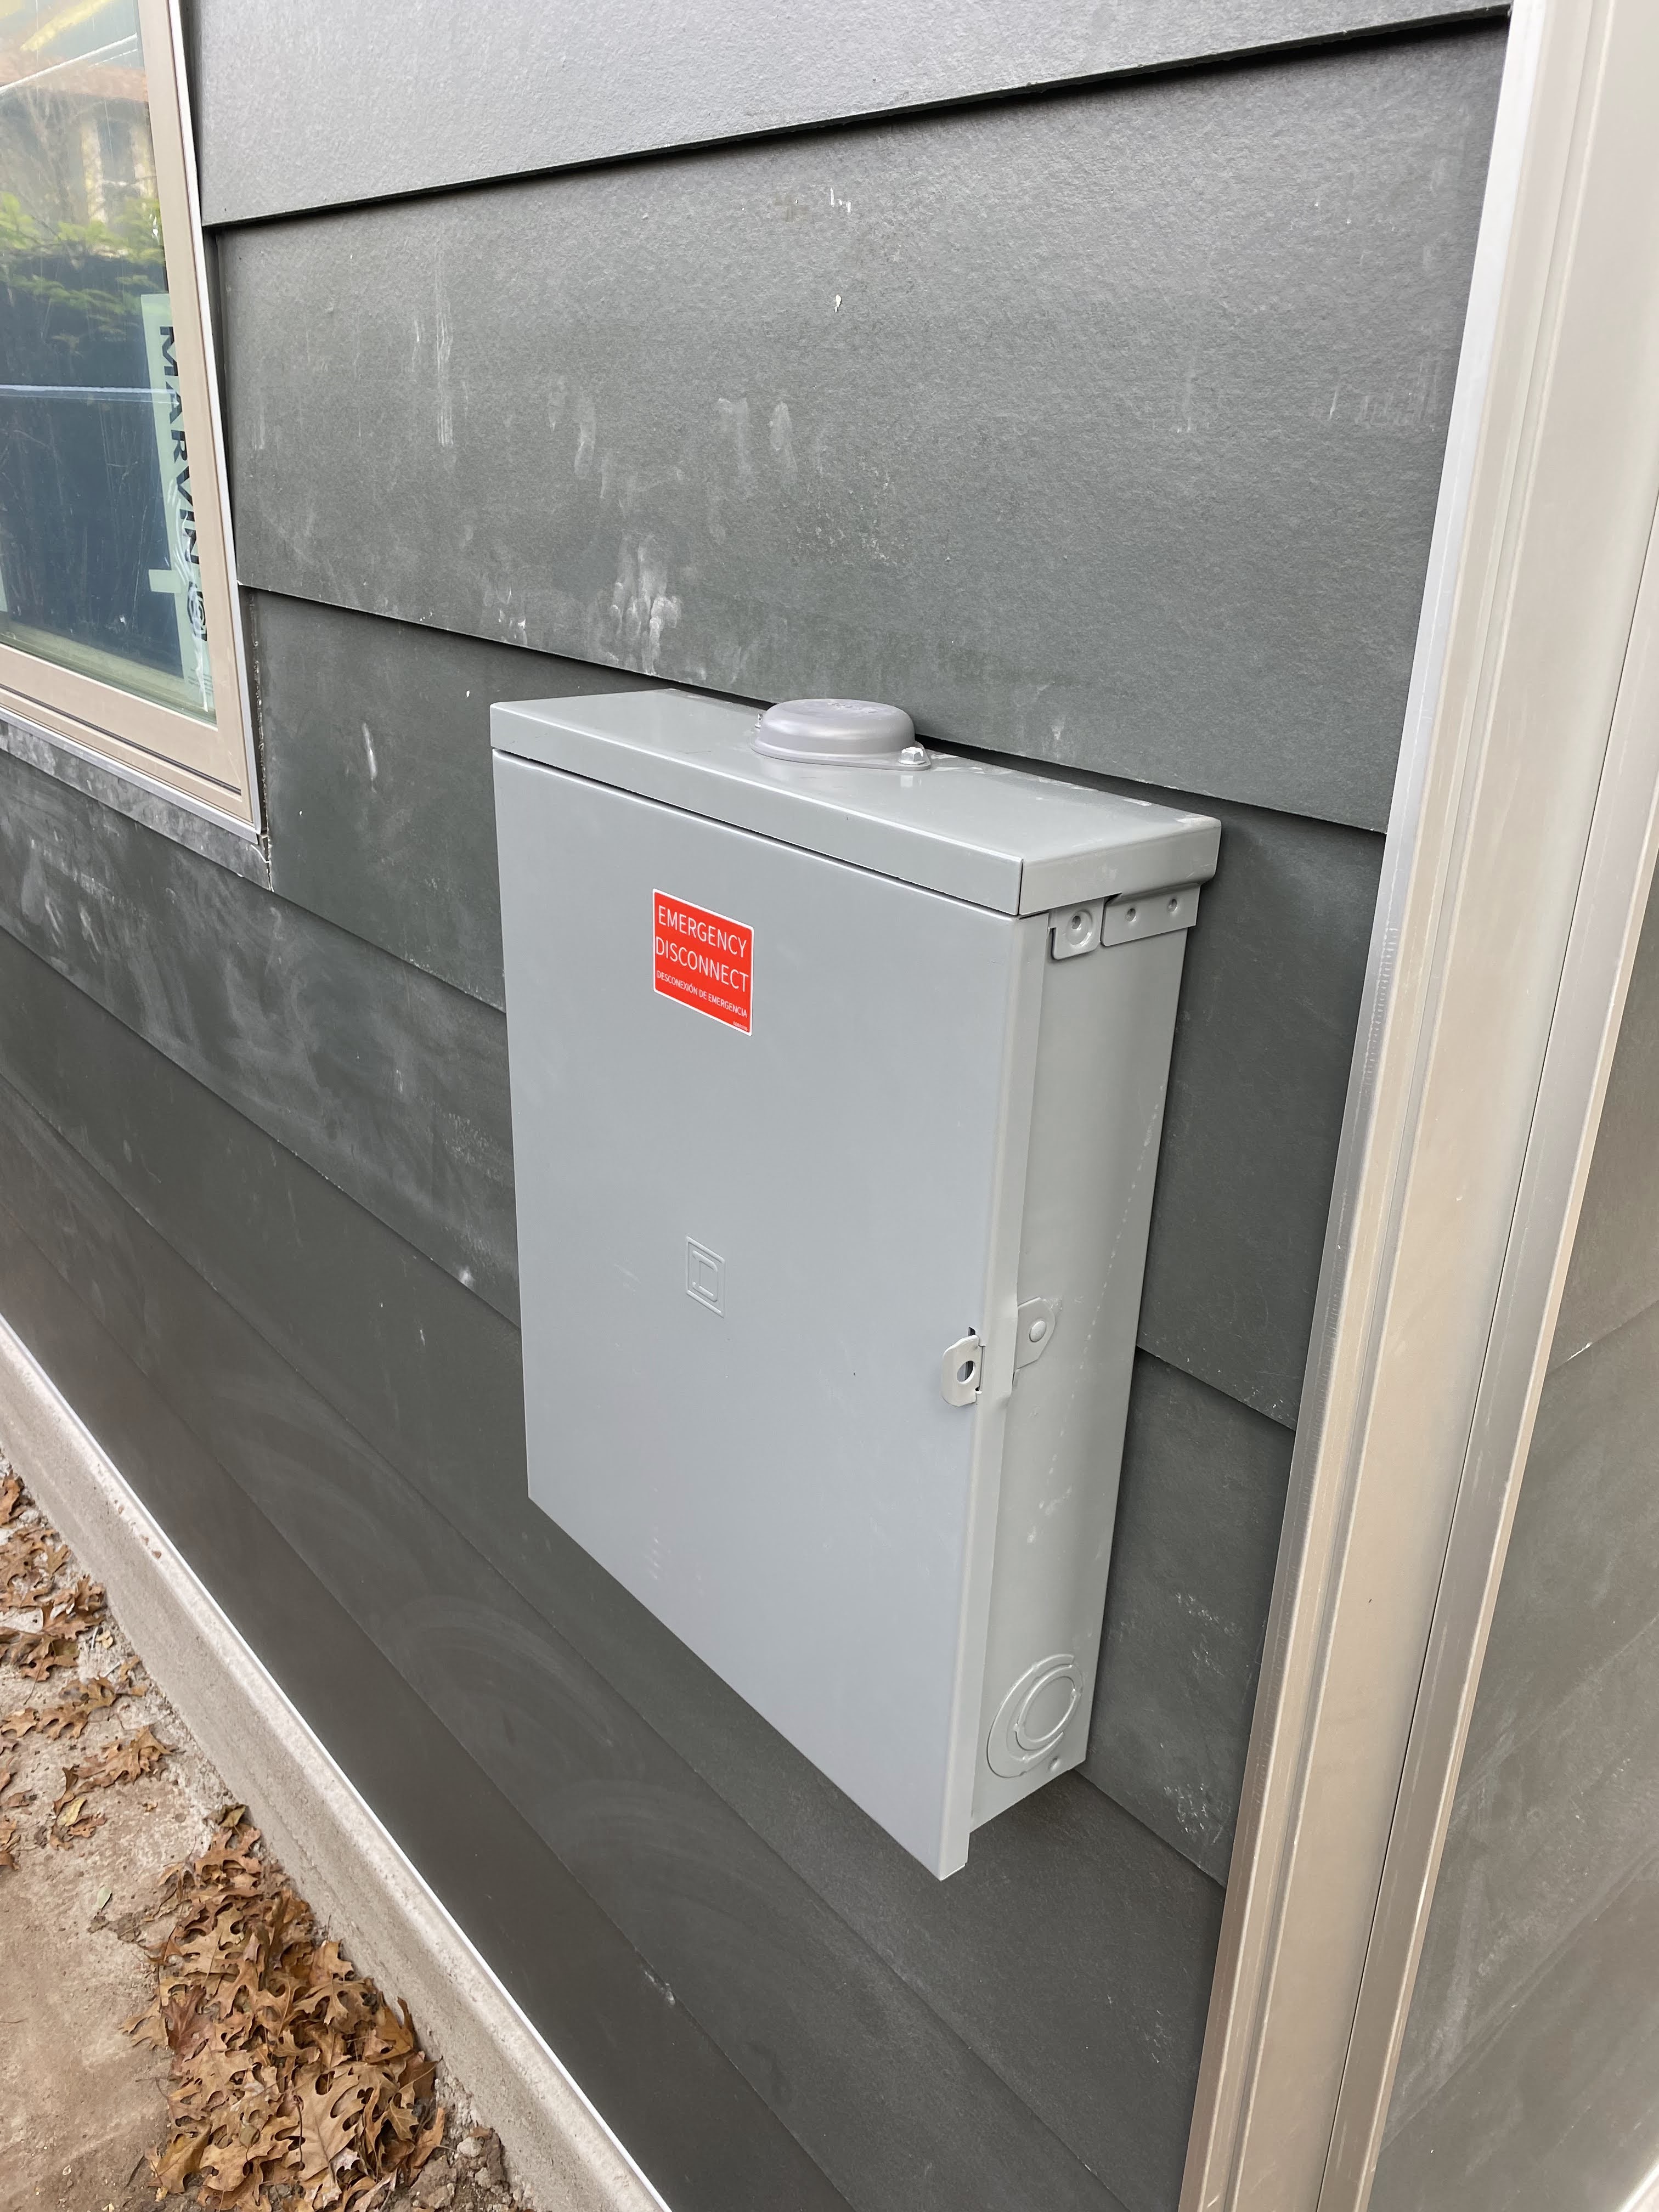
Now that the shell was built, the next step was to get it wired. For whatever reason, it was a challenge to find an electrician here in Austin to do the work. One company told me very angrily that they wouldn’t do any more shed projects! Apparently these things are popping up left and right, and companies would rather focus efforts elsewhere. Our general contractor recommended Dynamic Electric here in the Rattan Creek neighborhood of Austin. After how quick the progress was to start the project, it felt like a long wait of about three weeks after the construction without much happening until the team could get started.
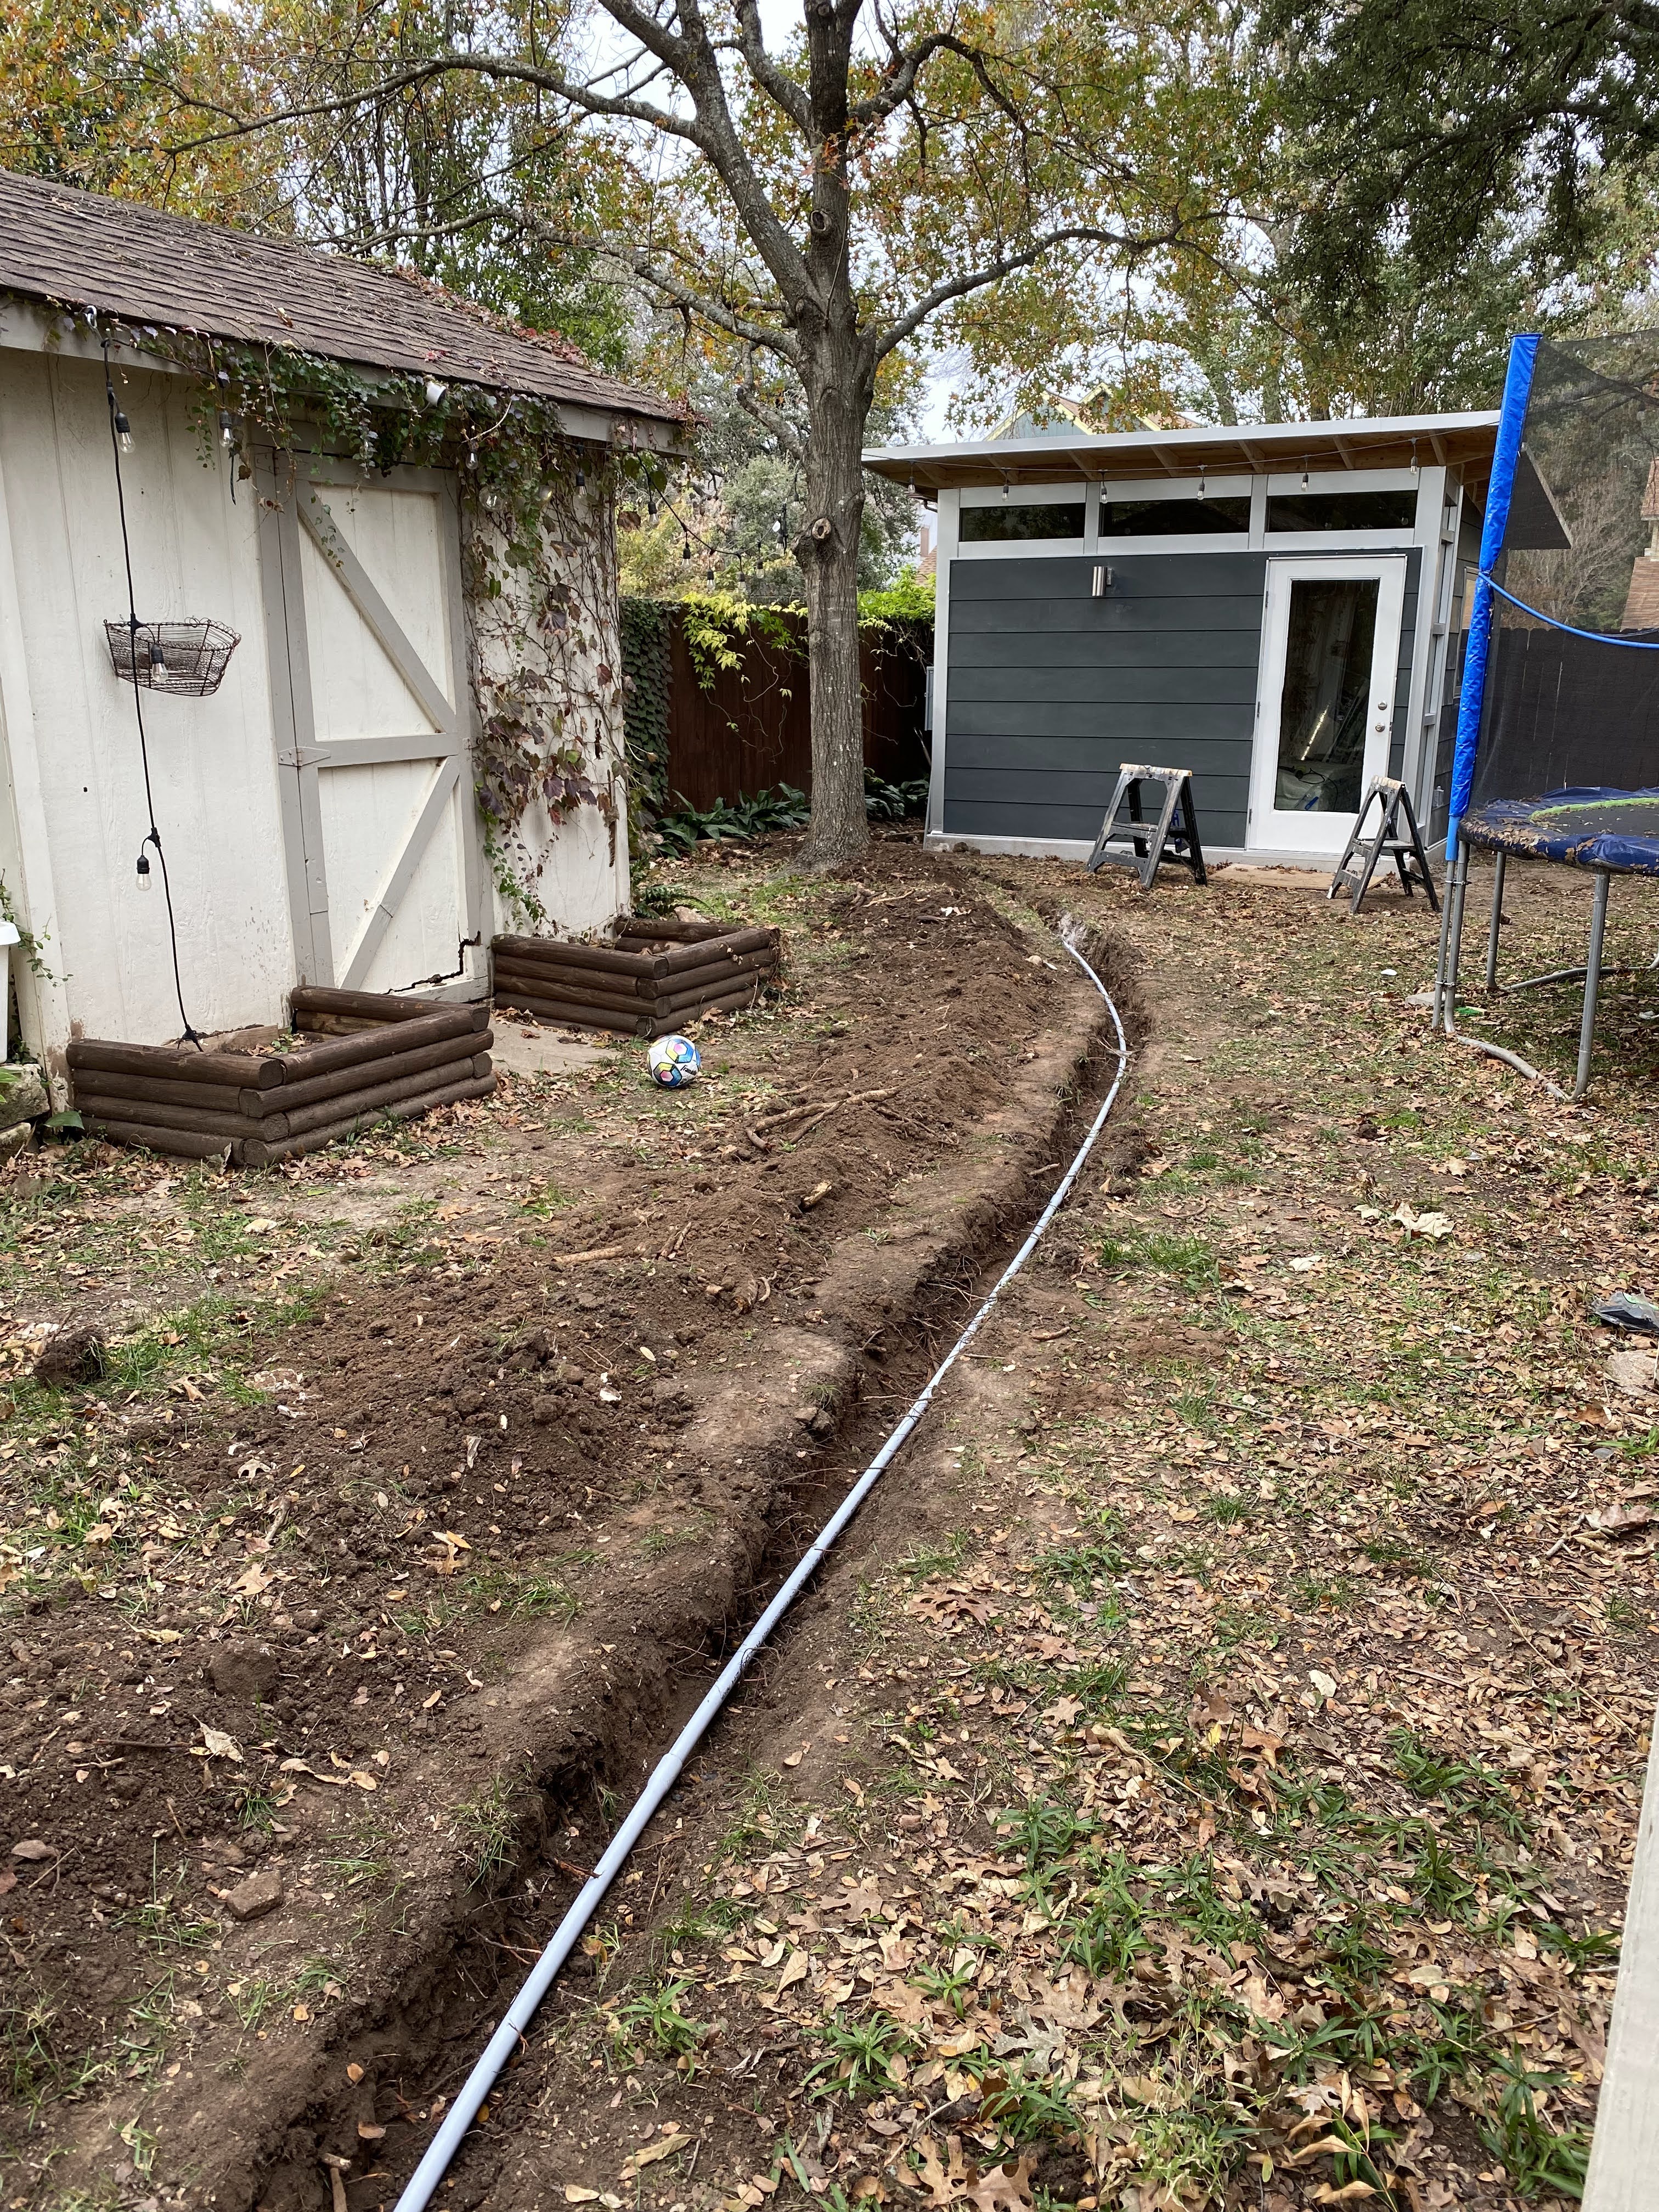
All of the electrical supplies needed were supplied by Studio Shed, which made it a bit cheaper in hiring electricians. They came out and easily wired up the shed the first day. Of course, it isn’t a one-day job. I believe the team came out four separate times. They assessed that a trench would need to be dug from the shed to the main panel at the house, about 50 feet away. My hats were off to the two gentlemen who dug that insane trench in our rock-hard Texas ground. For it to be regulation, the line has to be buried 18″ deep. Unfortunately, they couldn’t get through some solid rock in a few places. That meant the only alternative was to dig as far as they could and then pour concrete over the conduit so no one will accidentally puncture the line while digging. One day was just digging, and another day was placing the conduit.
The electricians would not be able to come out and finish the job until the drywalling had been complete.
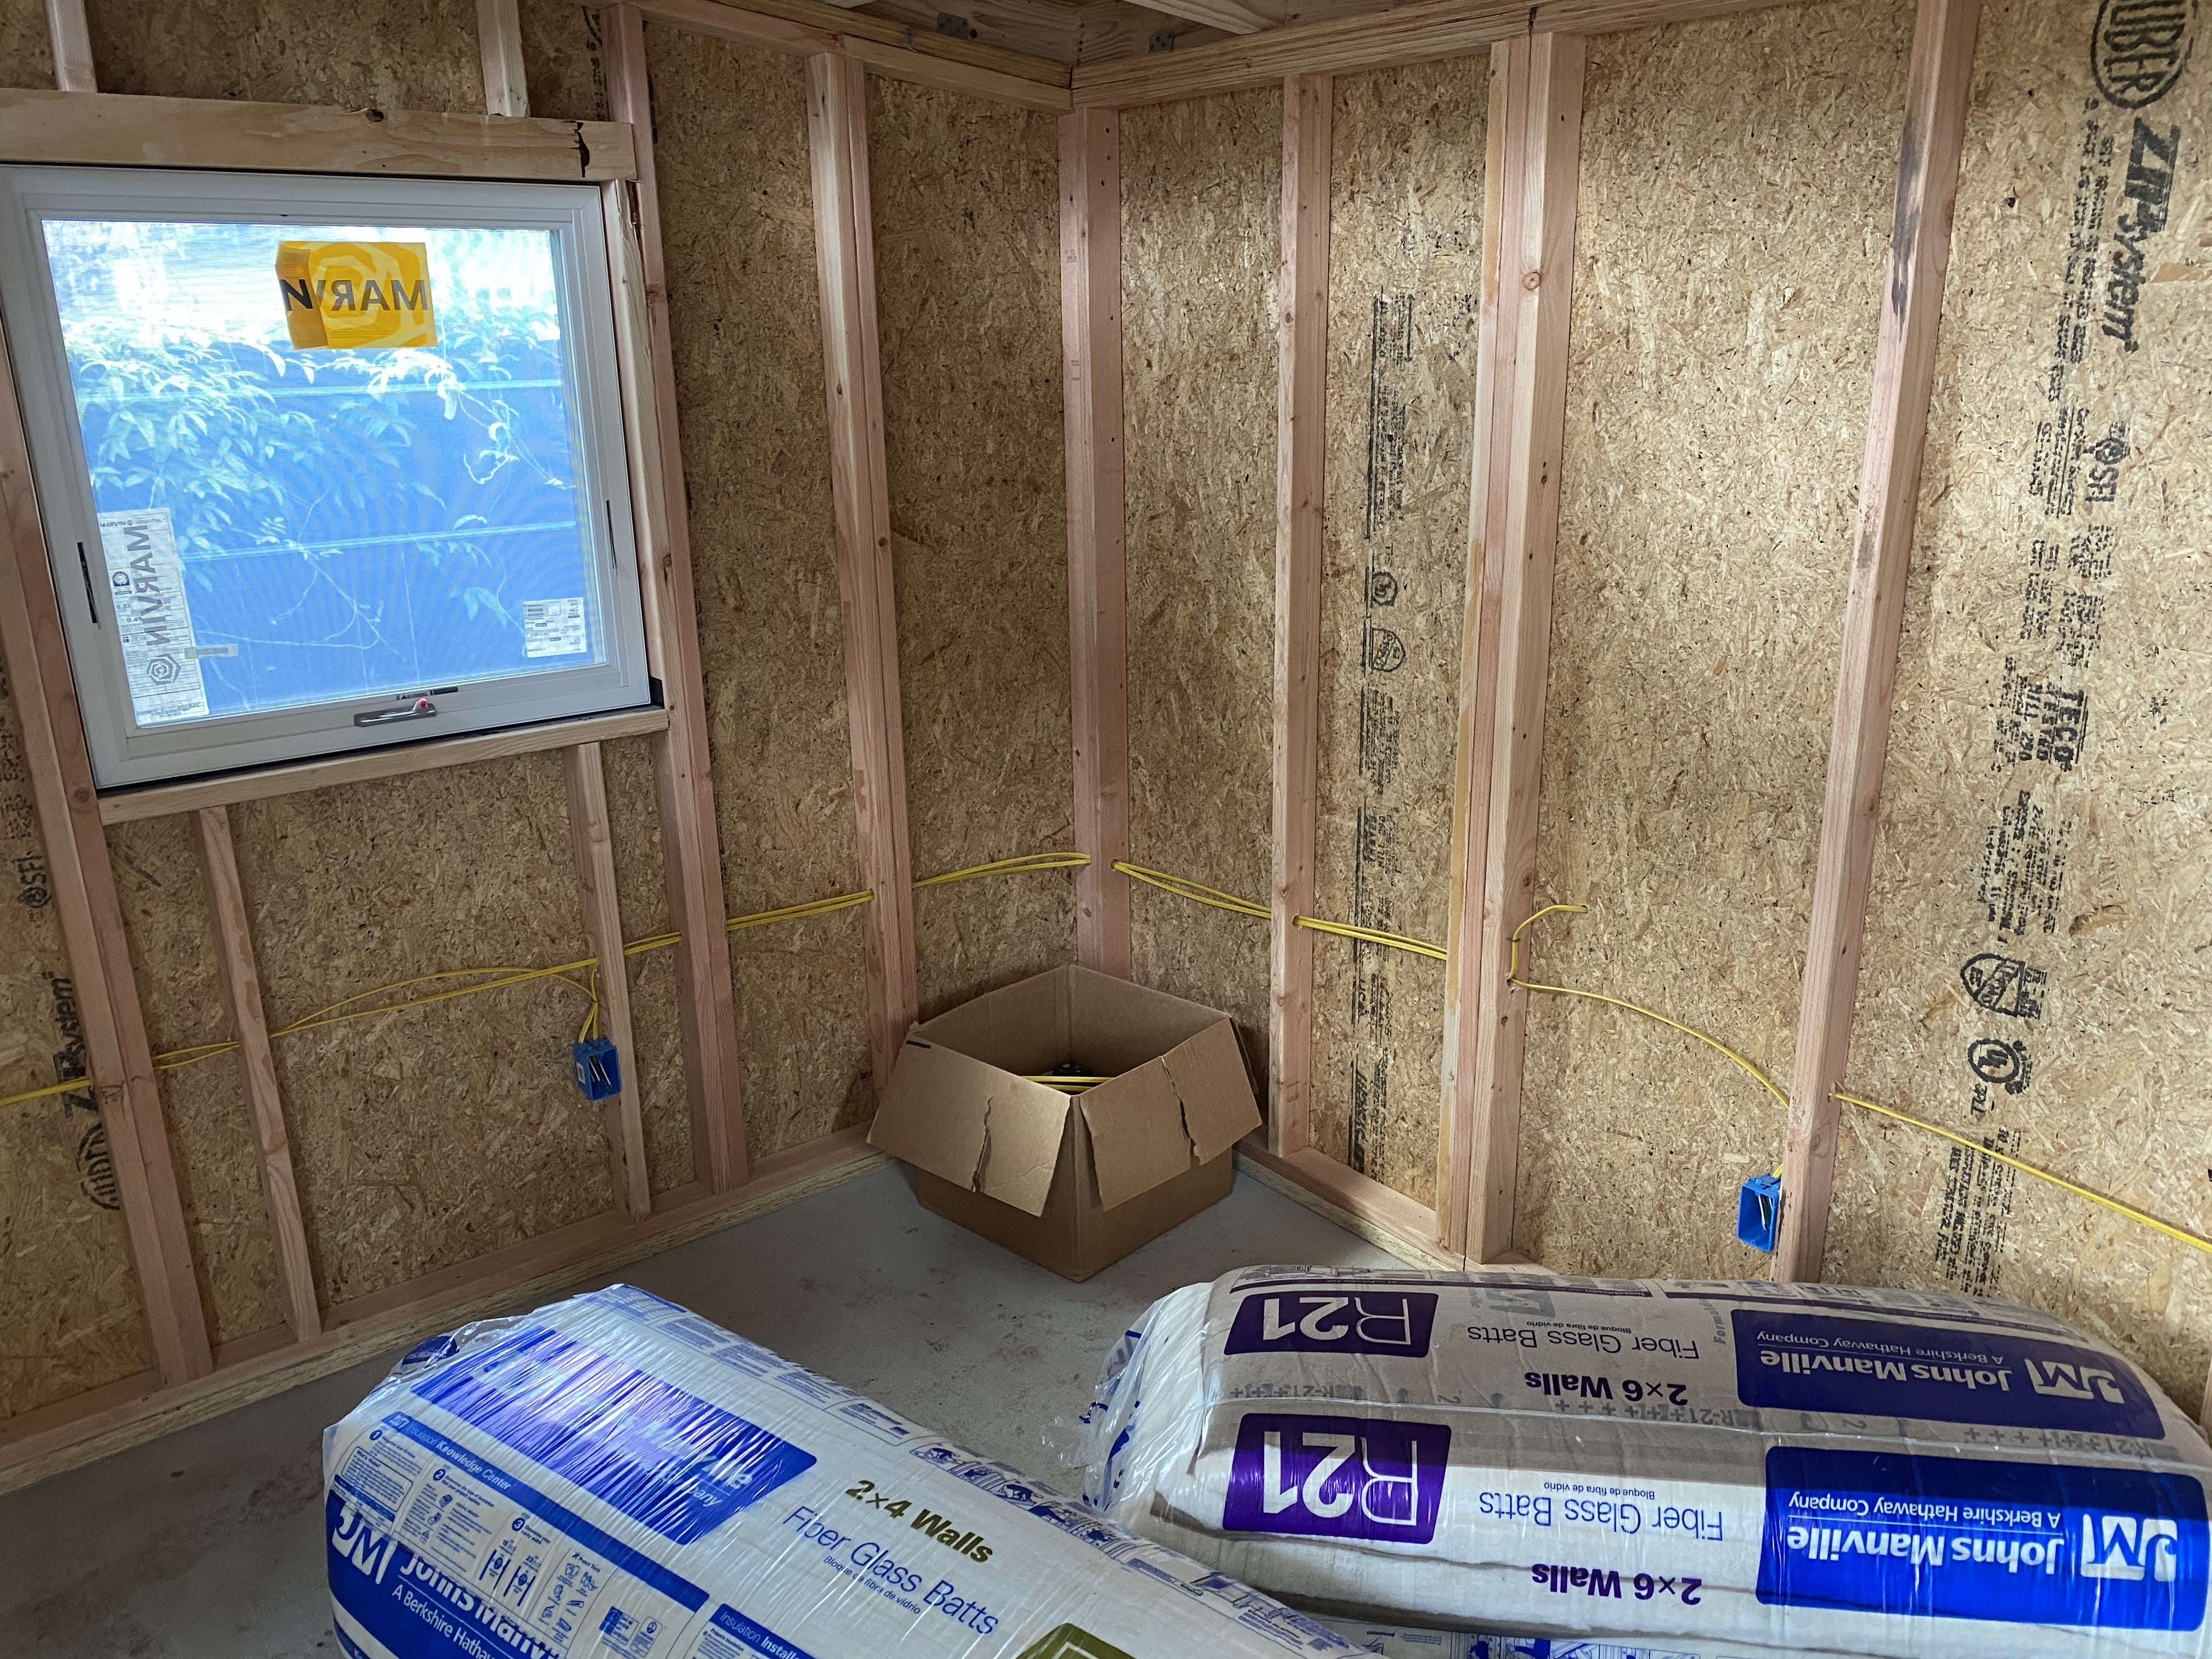
Insulating
The next part was to insulate the walls and ceiling, something I was largely able to do myself. Every time Austin had a little burst of cool weather (it was the hottest December ever recorded in Austin) I rushed out to install more insulation. I had never done it before and didn’t know how itchy it would be. Some of the pieces of insulation needed to be cut the long way by several inches, and I found garden shears to be somewhat useful to cut big sheets. It mostly just stayed in place on its own. 7yo John actually was a pretty good helper with this phase, and my wife came out and helped me do the ceiling.


Drywall
The one component Studio Shed did not ship with the kit was drywall because it is fragile and doesn’t ship well. I was on the fence as to whether or not I wanted to do this part myself, but after talking to several handymen, it seemed this was not a great idea for a beginner. Again, our local contractor had a good recommendation for help, a man named Adrian Morales who agreed to do the job on a tight timeline (I really wanted it done before Christmas) for a reasonable rate of $2900 which included all supplies.
There was a little bit of a language barrier between us, as I really struggle to understand accents and dialects, and Mr. Morales spoke primarily Spanish. But onward we went with the project anyway, and I mostly just stayed out of the way while he and his men worked.


I thought they did a really nice job, taking about three full days of work including the texturing. There was a little miscommunication on how to handle the little windows. Instructions said to use corner bead but not go all the way up onto the wood, but I failed in communicating that. They left the edges rough, as if I were going to install trim around all of them. It was a minor inconvenience, as I just went out and bought trim later to cover the gaps.
Painting
Again, Studio Shed included the materials—4 buckets of polar white primer/paint-in-one. I taped everything up and again tried to find days where the temp wasn’t quite so outrageous to work. Overnight lows in December 2021 in Austin were often in the 70s, so it was pretty hot most of the time. I only used 2.5 of the 4 buckets in doing a pair of coats.


Flooring and Trim
Luckily, my parents were back in Austin for Christmas, so I enlisted their help with the flooring, yet another thing I’d never attempted before. As usual, they knew their way around like they did it for a living. We got two full boards in, then cut one in half to go the full length.


Electric Finishing
On December 28 the crew was out one final time to put the lights, outlets and light switches in. They also had to run wire through the conduit from the house to the shed panel. I was surprised they hadn’t already done that when they installed and buried the conduit, but they only had put a feeder rope of sorts through and used it to pull the real wires through.


Move-In
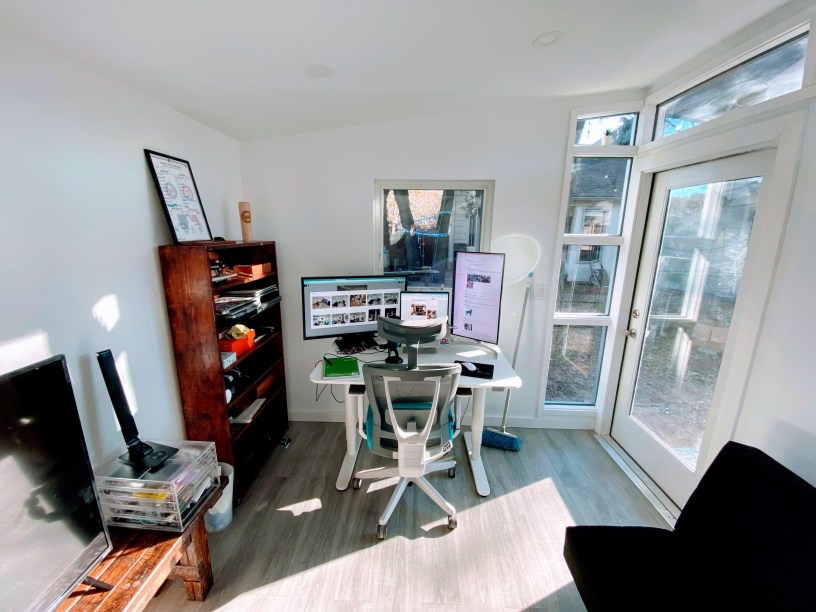
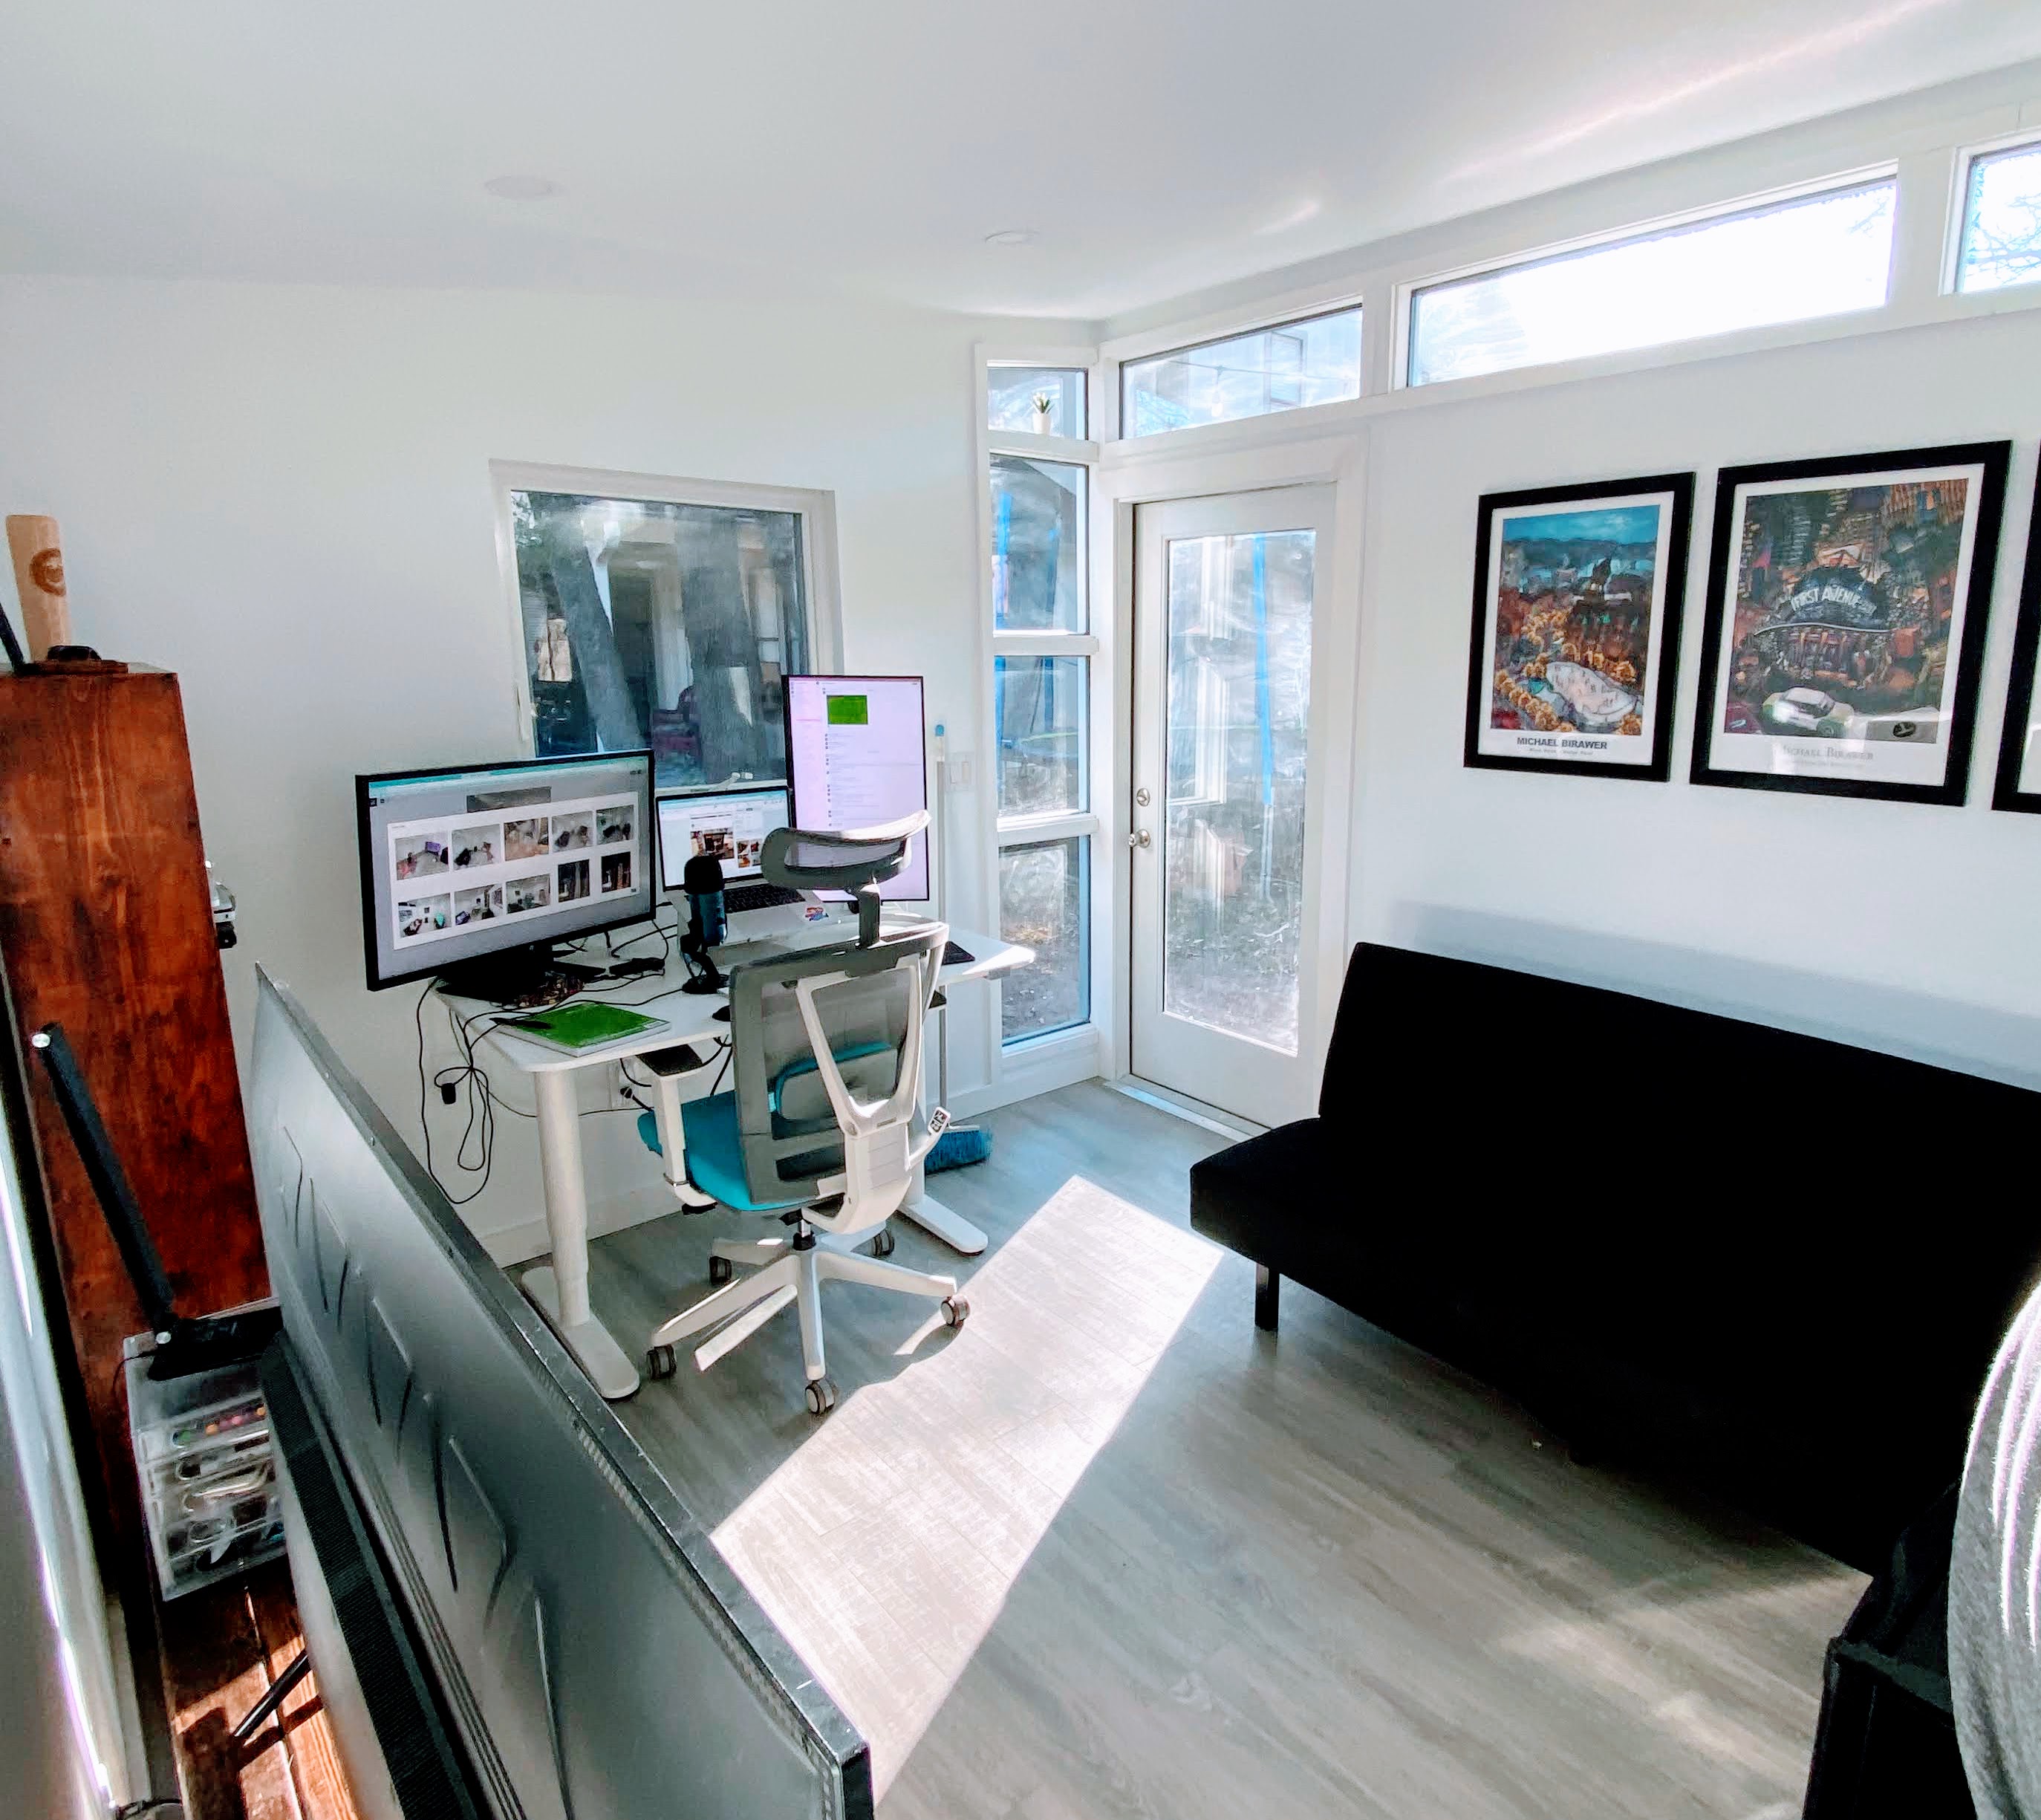
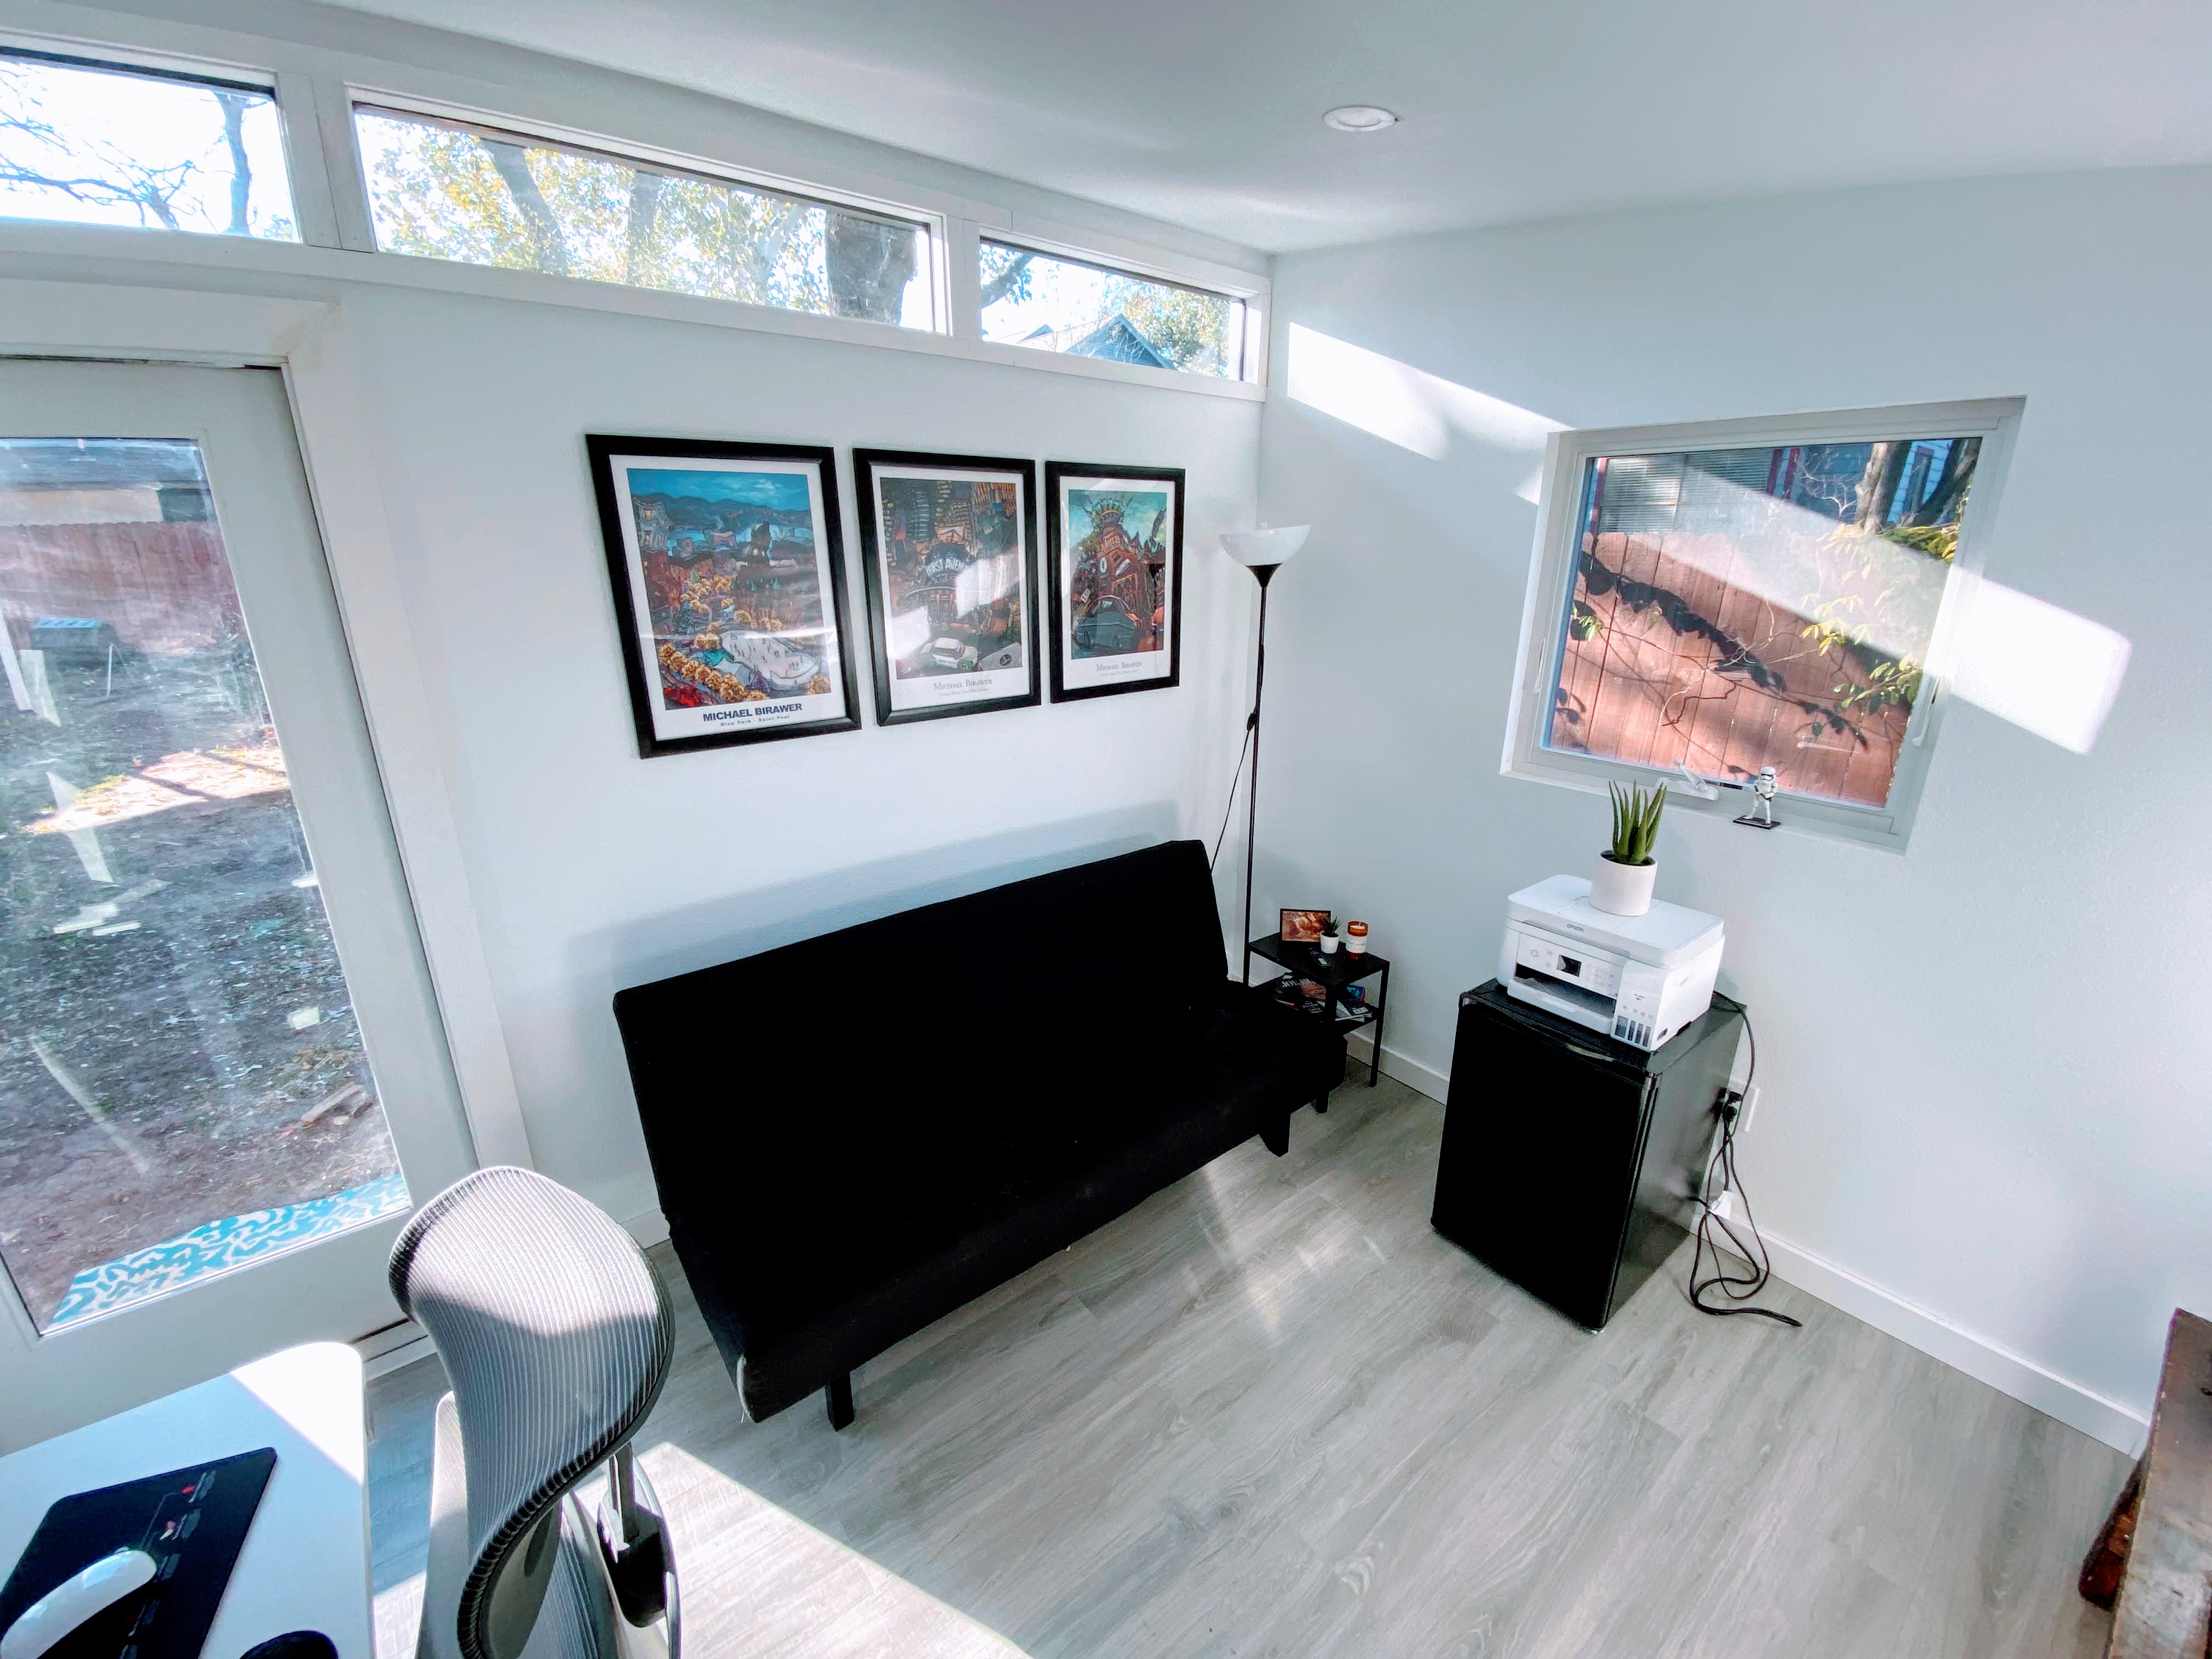
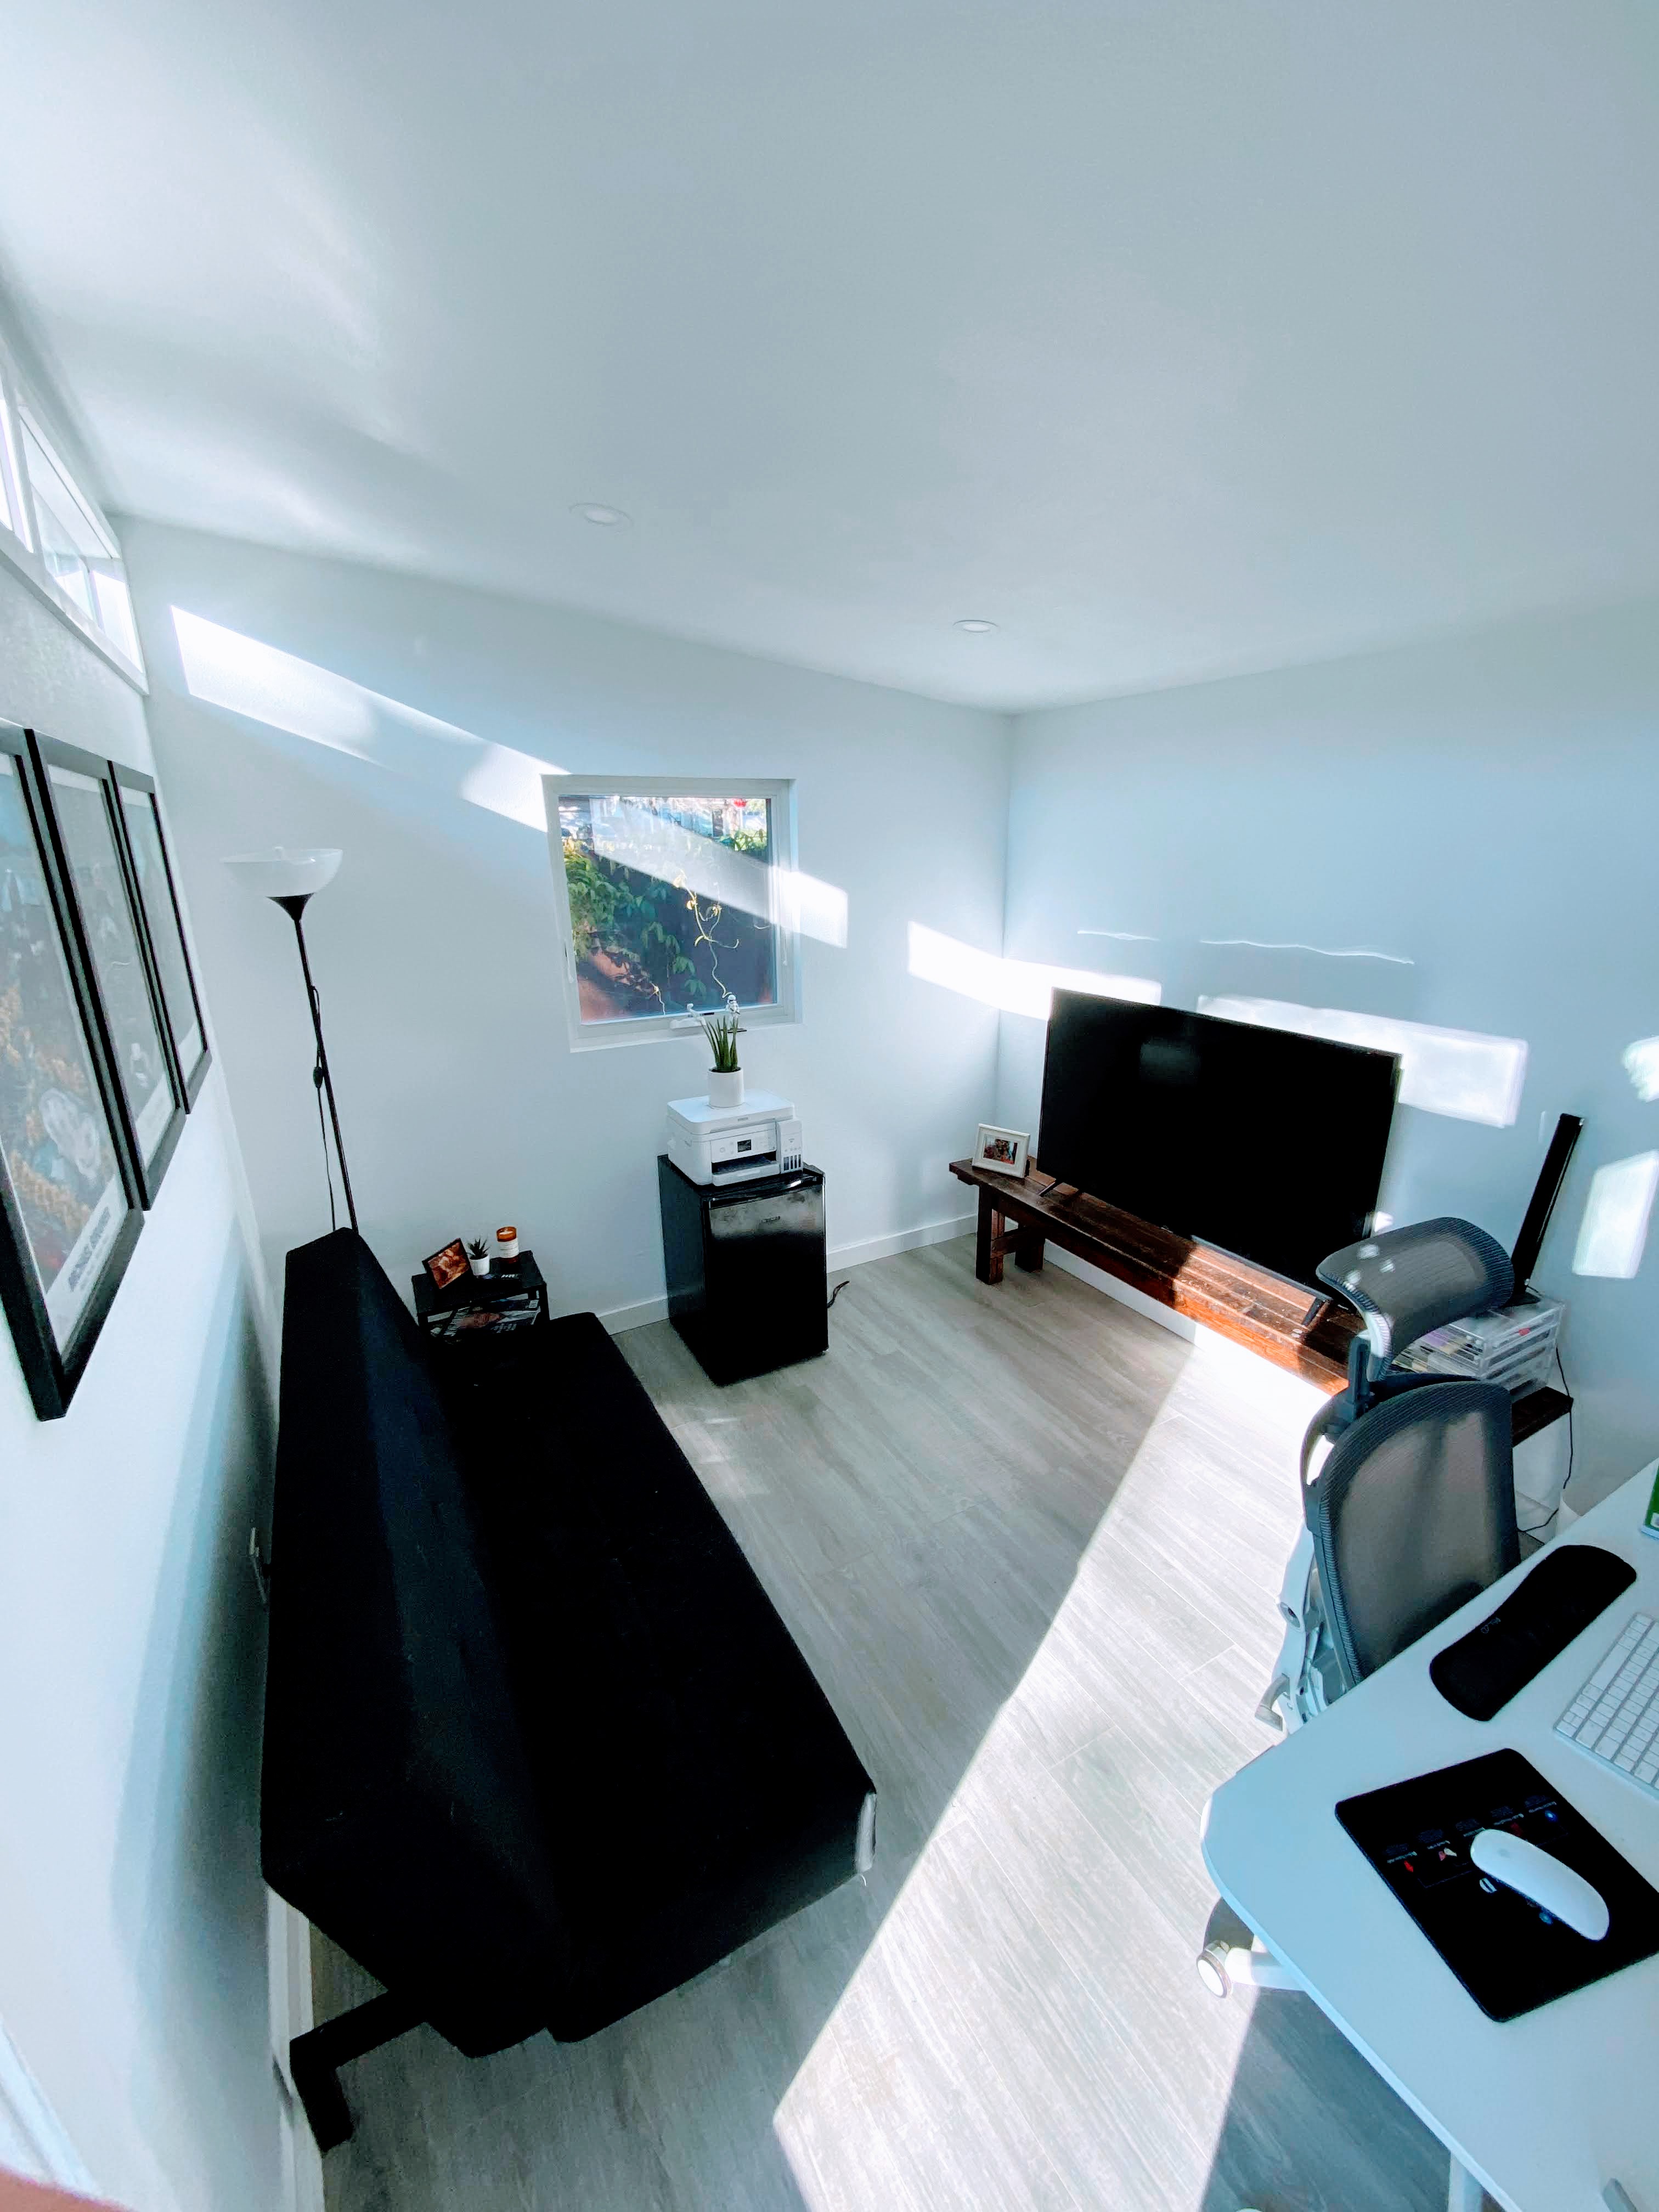
Now the fun part—moving in! As I said, the shed’s primary purpose is my office, but there’s room for more than just a desk and computers out there. We will use it as a guest room when visitors are in town with a pull-out sleeper sofa. We bought nothing new for furniture aside from the mini fridge which was a Christmas gift. Everything else was repurposed from the house. Lauren insisted I “live in it” a while before splurging on a new desk or couch or something. Good idea.
Internet was a little bit of a concern. Our AT&T internet is awful to begin with. On a good day I can achieve 20mbps inside the house. I bought a series of eero network extenders and they performed well enough, getting me around 15mbps in the shed. That’s not great, but probably sufficient for my needs.


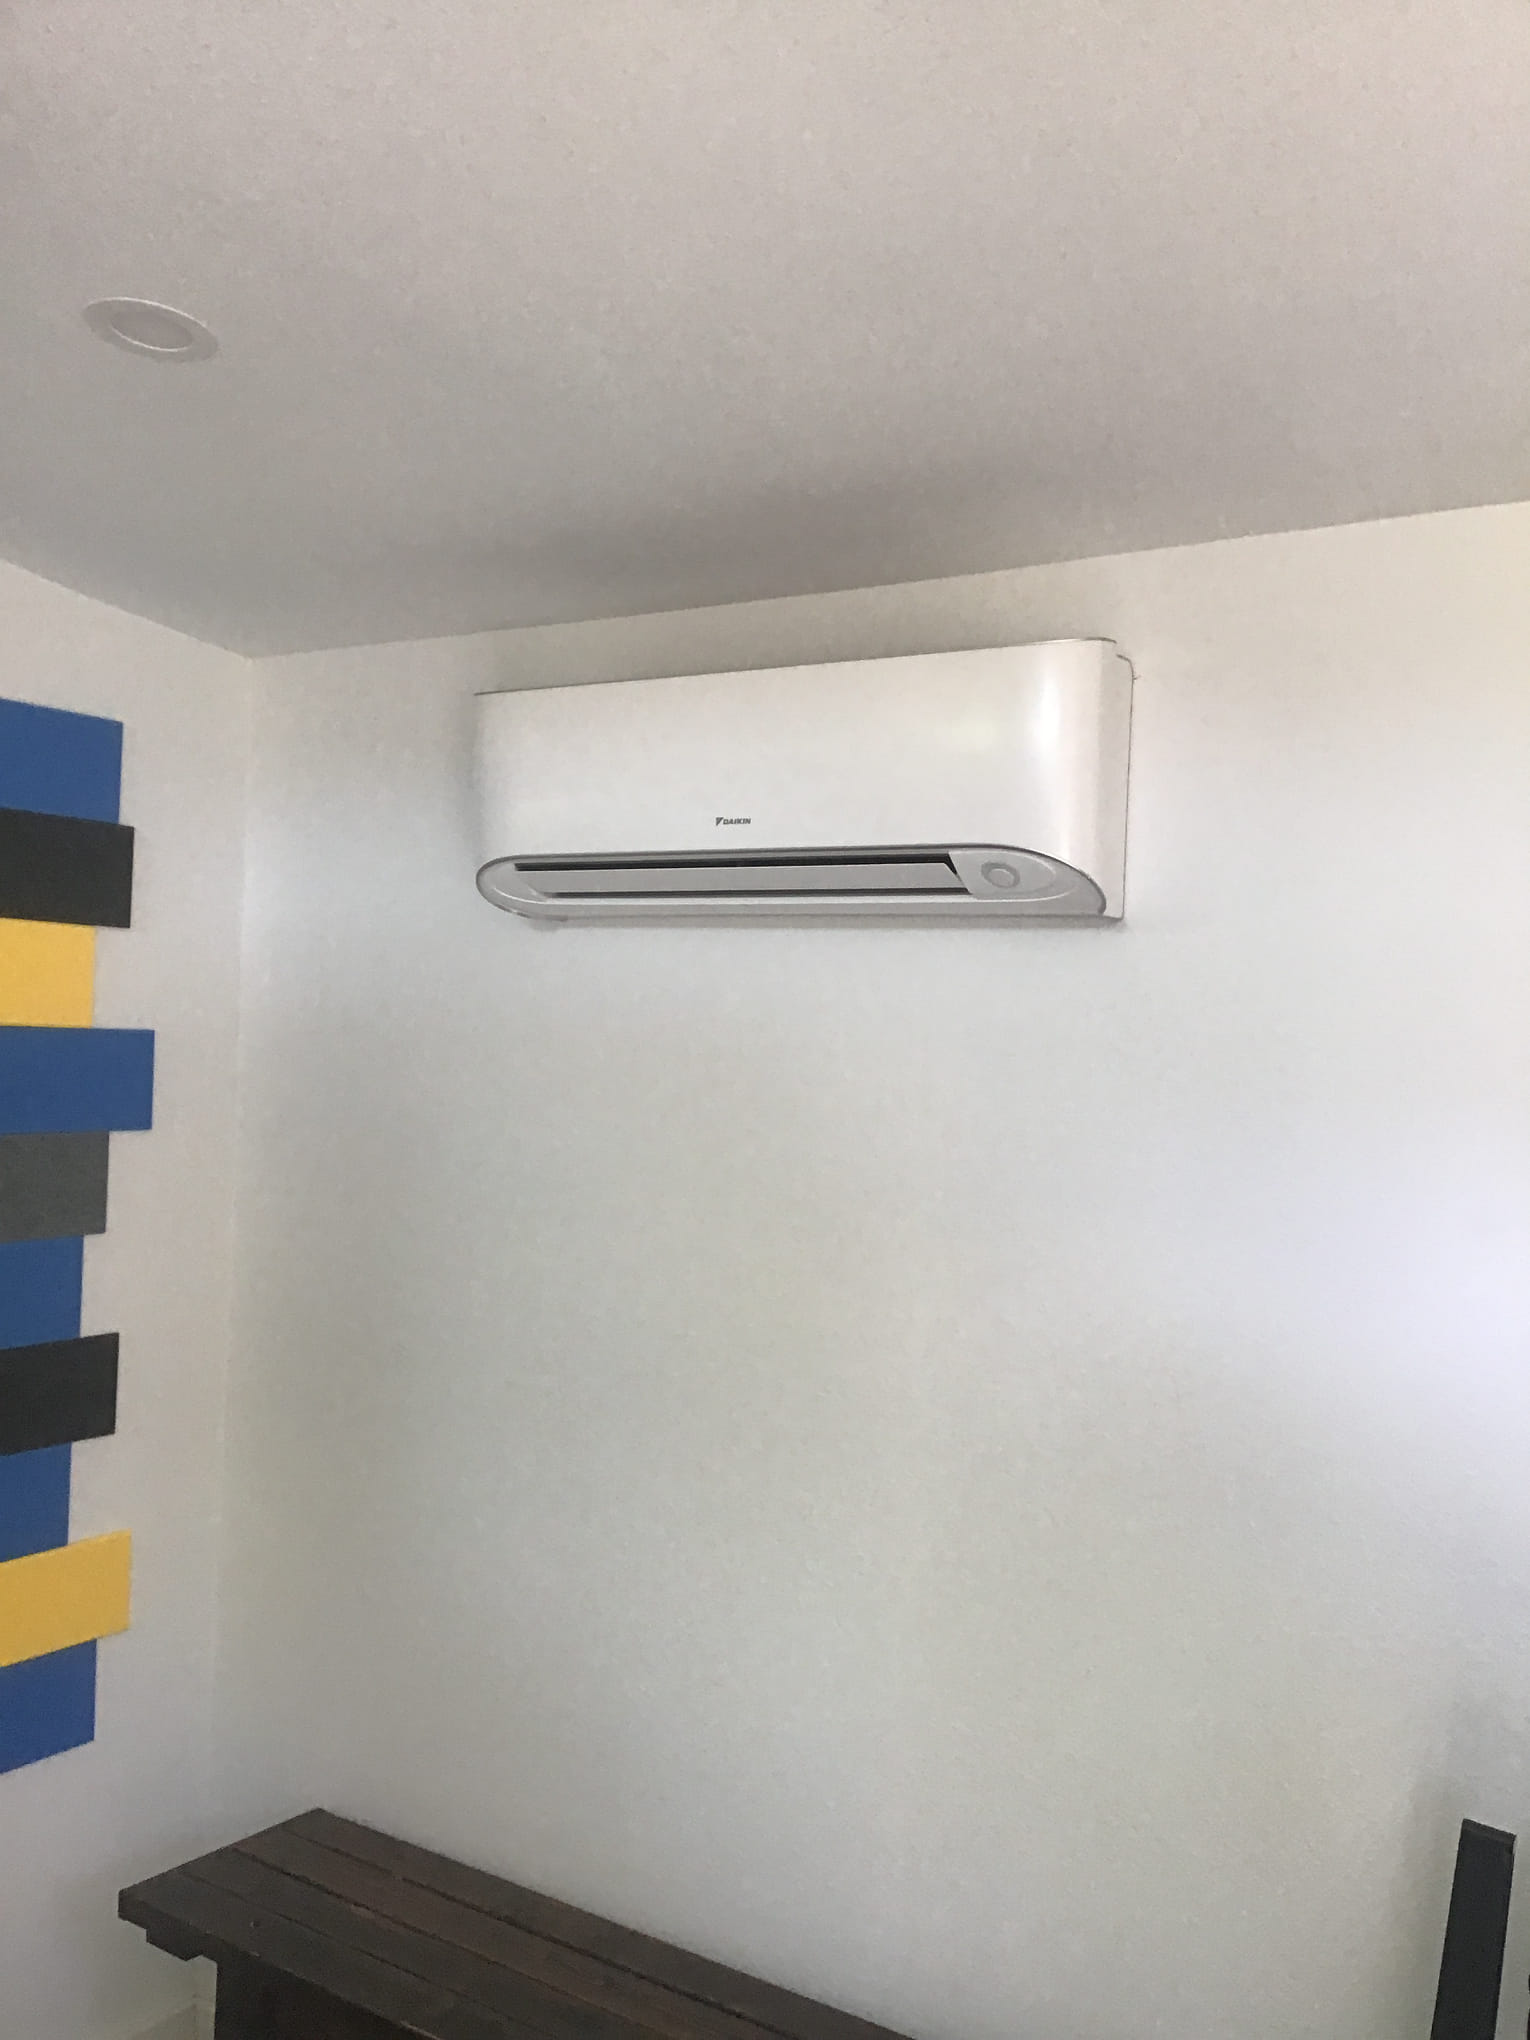
AC/Heating
In April of 2022, after several cooler winter months had come to a close, it was high time to get an AC installed. Even when temps reached the low 80s, the office became so hot the computers would just shut down. Blue Ribbon Heating and Cooling came out and installed a Daikin ductless mini split HVAC system which required drilling a hole through the wall.
The unit cost about $3,600 and was graded to cool a room far larger than the 10×12 shed. One might say it was overkill, but it would be very efficient!
The unit however required a different amperage or voltage than my current breakers could supply, or some such thing, I am clueless about all that kinda stuff. A local friend with an electrical background came out and made the adjustments, and the HVAC was good to start cooling!

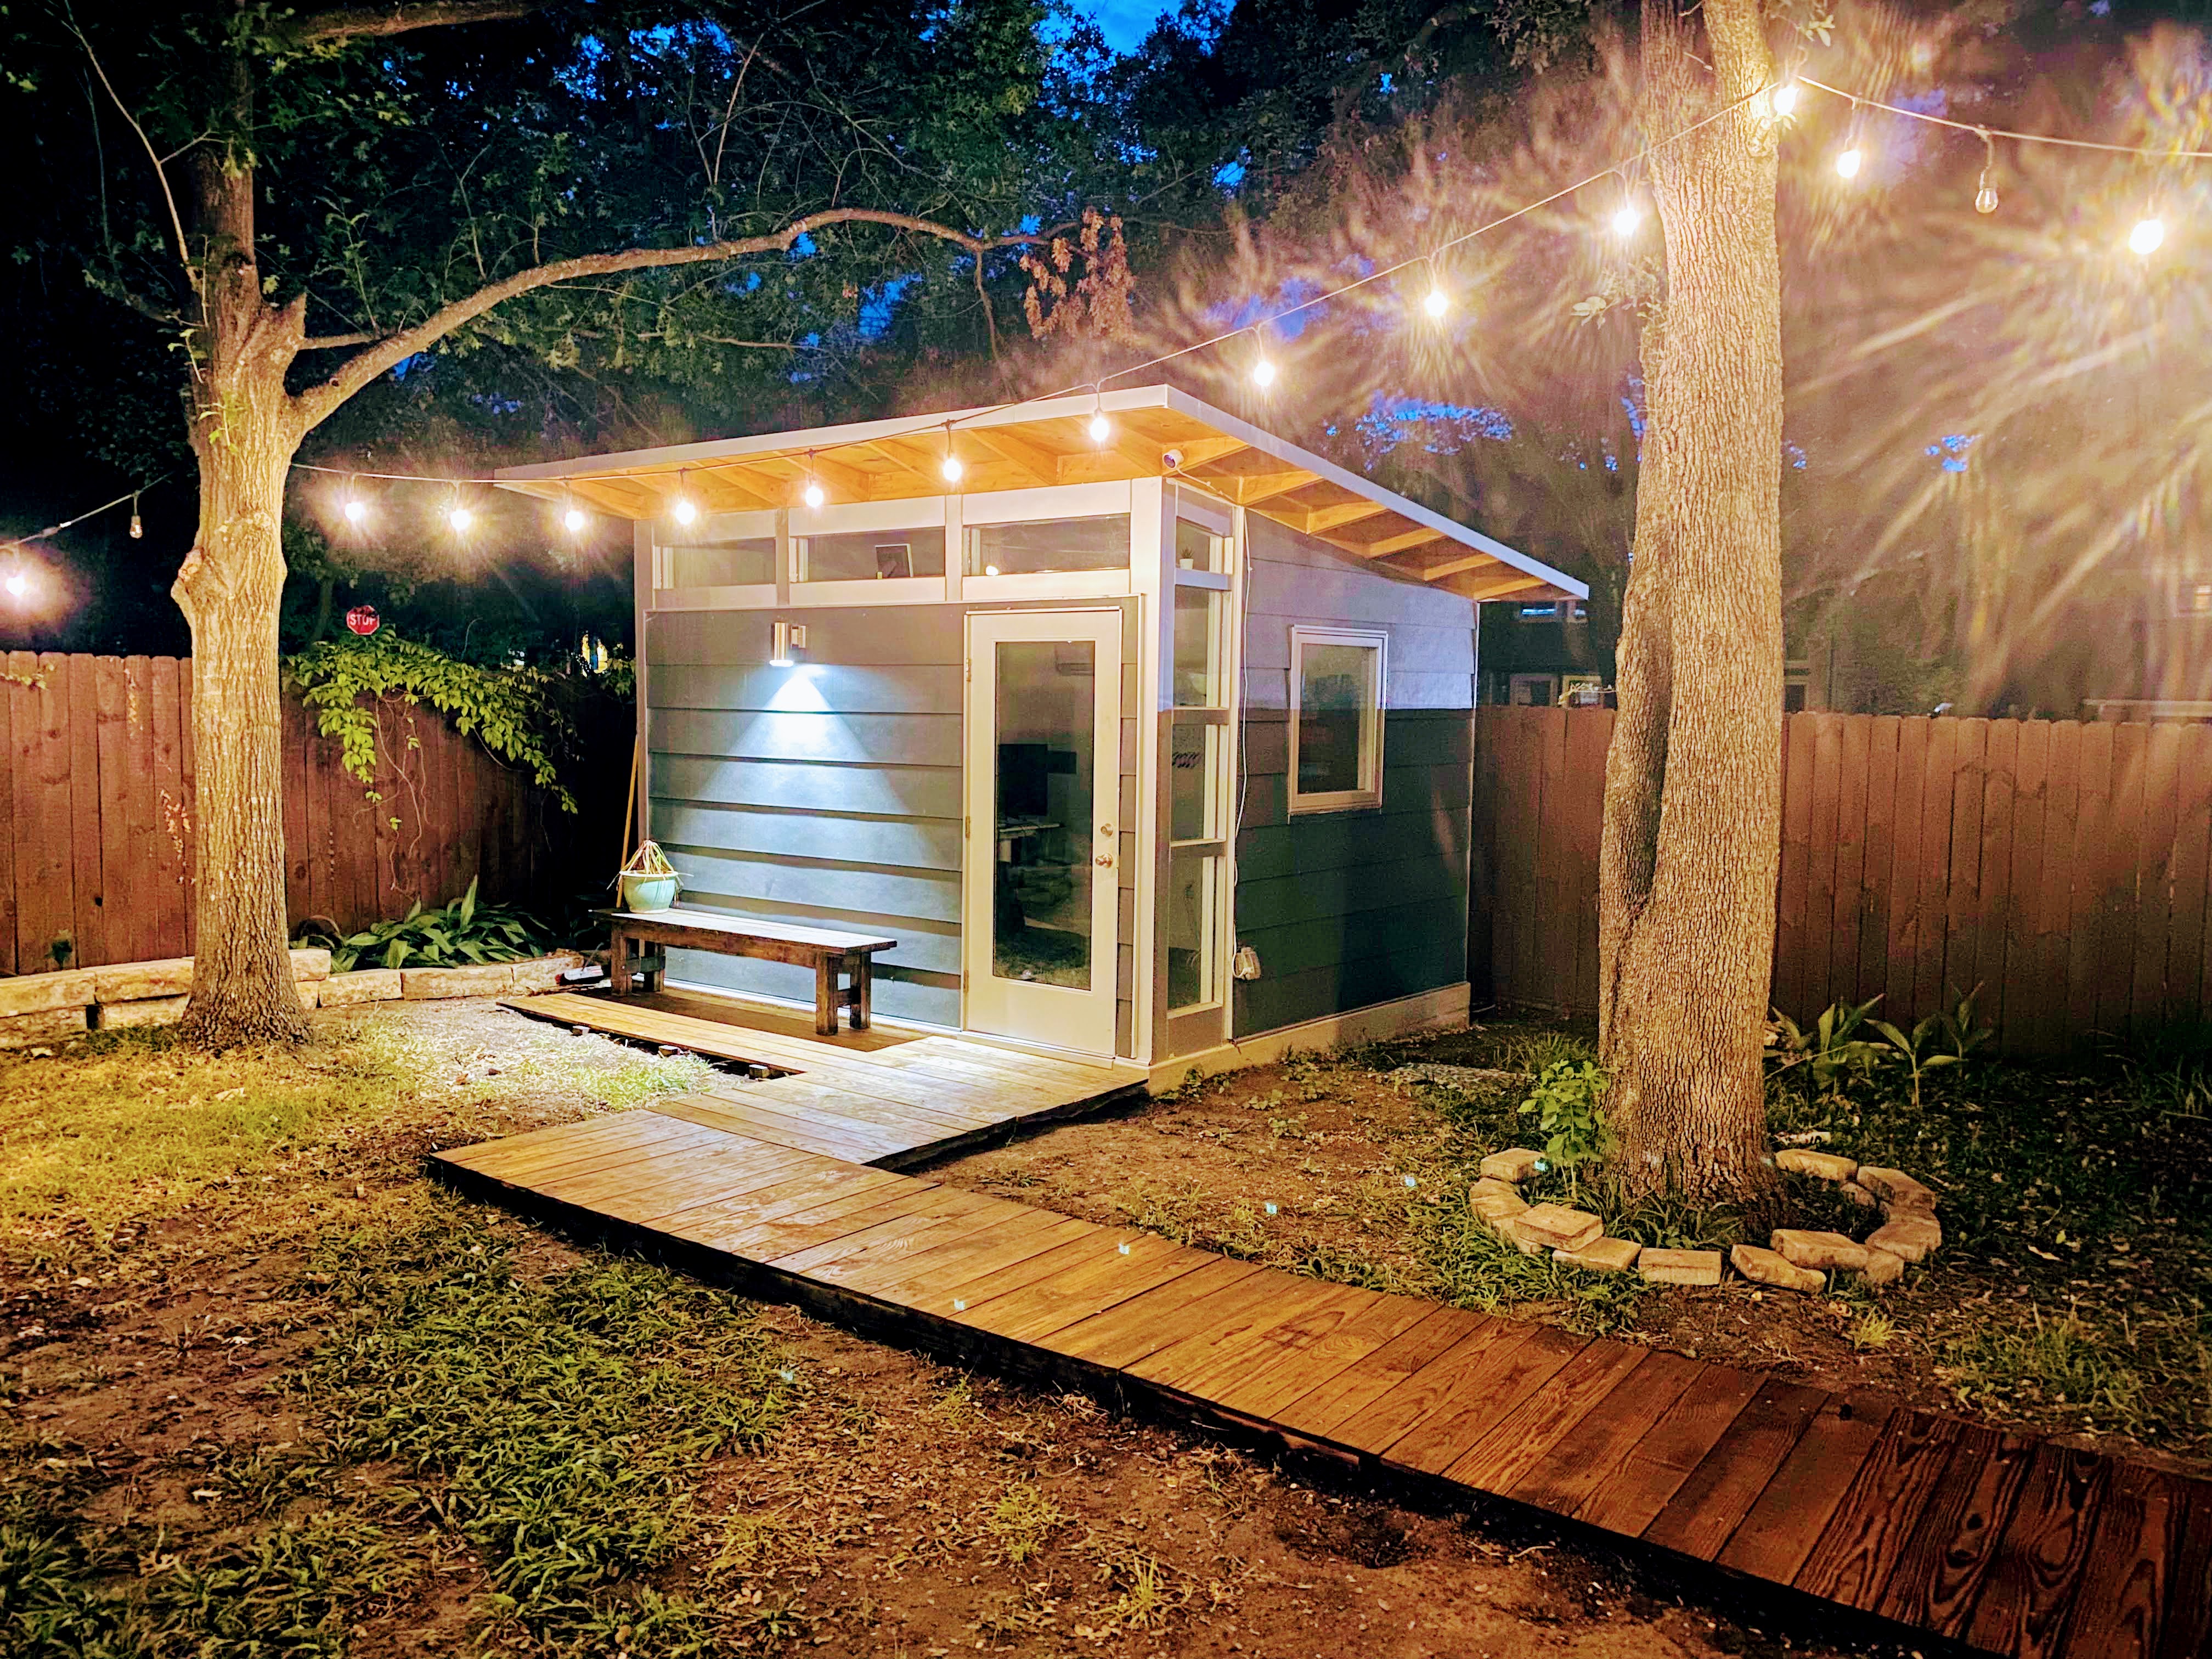
Pathway
In late 2022 I installed a semi-permanent wooden walkway from the house to the shed. I basically dug some paths for 4x4s to lay on the ground, then screwed a bunch of 1×6 boards to it. I probably should have used real decking lumber, but it is very functional and holds up well.
Tinting
After 18 months of working out there, I broke down and spent $400 to get the windows tinted. It was way too bright, to the point I could barely see my computer screens if the light shined in at a certain angle. The tinting helped immensely in that regard. I can’t say it helped with cooling much. It also makes it impossible to see into the shed from the outside except at night if the lights were on. In the daytime it’s just a mirror.
My Final Reactions
A+! It’s the sanctuary we dreamed of and declutters the house. No one has ever used it for sleeping, but it is a fine office, and the envy of many neighbors and colleagues. As far as I’m concerned, it’s 100% done with no future adjustments. 10×12 has proved to be more than enough space for what I need, even. Glad we didn’t spring for a larger model.

Great job!
great job, overall looks great and the detailed breakdown is super helpful.
but…why is the bottom left of the door flush with the frame/wall but the top left pushed in a few inches? also 15 Mbps is plenty stop acting like you’re running a website from out there lmao
This article highlights the real challenges many face when trying to balance the need for more space with a functional and aesthetically pleasing solution. The choice of a backyard office shed is a practical and creative way to address work-from-home limitations while adding value to the property. When embarking on such a project, it’s always important to carefully plan for key aspects like proper slab laying, unloading logistics, and hiring the right help.
I’m curious, did you find the pre-made kit sufficient, or were there adjustments you had to make to ensure everything fit as you imagined? For those considering a similar project, it’s always wise to look into customizable options that can be tailored to specific needs, both in design and function. Choosing the right team can make all the difference in how smoothly the project runs—whether working with professionals or skilled family members.
If anyone is considering expanding their own home space with a shed, taking the time to find reliable and experienced builders, like SE Yard Solutions, can help ensure a successful and efficient project.